Kinship Cooking

Veg-Forward Fare For All Tastes

  • About
  • Services
  • Get in Touch
  • Blog
  • Archive
Buttery Braised Leeks

Buttery Braised Leeks

Kinship Cooking
May 28, 2018 by Rachel Brumitt in Veggie Sides

This might be the first in a summer series I will call "How to Cook Vegetables!". With an exclamation point to make it seem urgent. It is kind of urgent as oh-so-fresh local farmers market veggies are only here for a limited time, and should be enjoyed in copious amounts. I will be inhaling fruits and berries as well of course, but I feel like there is slightly more need for easy ideas for veggies. Maybe some that don't get enough attention, or simple preparations that are overlooked but perfect.

Soon enough there will be colossal leeks showing up at our farmer's markets and they will demand your attention. Maybe some are slightly more intimidating, some more mundane but could be spruced up. What do I do with all that leek? Can I even eat all of that? What the heck is kohlrabi anyway? Hopefully this recipe will help you wolf down more leek than you ever dreamed imaginable.

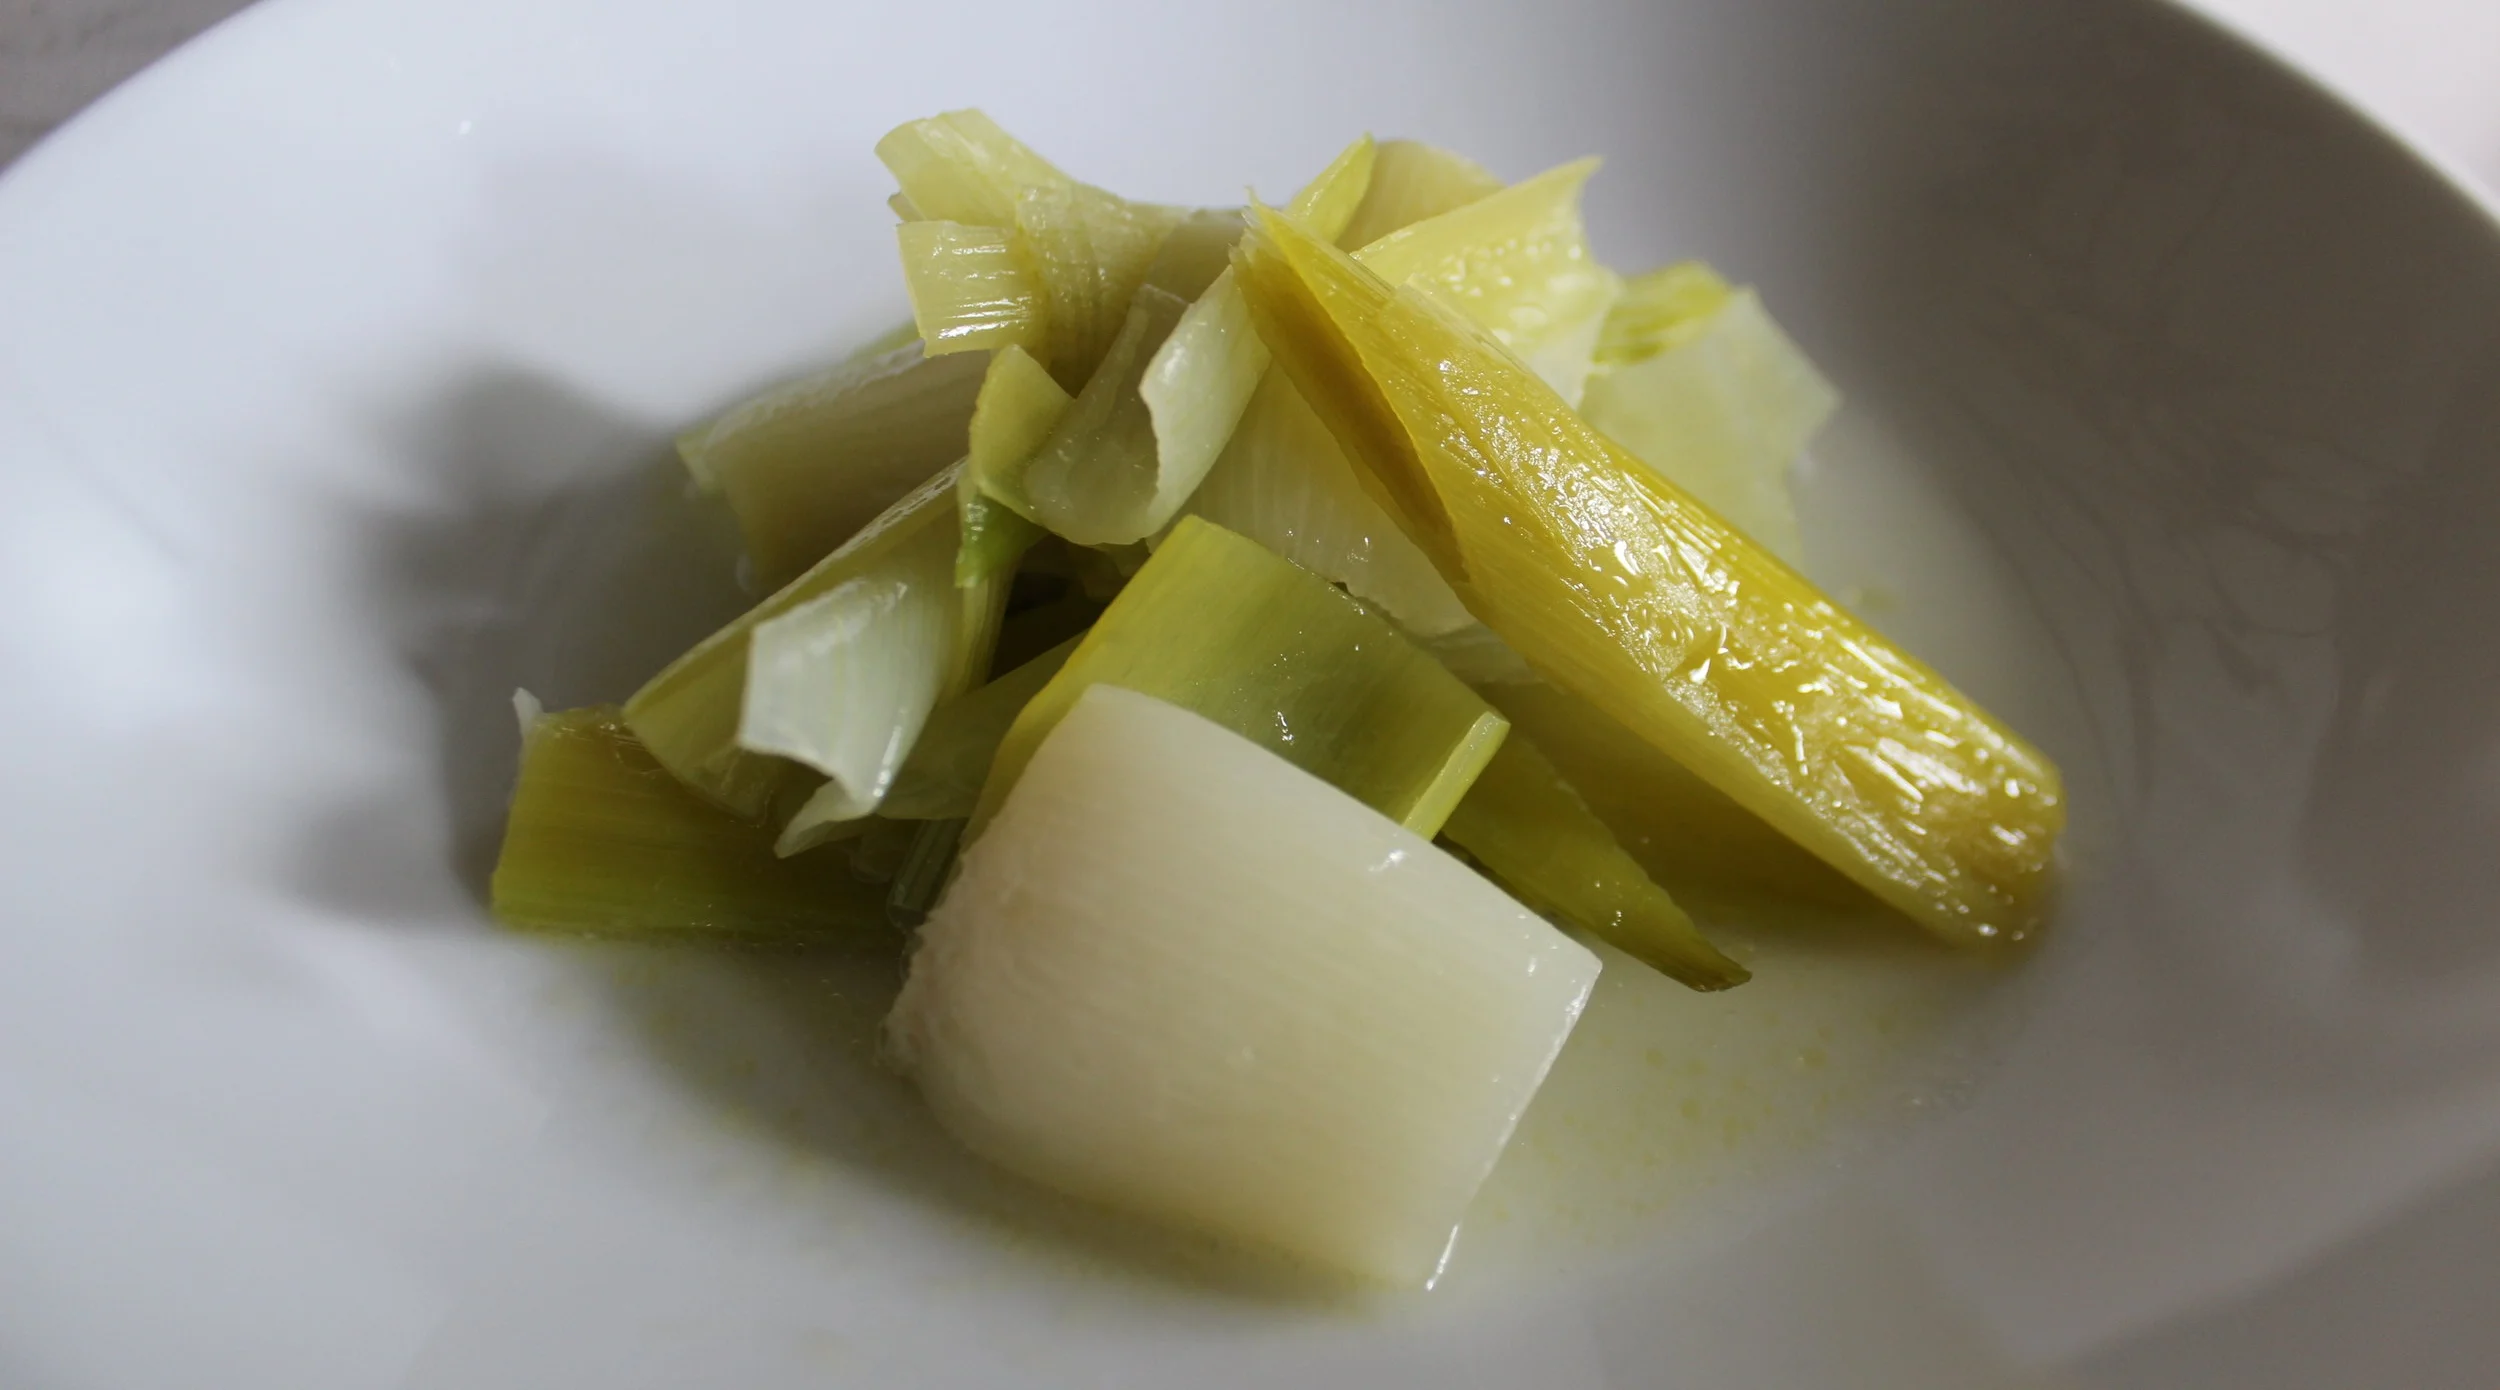
I love when I find massive leeks nearly three feet long. They are perfect as they often have an 80/20 ratio of tender white stalk to tougher green tops, and better yet is that the most delicious ways to prepare these gigantic, mild onions are the also the simplest. Since time must be taken to clean the leeks of the sandy soil they love to grow in, time is saved on the other end by using a nearly hands-off approach to cooking them which results in a magical, buttery, absolutely slurp-able heap of goodness that you will make again and again.


IMG_6702.JPG
IMG_6706.JPG

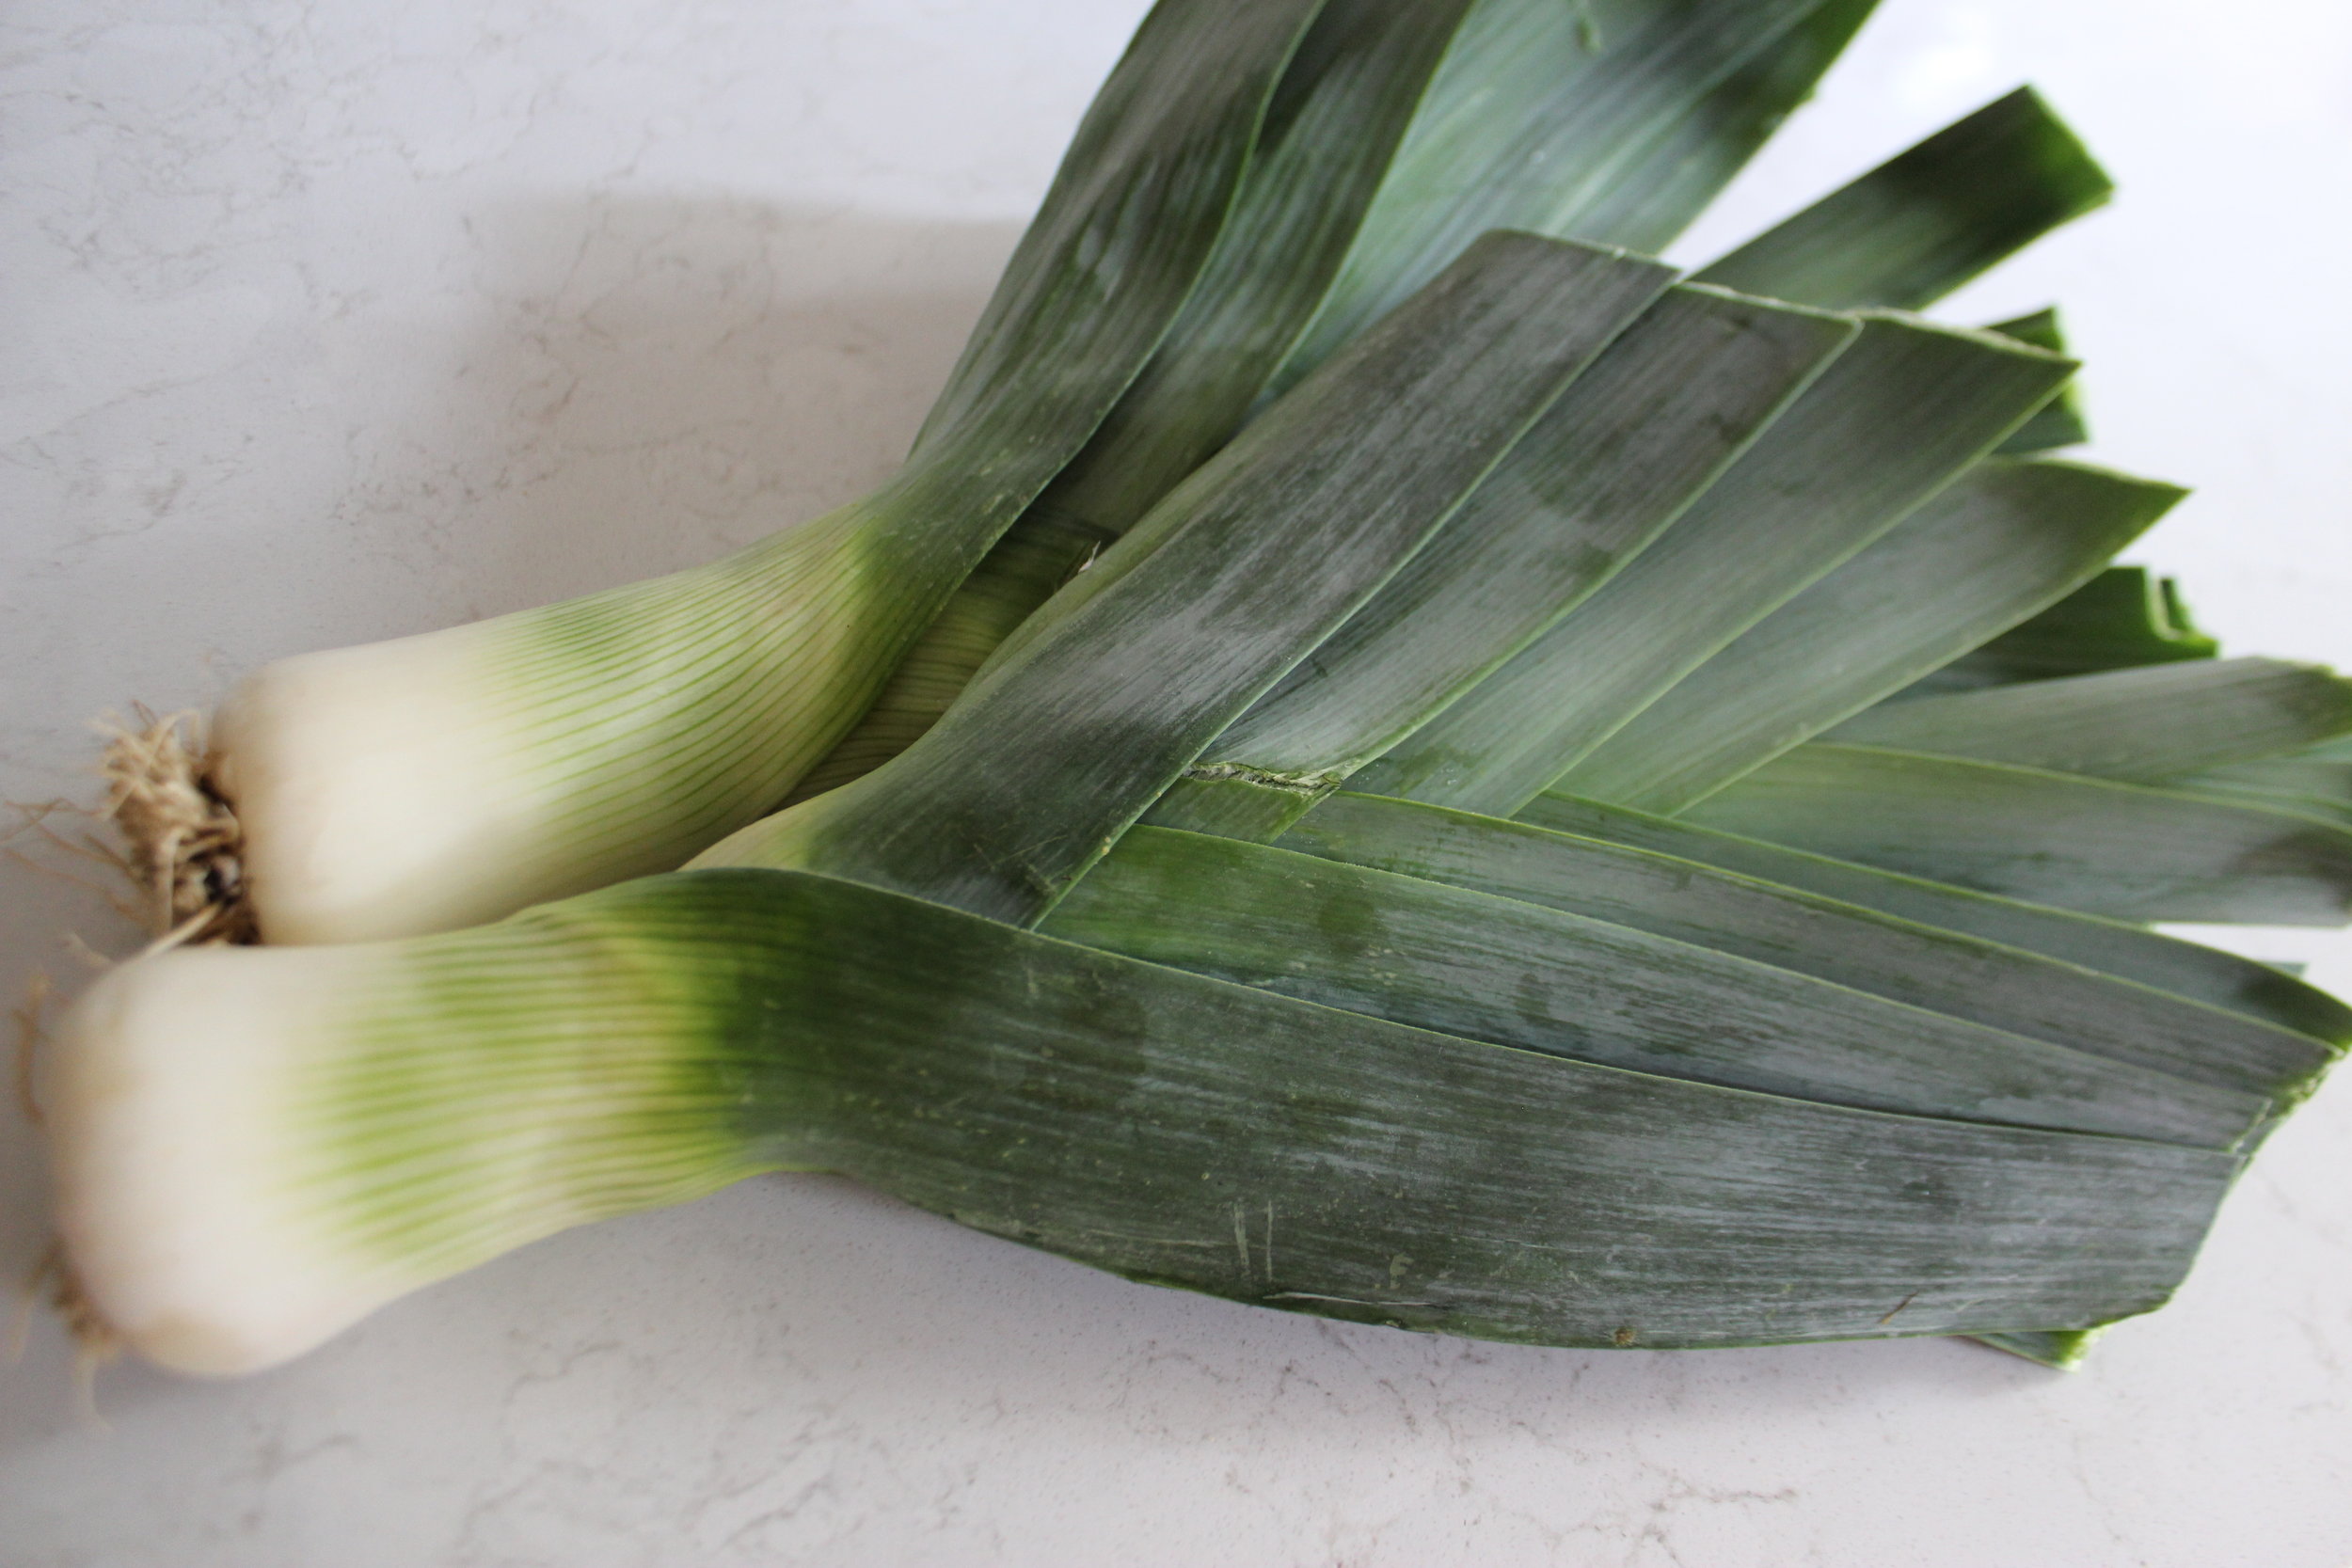
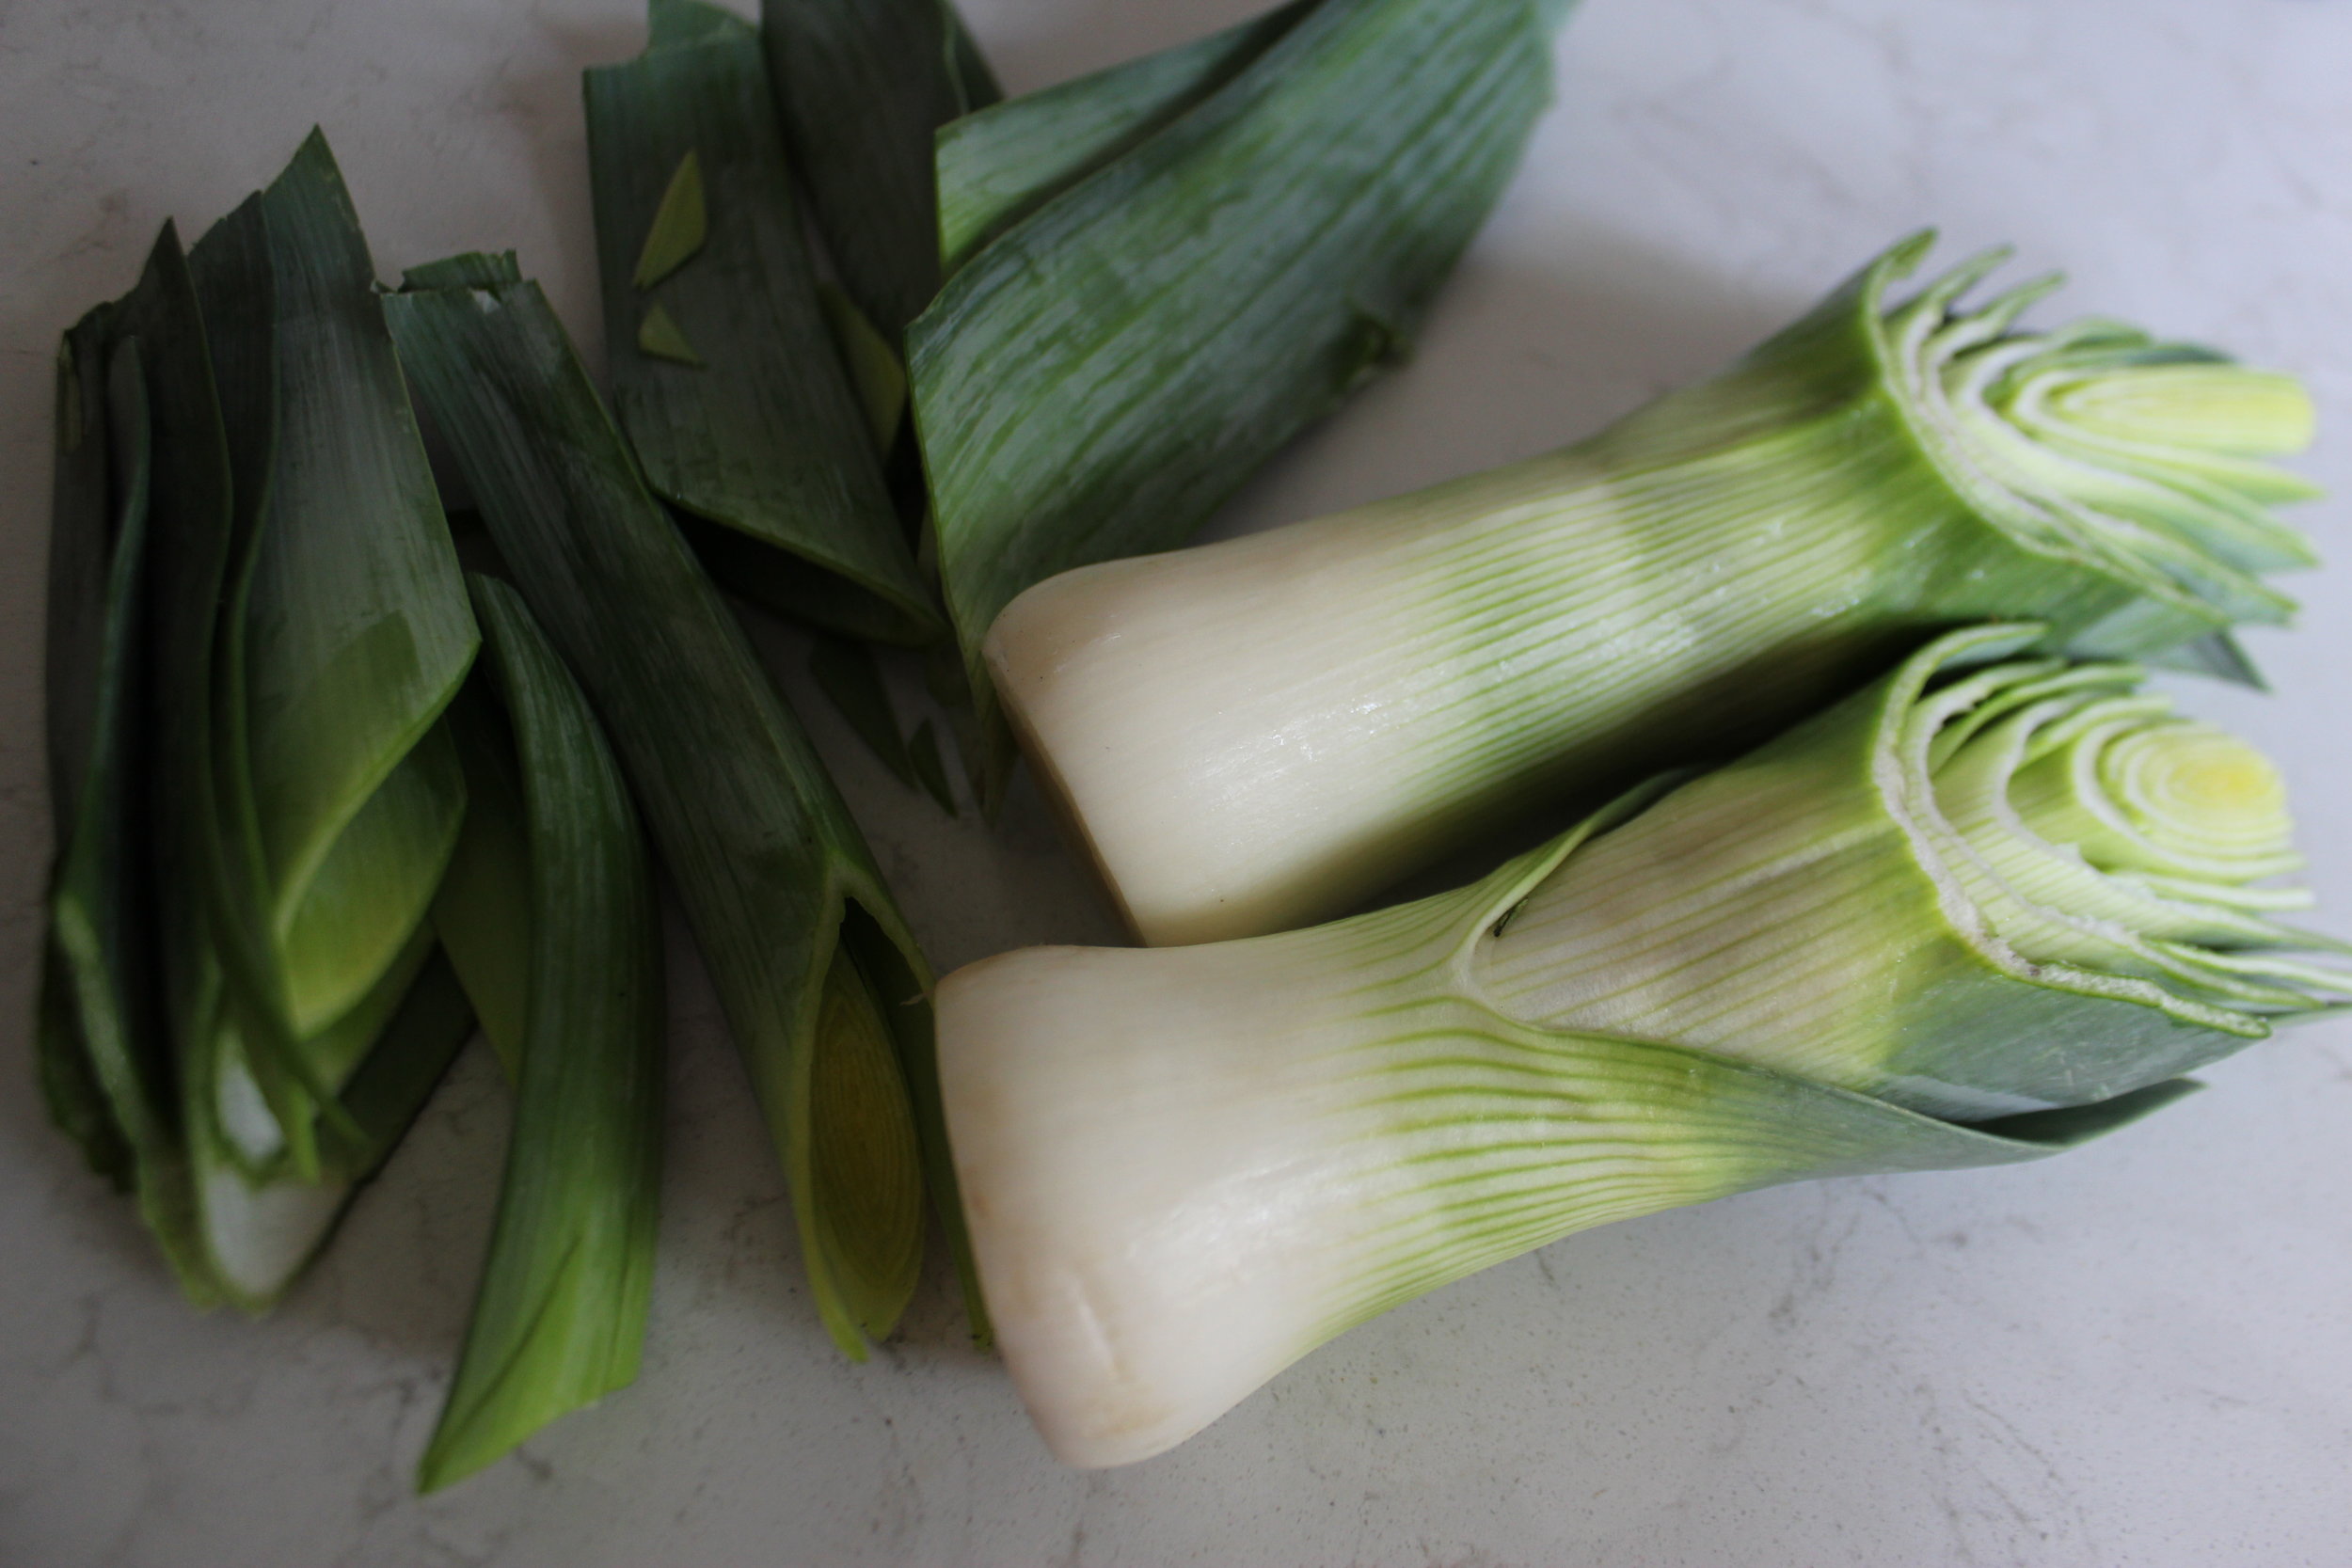
When the leeks have a lot of green top, don't despair. Remove any leathery layers on the outside and then, instead of cutting the green heads off straight across, angle your knife up 45 degrees from both sides. This saves some of the tender parts that are inside the center under the leaves. Don't forget to bag those green tops and toss them into the freezer for stock!

IMG_6713.JPG
IMG_6715.JPG
IMG_6724.JPG
IMG_6718.JPG

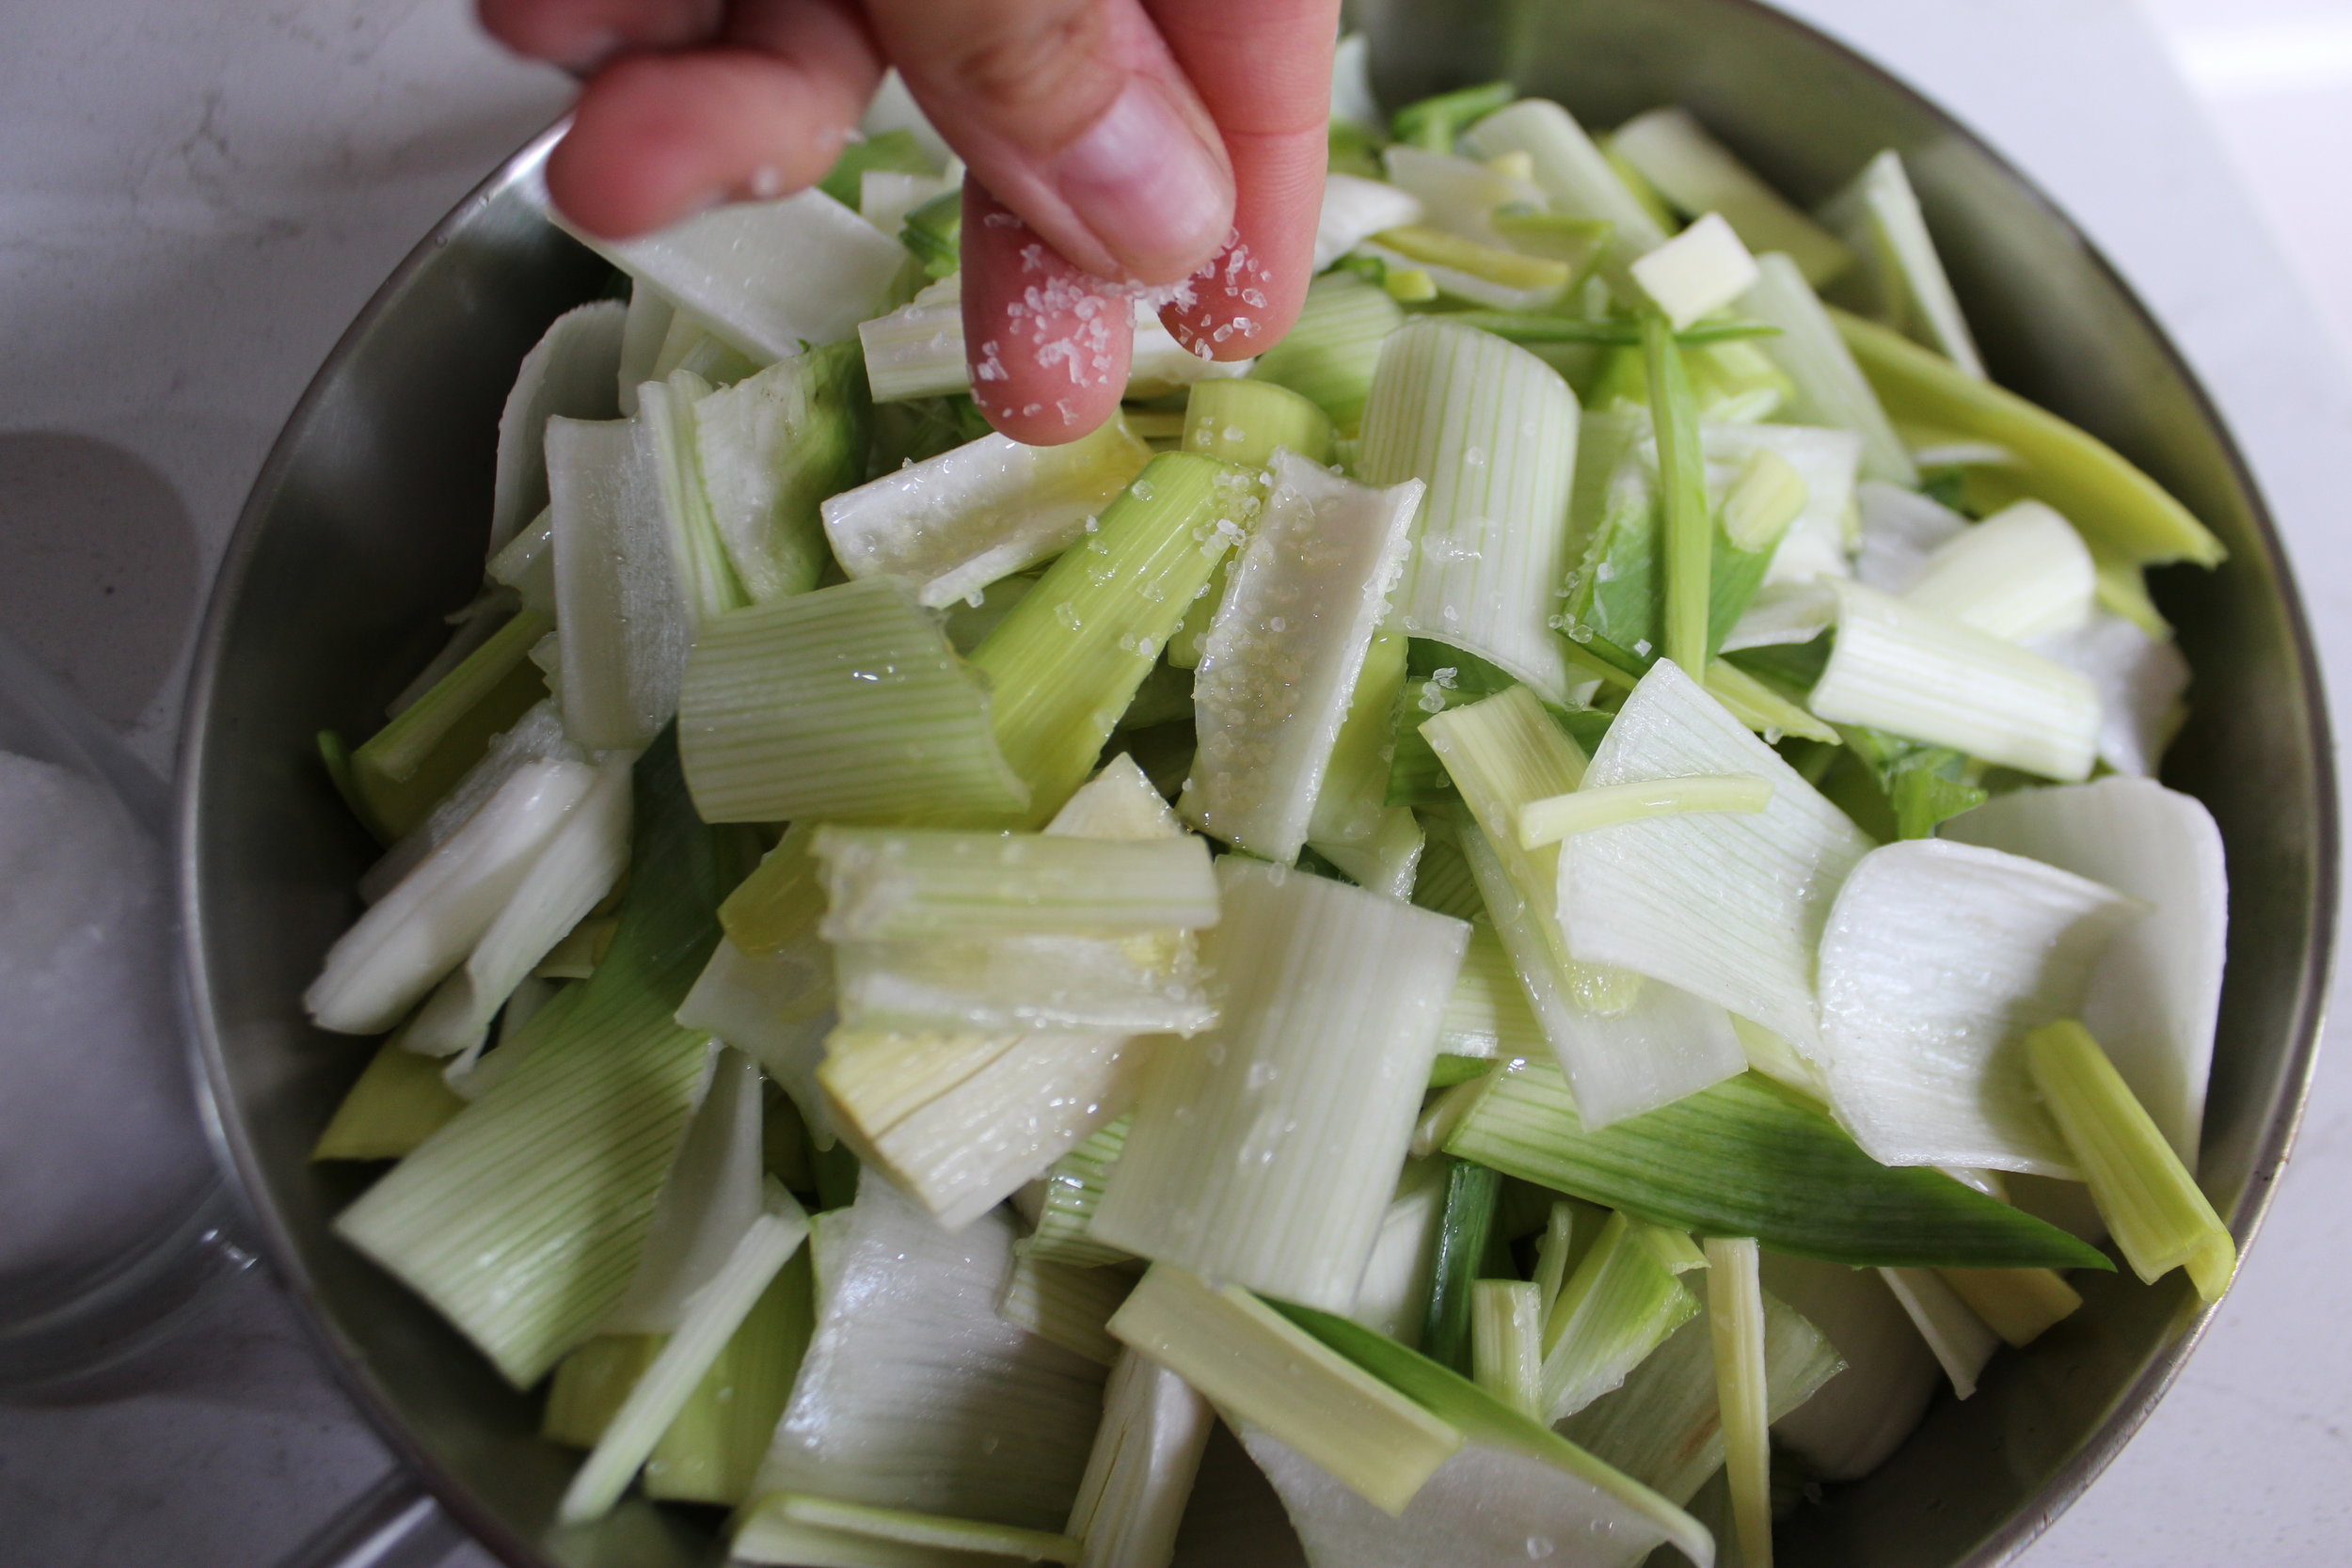
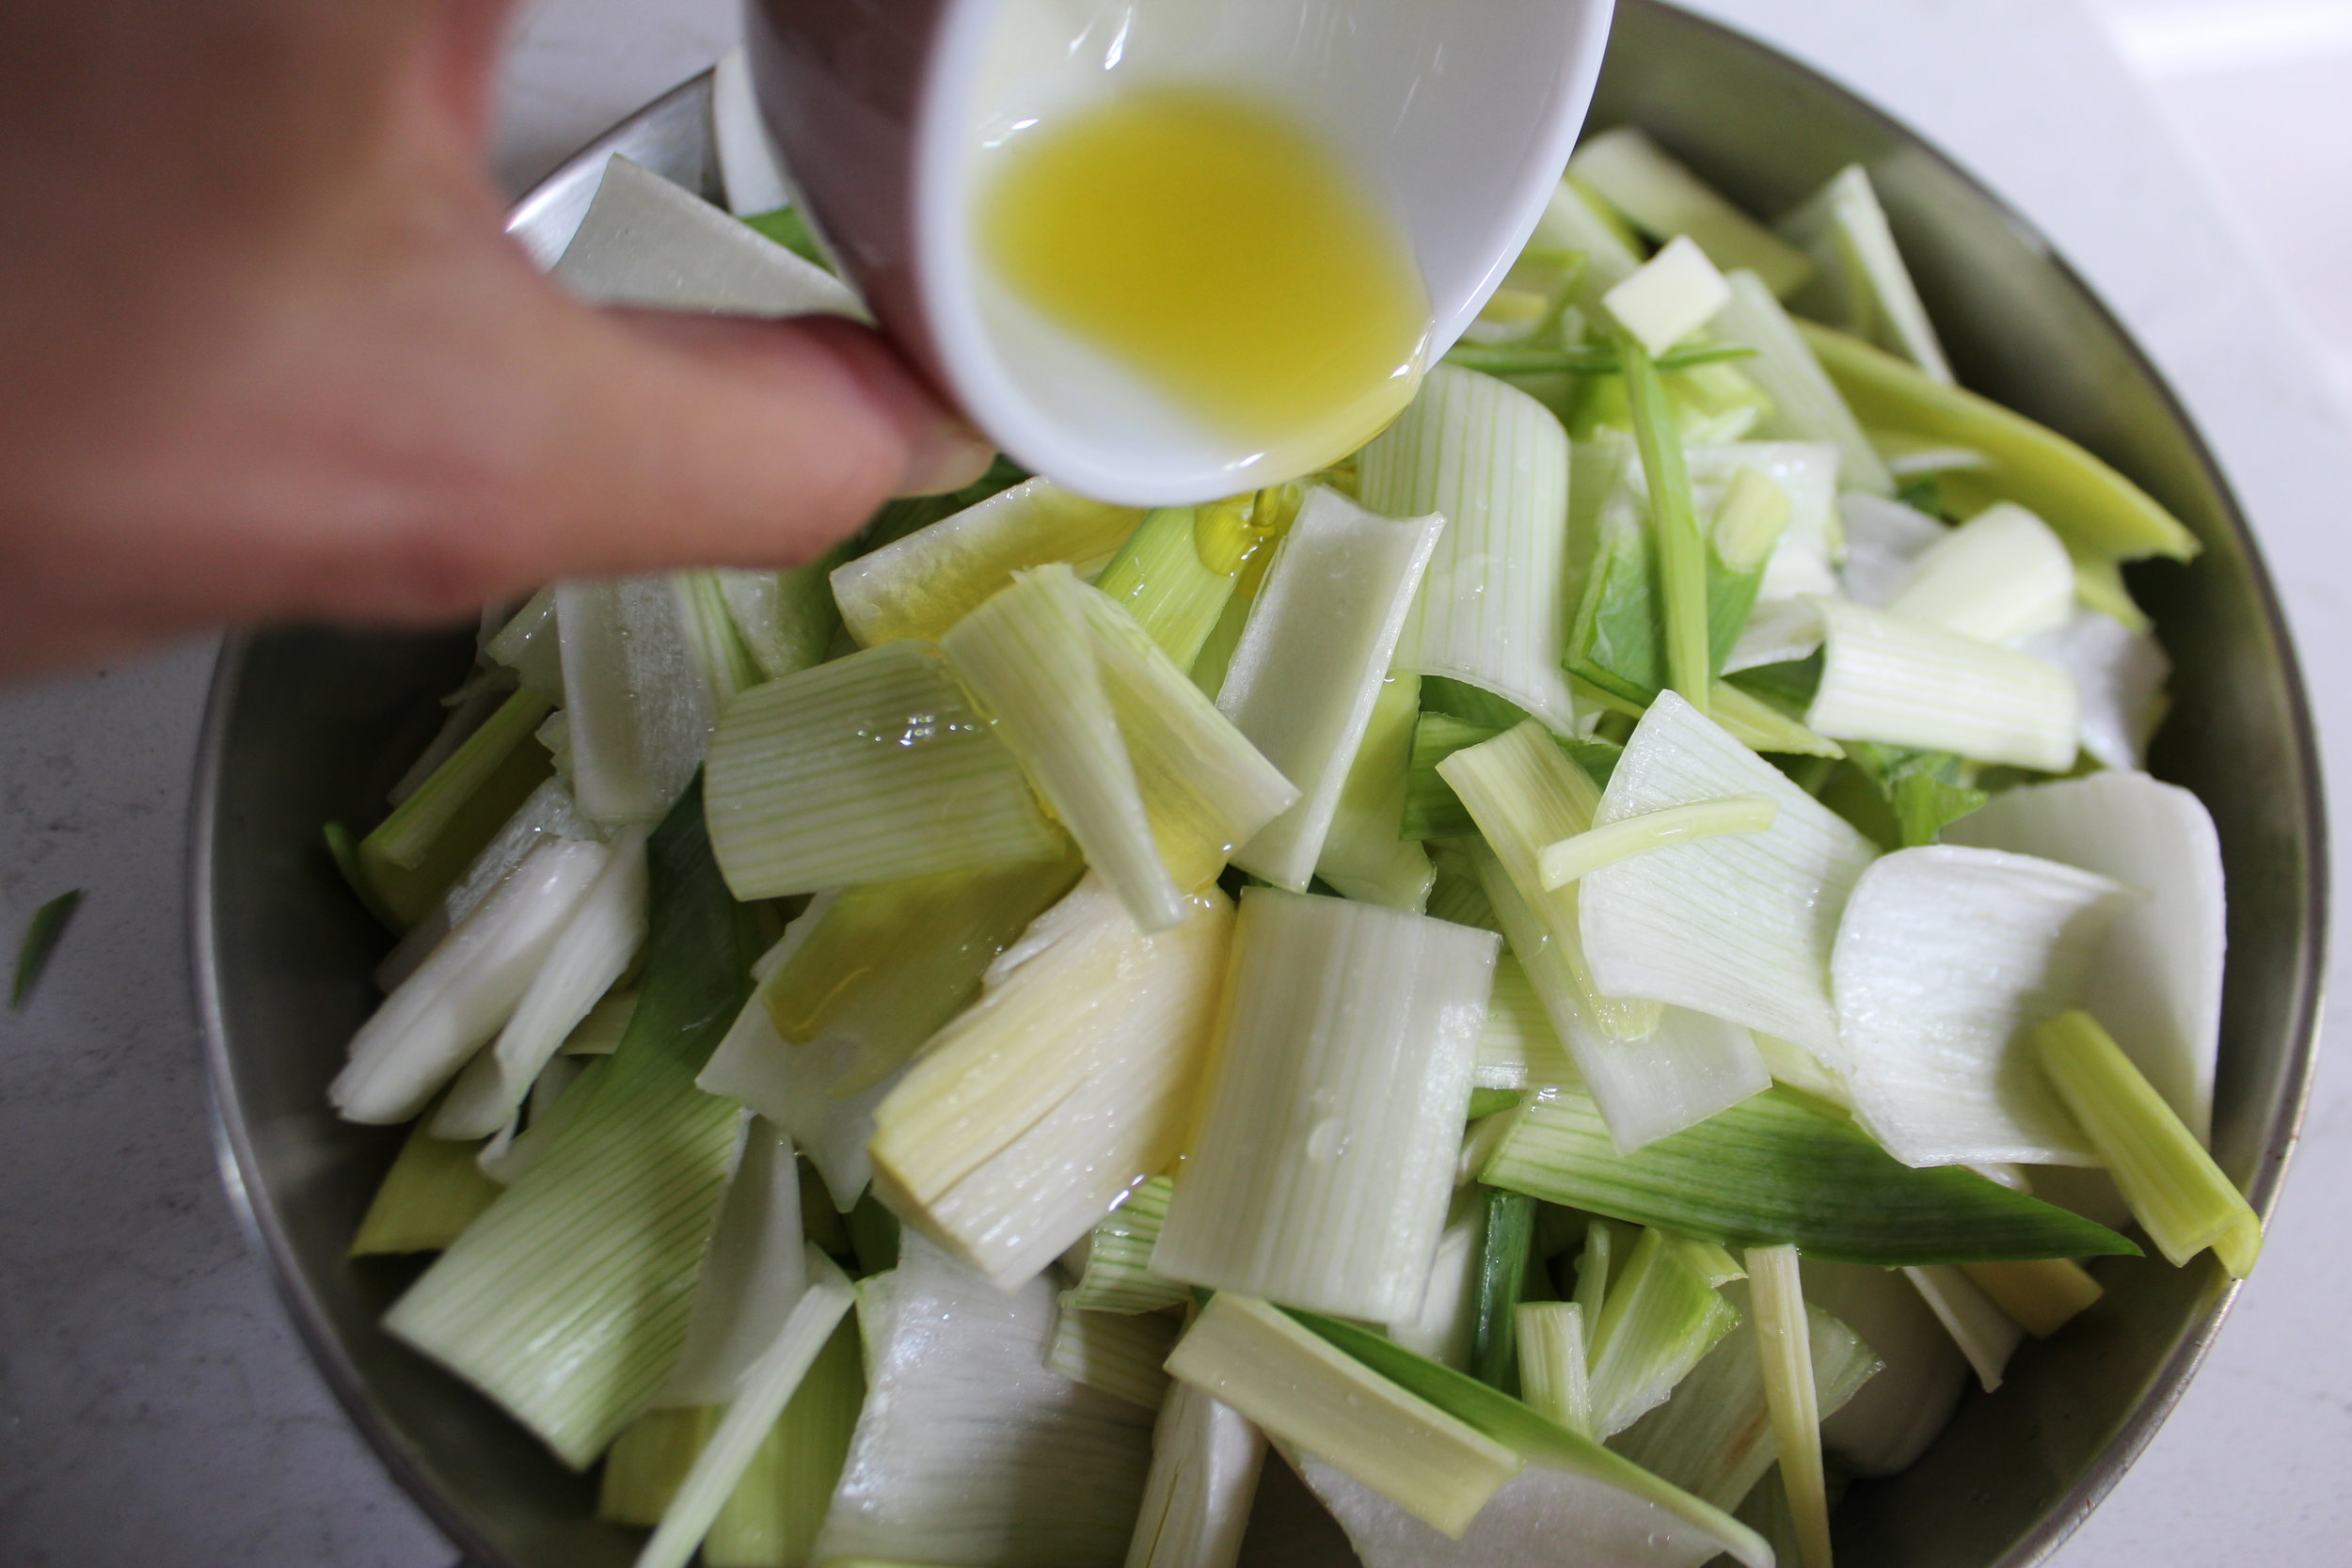
Make sure and triple wash those dirty little leeks! Use two big bowls, filling one with water and giving the leeks a good swishing and rubbing. Transfer the leeks off of the top of the water with your hands to the other bowl. Fill that bowl with water and repeat two more times, or until there is no more sand falling to the bottom of the wash bowl. All you need is salt, olive oil, water, and a nice pan with a tight fitting lid to braise the leeks.

Braised Leeks

And if you DO decide to put a little dollop of grass-fed butter on this gorgeous mess of leeks...who am I to judge? Enjoy!


Buttery Braised Leeks

Ingredients:

  • Leeks
  • Extra virgin olive oil
  • Sea salt

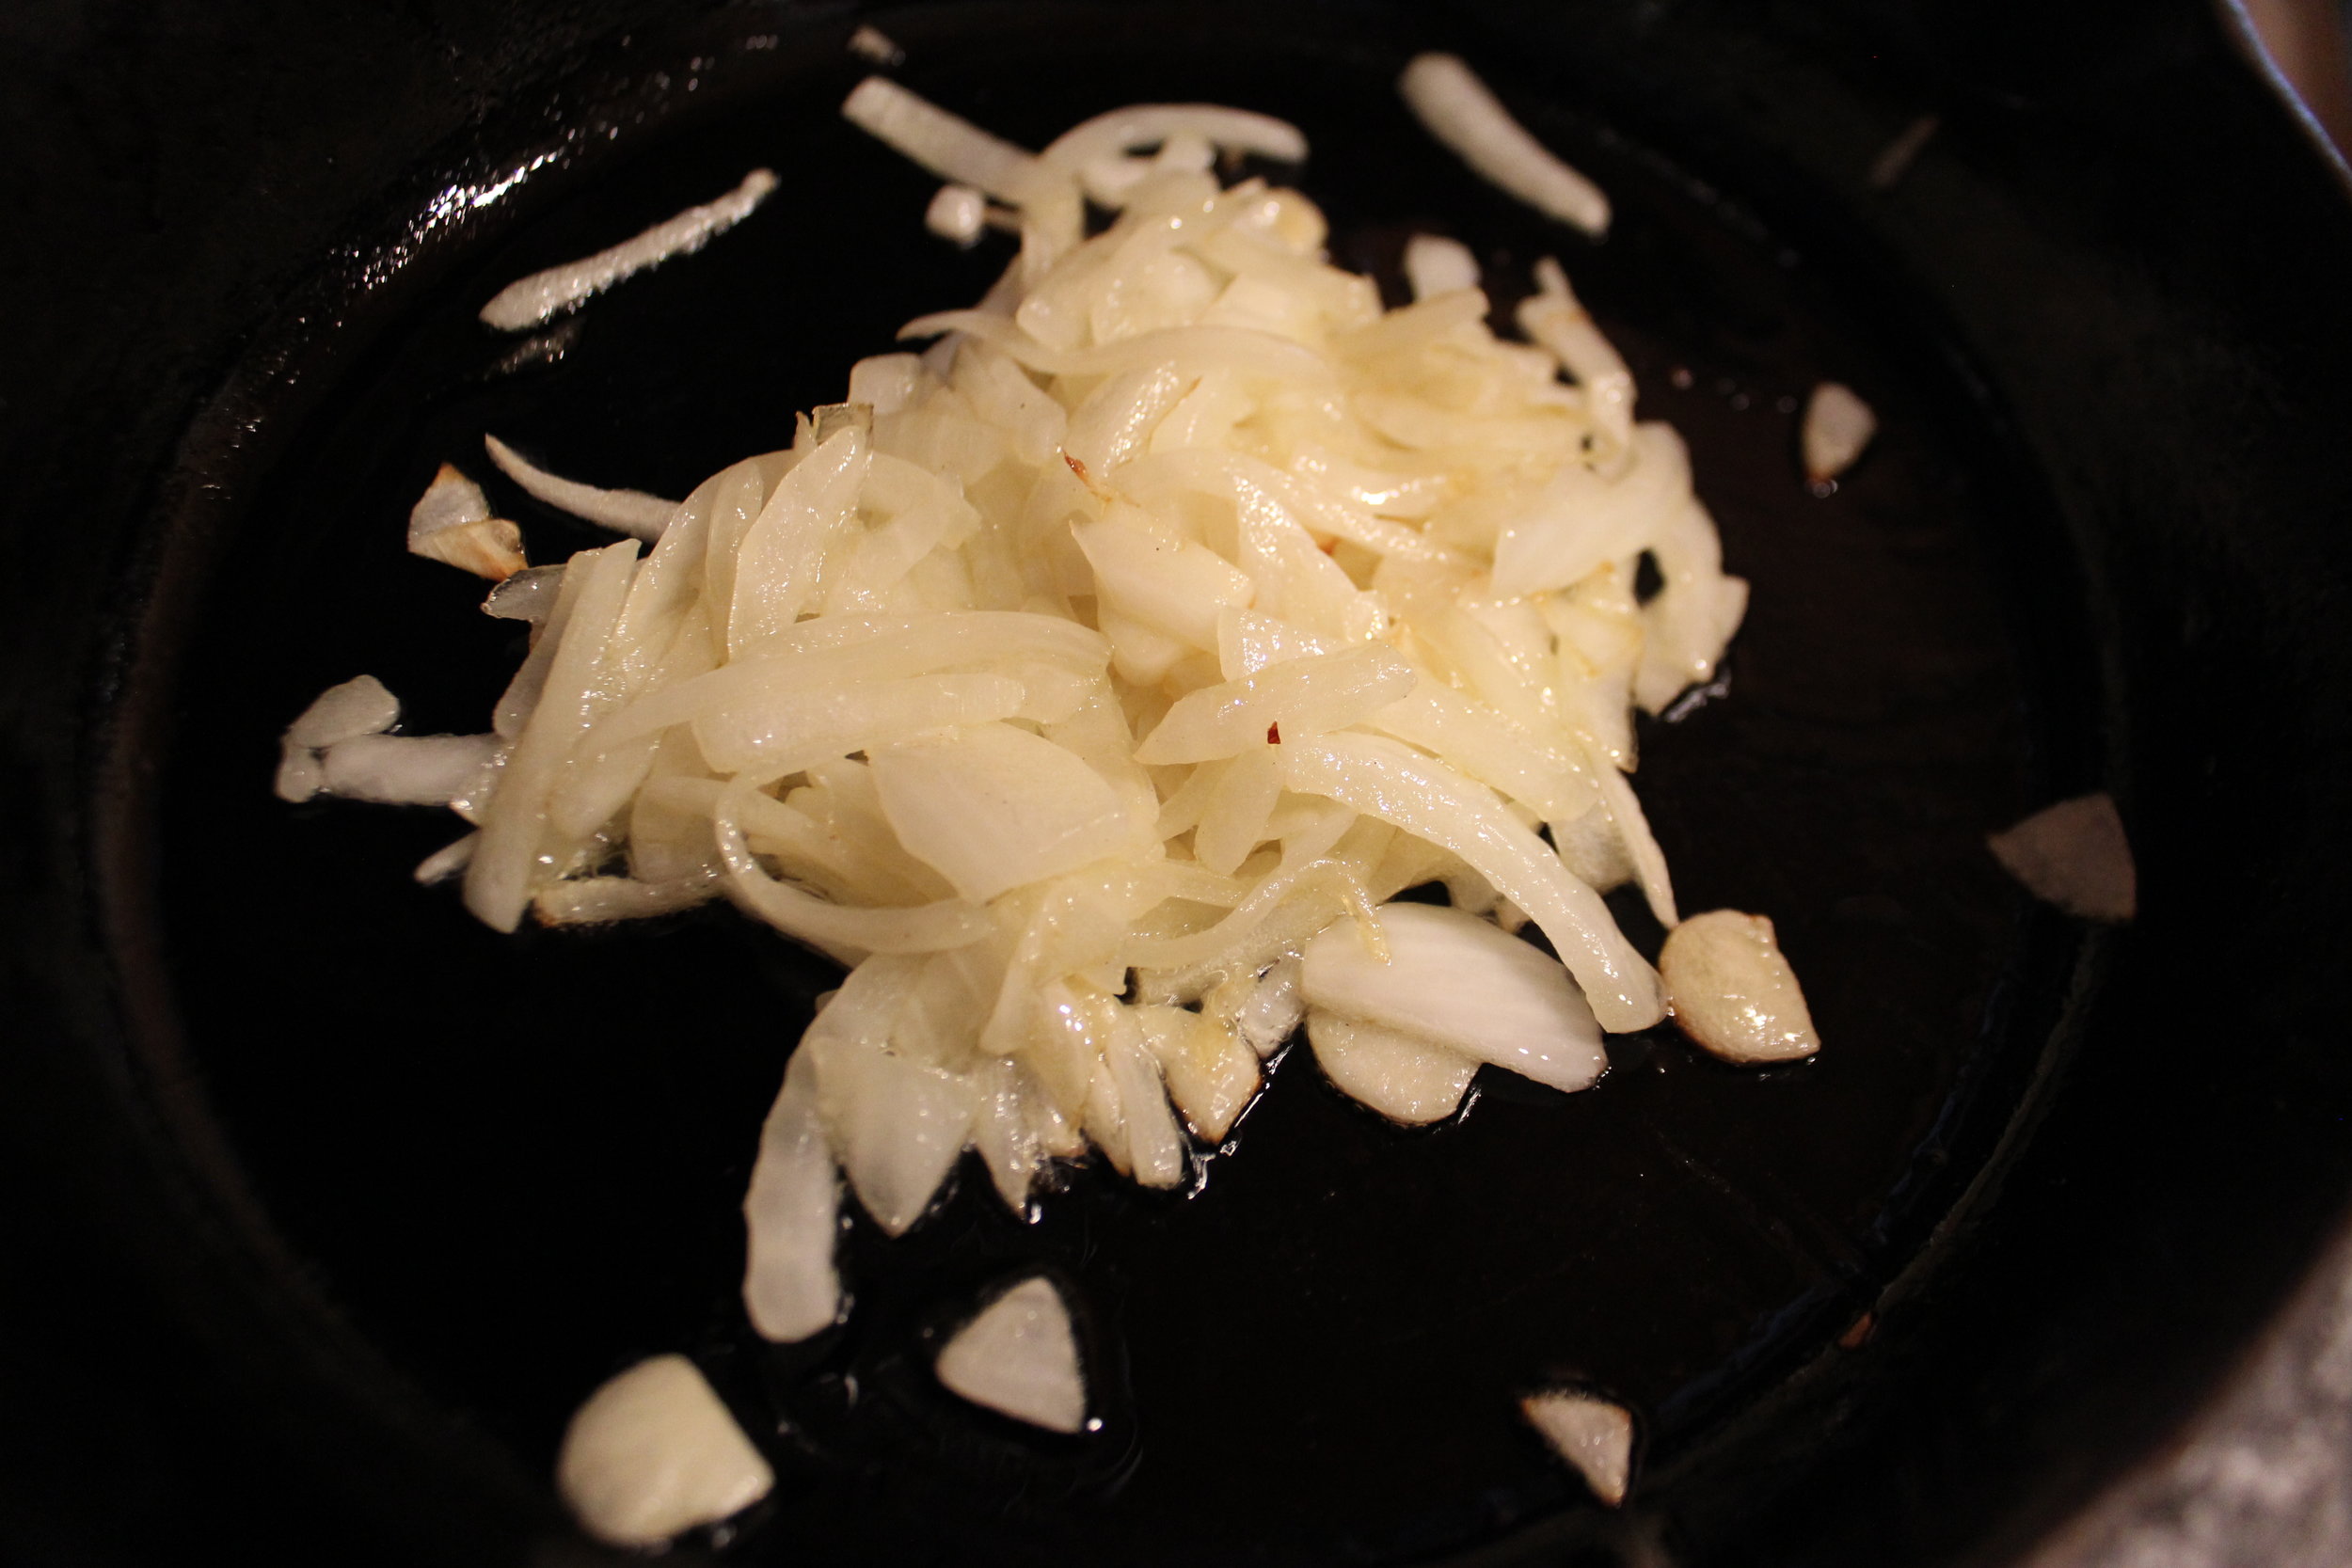
Cut the root bottoms from the leeks and most of the tough green tops. The lighter green parts may be suitable. Cutting at an angle toward the top (pictured above) from the lowest point on the green top that you plan to use will allow you to use some of the hidden tender bits inside the bottom of the green area. Remove any leathery layers of the white area as well.

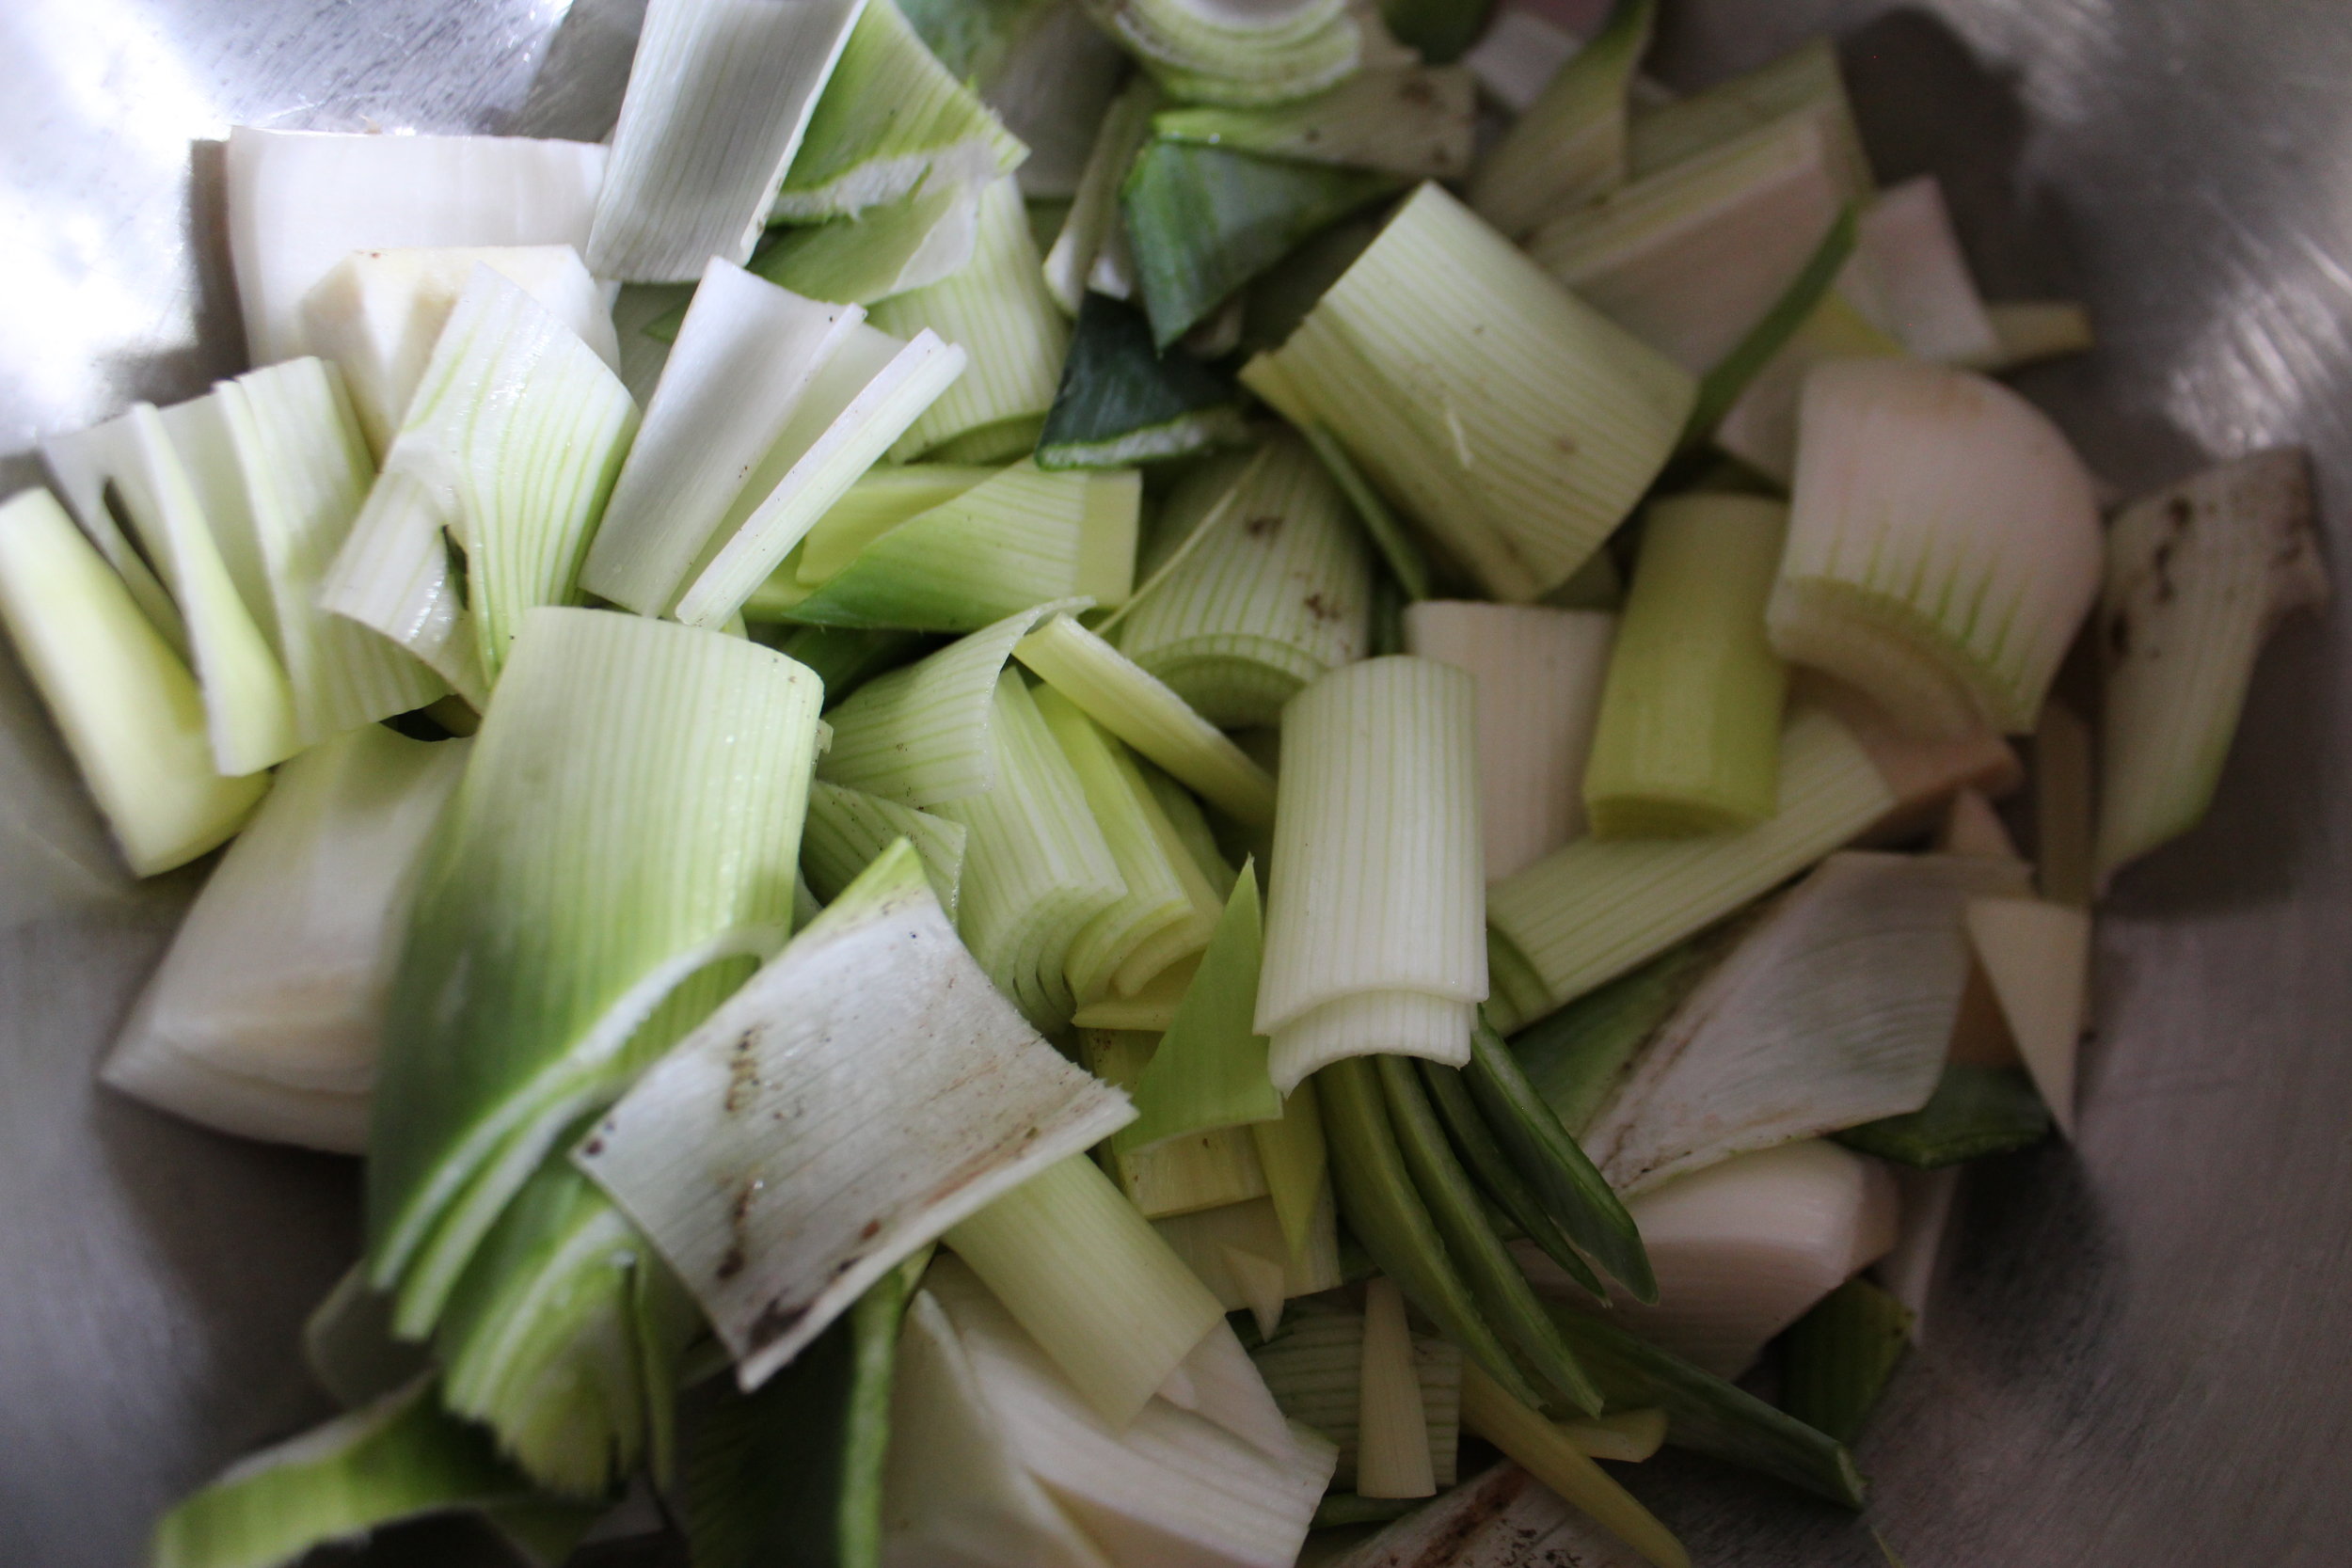
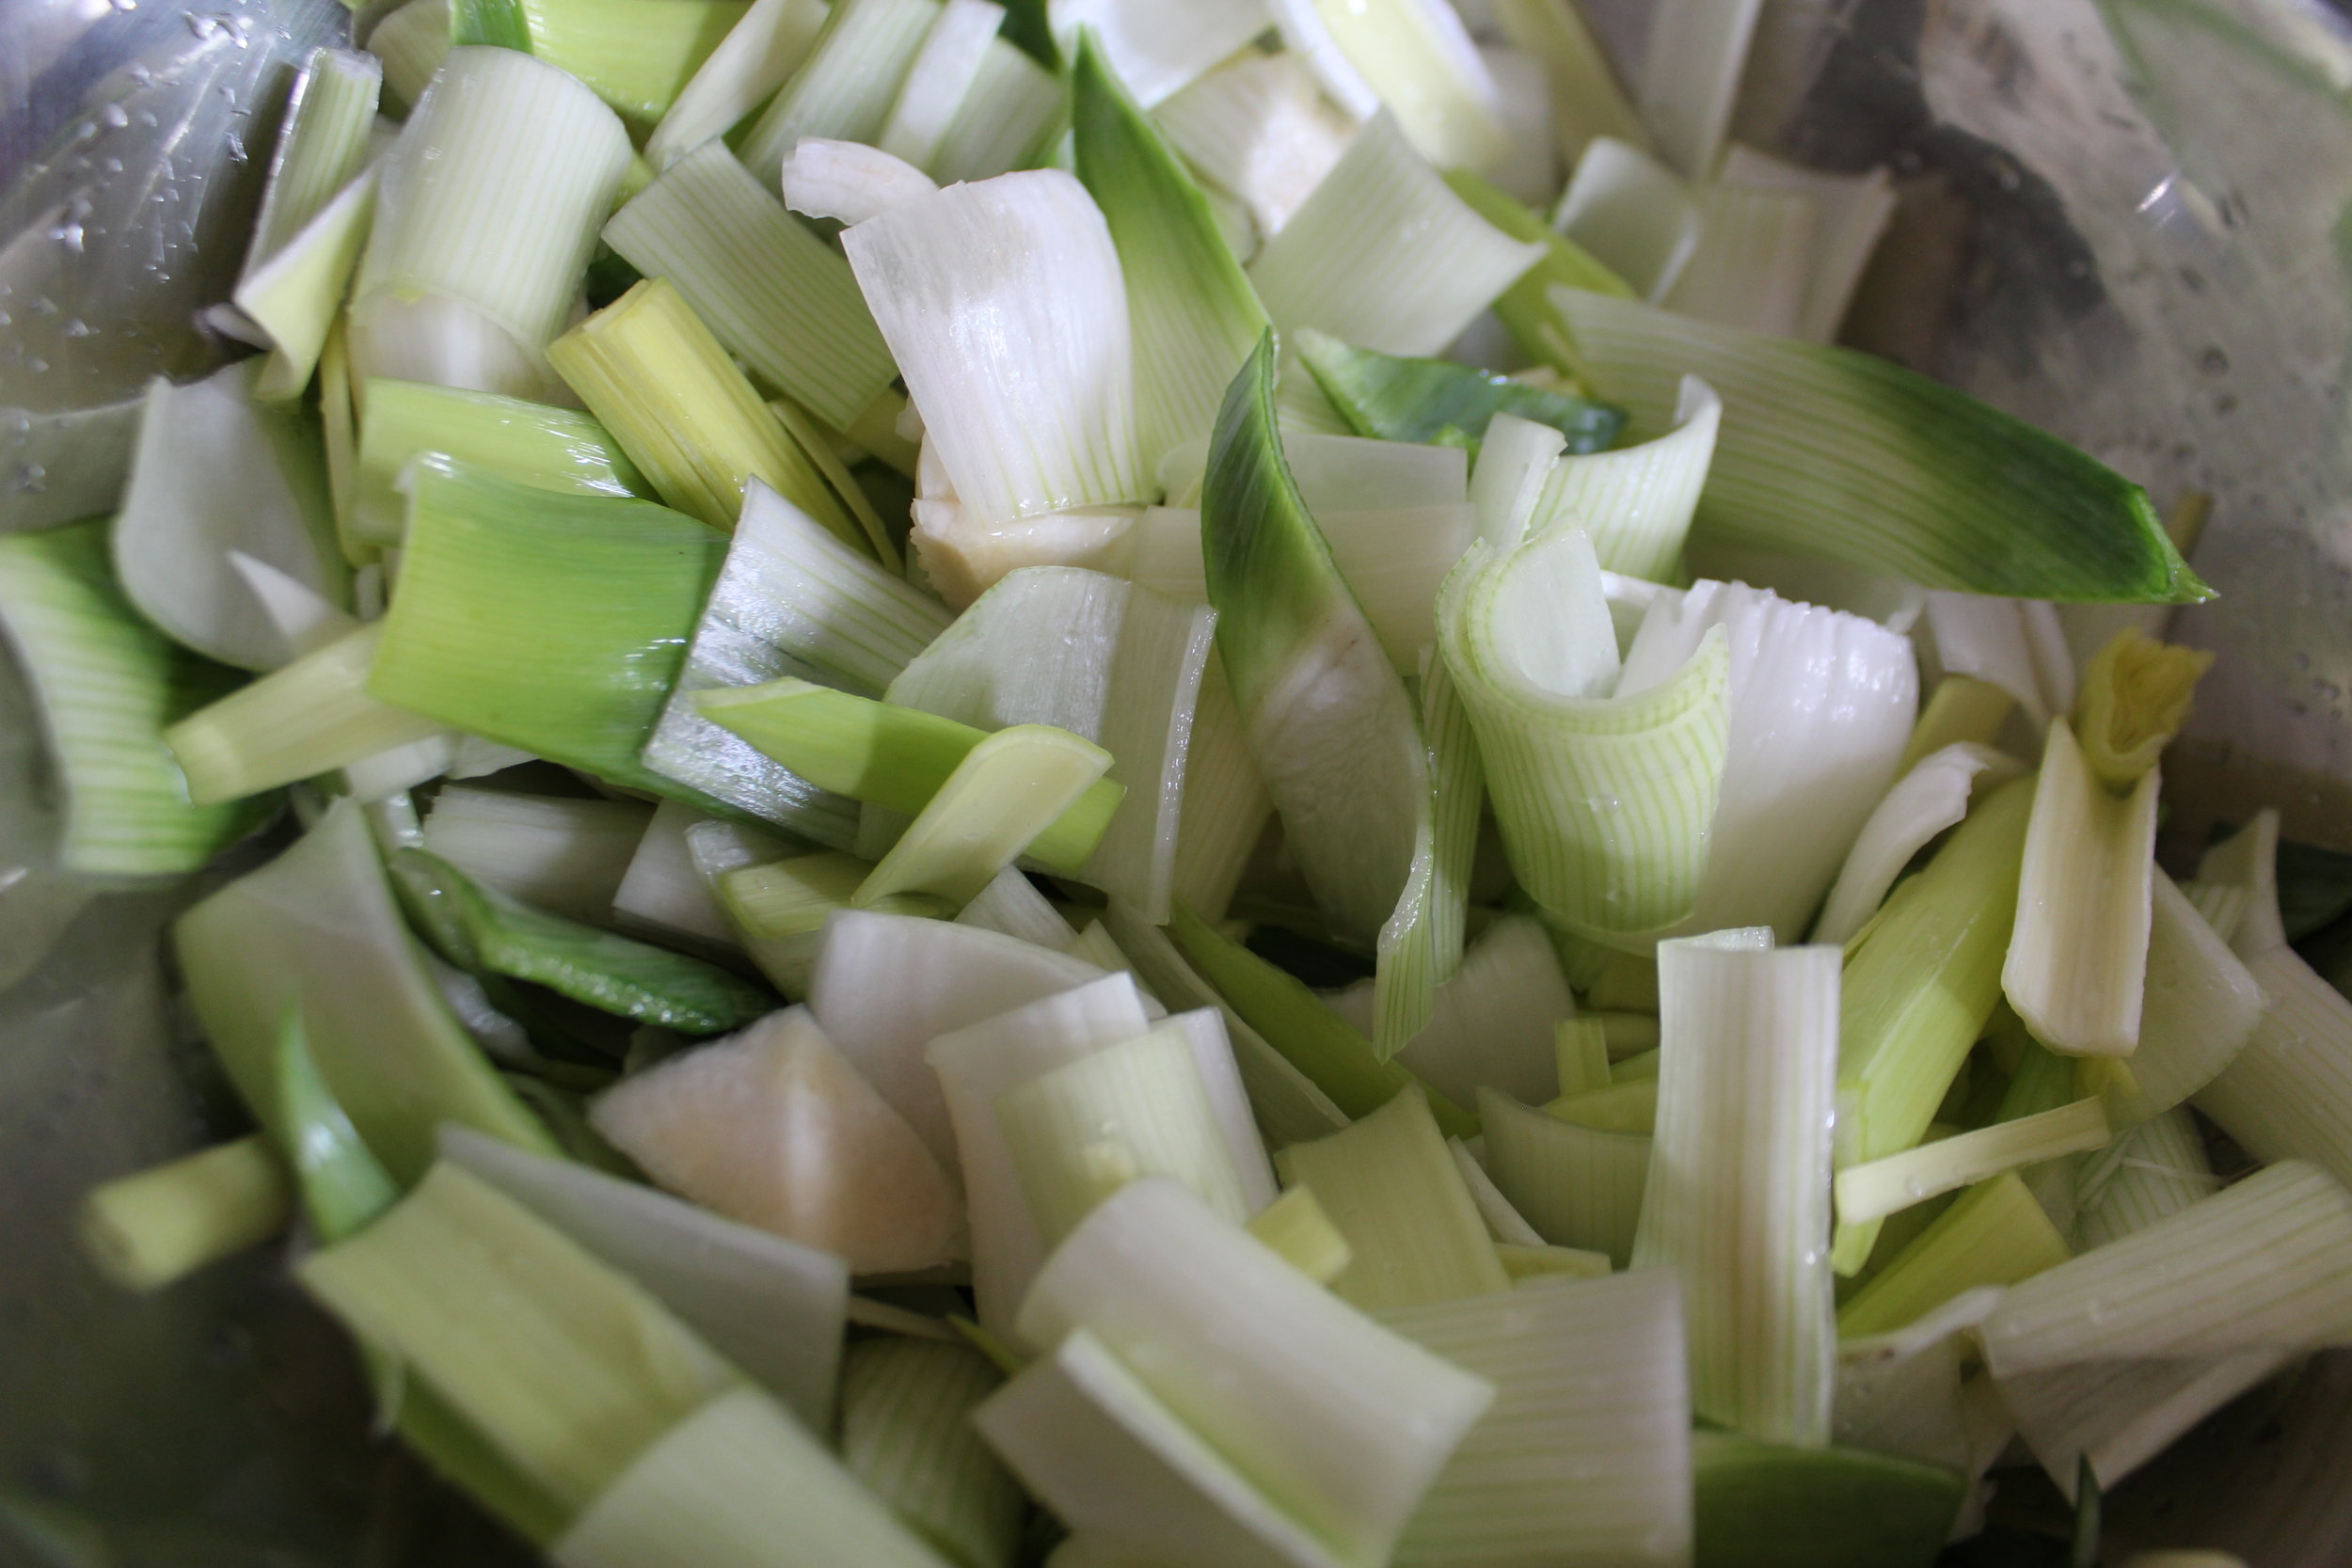
Slice the leeks lengthwise and then cut them in 1 1/2 inch segments. Gather two large bowls or one large bowl and a colander. Place the leeks in the large bowl and fill to the top with cold water. Shake the leeks around and rub them in your fingers to release dirt. Separate layers that might be stuck together also. This is where extra sand and dirt can hide.

Lift the leeks out of the bowl from the top with your hands either to the other bowl or the colander. Rinse the first bowl clean and repeat twice more or until no more grit falls from the leeks. When they are washed, drain the leeks of excess water.

Place the leeks, salt to taste, and a little olive oil in a deep saute pan or a pot with a tight fitting lid and add about 1/2 to 3/4 inch water depending on the amount of leeks you are braising. 1 Tbsp of olive oil for two medium sized leeks is a good guide. Bring the water to a boil, toss the leeks once, and reduce to a simmer with the lid on. Check the leeks after about 10 minutes. They will usually be as soft as butter in about 15 minutes.

Enjoy immediately!

May 28, 2018 /Rachel Brumitt
Leeks, Vegan, gluten free
Veggie Sides
Comment
IMG_5519.JPG

Sweet Sour Braised Cabbage with Dried Mushrooms

Kinship Cooking
January 14, 2018 by Rachel Brumitt in Veggie Sides

What are you having for dinner tonight? I bet you have some go-to meals that would pair nicely with this deep purple, earthy, phyto nutrient rich side dish. Sesame noodles and teriyaki salmon, Korean barbecue, barbecue tofu, stir fried rice with edamame, miso broiled eggplant and baked fish, simple chive omlette...all of these make for a perfect dinner. Hot or cold, sweet and sour cabbage is a beautiful and surprisingly light side dish that makes good use of a cool season staple.

 In the winter, we're not spending much time wandering wistfully through the farmers' market planning our menus around the abundance of spring, summer, or fall produce. We've got to stock some sturdier fellows in the old ice box, for when we get snowed-in (crosses fingers). Cabbage is great because it resides contentedly in the fridge for weeks making it an ideal veggie to have on hand for those nights when your crisper is looking a little bare. Oh, and by the way, ask the folks in produce to cut you a half a cabbage if the suckers are behemoth. It can be hard for anyone to get through one of the larger heads of cabbage at times, and I usually find the produce department most obliging.

IMG_5446.JPG
IMG_5470.JPG
IMG_5479.JPG

In the spirit of bringing more pantry wisdom to my readers and clients, I have been playing around with some dried mushrooms as well. Dried mushrooms are an ingredient I encourage because they can be easily used in so many ways, adding umami, texture, and depth to many dishes. See my recipe for Caramelized Onion and Porcini Gravy from Thanksgiving.

Using mushrooms gives this braised cabbage a heartier feel than many versions of this dish. It has a subtle sweet/sour flavor. Mushrooms are meaty without meat. For those who eat meat, try searing a little sausage or crisping slices of thick cut bacon in the pan before adding the other ingredients and braising. My point is: Eat loads of braised purple cabbage! It's good. Create your own style.

IMG_5463.JPG

I aim to help everyone develop a sense of comfort with basic cooking techniques, flavor combinations and ingredients. With this foundation, a sense of how to create endless variations on a dish follows. Getting beyond the proficient execution of recipes, and into the wild blue yonder is what gives a cook true freedom to play, and space to be creative. It also helps when you have 30 minutes to whip up a dinner from whatever random items you have on hand.

Some other variations you may want to make to this recipe include omitting the star anise, if you are not a fan, or omitting/changing the mushrooms. You may want to change the flavor profile by exchanging the ginger for more garlic, using balsamic vinegar and a bay leaf or sprigs of thyme. The sweetness of the mirin can be substituted by a little maple or sugar. Go nuts.

IMG_5471.JPG

Umeboshi "vinegar" is fun to have on hand. I used quotes because it is not a true vinegar, but rather the brine left from pickling Japanese ume plums. The pink color, and additional flavor come from the shiso leaves used when pickling the plums. This condiment has a bright, salty, fruity-tart flavor unlike anything else, and it is amazingly delicious. I always have a bottle on hand for sprinkling on rice, making beet, radish, or cucumber pickles, making dressings and sauces among other things. It is a truly excellent condiment for vegetables.

IMG_5489.JPG
IMG_5503.JPG

Sweet Sour Braised Cabbage with Dried Mushrooms

Ingredients:

  • 1/2 Oz paddy straw mushrooms
  • 1/2 C hot water
  • 3 C sliced red cabbage, 1/4 inch thick
  • 1 C sliced onion, 1/4 inch thick
  • 1 Medium clove garlic, sliced
  • 1-2 Whole star anise
  • 1/2 Inch ginger, julienne
  • 1/4 C mirin
  • 2 Tbsp rice vinegar
  • 2 Tbsp umeboshi vinegar
  • 1/4 Tsp toasted sesame oil to finish (optional)

Prep the mushrooms by soaking them in 1/2 C hot water for about 20 minutes. Squeeze the mushrooms and reserve the soaking liquid, pouring the liquid into another container and off of any grit that has settled to the bottom.

In a pan, pot, or dutch oven with a tight fitting lid, combine the cabbage, onion, garlic, star anise, ginger, mirin, rice vinegar, and umeboshi vinegar. Combine the mushroom soaking liquid plus additional water to total 2 C and add to the pan. Toss the ingredients, cover, and bring to a medium simmer. Maintain a simmer with the lid closed for 30 minutes. Check the water level after about 20 minutes to make sure too much isn't being lost to steam. The cabbage should be tender when done. Drizzle the sesame oil over the cooked cabbage before serving, or add about 4 drops to each serving individually.

Serve the cabbage hot or chilled.

Yield: 4-6 servings. The cabbage will keep for 1 week refrigerated.

January 14, 2018 /Rachel Brumitt
Cabbage, Mushrooms
Veggie Sides
Comment
Smashed Chickpeas and Spinach with Allspice and Fennel

Smashed Chickpeas and Spinach with Sesame, Allspice, and Fennel

October 22, 2017 by Rachel Brumitt in Greens, Beans, Veggie Sides, Gluten Free

Spinach is a go to veggie for me when I need a quick green for a meal and I am short on time. It cooks almost instantly and it's so easy to pick up in huge 16 oz container, washed and dried and ready to go. I was in need of a quick dinner this weekend and was also seriously craving sesame. I reached into my brain, and my spice drawers, and pulled together a combination of spices that would play nice with the sesame. Namely, fennel seed, ground allspice, and chili flakes.

The humble sesame seed has insinuated itself into cuisines all around the world. The seeds, the oil, toasted and untoasted, and the paste all have many delicious applications. Sesame crusted fish, crisp and savory stir-fried vegetables finished with toasted sesame oil, or halva, a favorite tahini-based confection of mine. Dang, now I want halva...sigh. The sweet, unique flavor of fennel seed is a favorite of mine as well as the slow kick of chili flakes, but I wanted a warm spice to add another prominent angle to the flavors of my impromptu spinach dish. Here is where that little jar of allspice that often sits forgotten in our spice collection comes in. 

Allspice has a strong earthy flavor that is deep and powerful like clove and cardamom, somewhat earthy-sweet like cinnamon and nutmeg, with a peppery aspect without the sharpness. That's my take on it. This complex but amiable flavor gives allspice the ability to meld into many world cuisines quite neatly. Try it in your next home made curry, in turmeric rice, in mashed or roasted sweet potatoes, in tropical marinades, Mexican mole, or let it stand alone in banana bread or other baked goods.

This dish is great by itself but it works well with a grain, flatbread or other carbohydrate. Bulgur wheat, pita, or cous-cous are good options. Double the coconut milk if you want it a little saucier. Now gather your ingredients!

Ingredients for Smashed Chickpeas and Spinach with Sesame, Allspice, and Fennel

Spinach and other voluminous greens are one of the reason I have a couple twelve inch saute pans, but you also need the space to ensure you don't crowd the chickpeas too much while frying them.

IMG_4164.JPG
IMG_4182.JPG
IMG_4263.JPG
IMG_4269.JPG

Prepare your spices and seeds! Toasting the sesame seeds is essential. It dramatically enhances the nuttiness factor. Be watchful because they will burn in an instant. You can grind the fennel seed to a rough or fine texture in a mortar or spice grinder or leave it whole if you like. The fennel seeds need not be toasted beforehand. Whole allspice berries look somewhat like large, smooth, brown peppercorns but they are quite hard. If you want to try to grind whole berries, you may want to use a mortar to grind them or make sure you have a very tough spice grinder. If you have that leftover ground allspice from your pumpkin pie, you are set. Dice up some garlic, grab some coconut milk and start with the chickpeas.

IMG_4198.JPG

To get nice crispy fried chickpeas, make sure you drain them well, rinse them, and pat them very dry. When you have everything measured and ready to go, get out your largest saute pan, non-toxic nonstick if you have one, and fire it up to medium high. Add the olive oil and make sure it is hot by looking for a slight rippling on the surface then add those chickpeas! I used a potato masher to gently squish about half of the chickpeas halfway through frying. This is the time to get out your splatter guard if you have one. This process can spit oil a bit. Put your apron on too!!!

When done, move the chickpeas to a plate, remove the pan from the heat, and get the sesame oil, garlic, and spices in the pan. If you have some stuck on chickpea in your pan, gently scrape it clear in one small area to make room for the garlic and spices. Once you add the spinach and coconut milk it should loosen and incorporate into the dish with the help of a spoon or spatula.

IMG_4203.JPG
IMG_4207.JPG
IMG_4208.JPG
IMG_4249.JPG

Smashed Chickpeas with Sesame, Allspice and Fennel

Ingredients:

  • 2 Tbsp sesame seeds
  • 15 oz can chickpeas
  • 3 Tbsp extra virgin olive oil
  • 1 Tsp whole fennel seeds
  • 1/4 Tsp ground allspice
  • 1 Tsp chili flakes
  • 1 large clove garlic
  • 2 Tsp toasted sesame oil
  • 8 oz baby spinach, completely dry
  • 1/4 C coconut milk
  • 1/8 Tsp sea salt

*Note: If using home cooked chickpeas make sure the chickpeas are not too soft. They must hold together for the frying process. If using a bunch of spinach, make sure to wash well and pat as dry as possible.

Heat a large, heavy bottomed saute pan over low to medium-low heat. Add the sesame seeds and stir frequently until they become glossy and about half begin to brown. Remove the sesame seeds from the pan and set aside. Drain, rinse and pat the chickpeas completely dry.

Now prepare the spices and garlic. Grind the fennel seeds in a mortar or in a spice grinder. You may prefer it fine, roughly ground, or even leave them whole. Smash and roughly mince the garlic. Combine the fennel, ground allspice, chili flakes and garlic in a small bowl. Measure the coconut milk and set aside. 

Heat the pan to medium high or high and add the olive oil. You may want to keep the heat lower if you are using a pan with a thinner bottom. When the olive oil is hot but not smoking, carefully add the chickpeas and begin frying them. Stir them only occasionally to allow them to brown and crisp. Smash about half with the back of a fork or a potato masher half way through frying them. 

When the chickpeas are nicely browned and crispy, remove them from the pan and remove it from the heat. Gently scrape any sticky chickpea bits and make a little room for the garlic and spices. Add the toasted sesame oil, garlic and spices in the cleared part of the pan and fry them together for about two minutes, returning to low heat if necessary. Return the pan to medium heat and add the spinach a handful at a time, stirring until it is just wilted. Stir the coconut milk into the spinach until you see it bubbling, then add the chickpeas and sesame seeds back to the pan, mixing completely. Serve hot and enjoy!

October 22, 2017 /Rachel Brumitt
Spinach, Chickpeas, Fennel Seed, Allspice
Greens, Beans, Veggie Sides, Gluten Free
2 Comments
Dandelion Greens

Braised Dandelion Greens

July 21, 2017 by Rachel Brumitt in Greens, Veggie Sides

I am so fortunate to have had family time in Grand Marais Minnesota this week. This is a tiny, adorable, bustling tourist town with a permanent population that hovers around 1,300 people. If you have never been to the arrowhead region of Minnesota along the shore of Lake Superior, let me briefly explain. Vast icy waters, rocky basalt cliffs and outcrops into the lake, neon lichens and wild flowers, multicolored cobblestone beaches, cool breezes and excellent sleeping weather, seagulls, pine trees, lake fish, excellent hiking...majestic beauty anyone? Yeah, it's that magical. I am soaking it into my soul.

So, after a lot of deliberation, and testing of other recipes, I went back to the drawing board and looked out the window on an excellent wild harvesting opportunity which was right under my nose. Pedestrian as it is, dandelion is an age old foodstuff that has medicinal uses and the flowers make a very good wine.

Now, I will admit, if even kale is too bitter for you then dandelion greens may not be your thing, but I have always encouraged my clients, friends, and family to consider expanding their palate through exposure to allow for more bitter tastes. I feel this is a flavor often left out of the American diet save for coffee, tea, and maybe very, very dark chocolate. Once you start getting used to bitter greens, you may even begin to crave them. There is a wonderful contrast when they are served with fatty or rich foods, comfort foods like potatoes, starches and pasta, or good bread and cheese. Maybe dandelion greens can be your gateway to radicchio and broccoli raab. Don't say I didn't warn you.

One extra step you can take if you want to enjoy the greens but want to reduce the bitterness factor is blanching the greens briefly first. After the greens are washed and the ends are trimmed, immerse the greens in a pot of boiling water for 2 minutes. Drain the greens and shock them in a bowl of ice water. Then remove excess water with a towel and proceed to chop them and braise them according to the recipe. I found that the greens I used were only mildly bitter and did not require blanching. I also tend to enjoy bitter flavors.

IMG_3606.JPG
IMG_3613.JPG
IMG_3617.JPG

I almost always use a base of sauteed onion with greens, especially more bitter or sharp greens, and here I use sweated onion and garlic. The braise takes a little time but the whole process should take no more than an hour with little oversight. The addition of a little honey and vinegar round out the flavors and chopped nuts add texture. Hazelnuts, walnuts, pecans or even toasted pine nuts are all lovely.

Make sure to wait to salt the greens until after they are braised and the liquid is cooked off. This way you will avoid over salting them. Also, I just had water on hand but a flavorful stock or broth of any kind would be great choices for braising liquid. Grating a hard cheese such as Parmigiano Reggiano, Grana Padano, Pecorino Romano, or Asiago is also a wonderful way to finish the dish.

Braised Dandelion Greens

Free greens for everybody! Enjoy these delicious, abundant, and nutritious greens anytime you come across a pristine patch of dandelion! They also freeze well, just leave out the nuts.


Braised Dandelion Greens

Ingredients:

  • Dandelion greens - enough to make three cups when chiffonaded and chopped small (see picture). As a guide, the bunch I picked were about 8 to 10 inches long. I was just able to get my middle finger to touch my thumb when gripping them about 1/3 third the way up from the bottom of the leaves. Get as close as you can to 3 cups finely sliced/chopped and if there is a little left over, toss them in too!
  • 1 C thinly sliced yellow onion
  • 1 large clove garlic, 1/8 inch slices
  • 1 Tbsp extra virgin olive oil
  • 1 Tbsp honey
  • 2 Tsp vinegar, your choice
  • 3 Tbsp chopped nuts (hazelnut, pecan, walnut, pine nut- toasted or untoasted nuts are fine)
  • salt and pepper to taste

Wash the greens well in a large bowl, immersing them and agitating them in three changes of water or until no sediment is present in the bottom of the bowl. Pat the greens dry and cut off one inch of the bottom stems. Bring the greens together tightly and slice them in long, thin ribbons 1/8 in wide. Now gather the greens in a mound and chop them in the other direction several times.

Bring a saute pan with a lid or small pot with a lid to low/medium heat. Sweat the garlic and onion with the olive oil while stirring occasionally 5 to 6 minutes until the onion softens and begins to become translucent. Do not brown the onion or the garlic because you want a sweet undertone to balance the bitterness of the greens. Add the greens and 2 cups of water or stock. Simmer the greens, covered, for 25 minutes. Now remove the lid and cook off the braising liquid. When the cooking liquid is almost gone, remove the pan from the heat. Add the honey and vinegar and season with salt and pepper to taste. Transfer the greens to a serving dish and top with the chopped nuts. You may want to try tossing the greens immediately with fresh pasta and top with grated hard cheese. Enjoy!


July 21, 2017 /Rachel Brumitt
Dandelion Greens, gluten free
Greens, Veggie Sides
Comment
IMG_3409.JPG
IMG_3429.JPG

Smokey Stewed Okra and Tomato

July 07, 2017 by Rachel Brumitt in Veggie Sides

Ok all you okra lovers, here is one for you. I know okra is not for everybody and that's ok, that leaves more for me. In this recipe I am combining two of my (many) favorite things: okra and smoked paprika. Smoked paprika, or pimenton, is a spice I feel should be in every pantry. You can get sweet or spicy varieties of this, though often they are not labeled as such, so just get what you can.

This ground, smoked paprika imparts a strong signature taste to foods, so for those with a sensitive palate who have not tried it, feel free to reduce the amount in this recipe. I really like it to stand out. For some recipes that usually call for pork or smoked meats as a flavor element, like split pea soup, it is a wonderful spice to add that missing flavor, but I encourage all to become familiar with it. It is also lovely to add a little to the olive oil when making a nice crispy fried egg. Smoked paprika adds a twist to potato salad. Try a dash in gazpacho, or sprinkled on sweet corn with butter and pepper too.

IMG_3432.JPG
IMG_3441.JPG

As tomatoes and okra come into season in your area, snatch up some small, tender okra and some meaty tomatoes. Roma style tomatoes work really well, but I have used other firm fleshed tomatoes. What you have on hand will do, though softer tomatoes will melt into this dish more, and that is just dandy too. I am picky about my okra. Sometimes larger okra can still be tender, but your best bet is the smaller ones. Feel the outside and avoid any that feel too firm or are woody. The okra I choose are usually around three to four inches long and even the top part above the pod are tender enough to eat when cooked.

This is a recipe that does benefit from cooking in a large heavy bottomed saute pan or wide heavy bottomed pot, both with tight fitting lids. This allows the okra room to fry a bit in the oil during the saute process which will decrease the "slimy" texture the okra can produce. There, I said it! Yes, okra can sometimes be slimy, and it is actually prized for it's thickening ability in soups and stews. But.....I find that this recipe does not have that texture at all. The okra are simply soft, tender and flavorful. So, look for a large pan, or in a pinch, split the recipe into two pans.


IMG_3454.JPG
IMG_3465.JPG

This is a great side dish for a cook-out, pot luck, or as a simple dinner with rice and fried eggs. Actually, it's one of my husbands favorite dinners. And don't knock it for breakfast either!


Smokey Stewed Okra and Tomato

Ingredients:

  • 2 1/2 to 3 C okra, 1/3 inch bias cut
  • 4 to 6 Roma tomatoes, depending on size
  • 1 small yellow or white onion
  • 3 Tbsp extra virgin olive oil
  • 3 large cloves garlic, minced
  • 1/2 Tsp smoked paprika, sweet or hot
  • 1/2 Tsp sea salt
  • 1/4 Tsp fresh ground pepper

Wash and dry the okra and tomatoes. If your okra are larger or a little tough, consider removing the top ends right where the pod starts. If the okra are fairly tender, leave the tops on and slice all the okra to 1/3 inch thick bias cut. Any length of cut is ok, but I cut mine about 1 inch long. Chop the tomatoes into roughly 3/4 inch cubed chunks. If you have large Romas, use about 4, if they are smaller or really small use 6 or more. You need enough tomato to produce the stewing liquid. Mince the garlic and measure out the smoked paprika, pepper and salt. Combine these in a small dish to add to the pan together.

Heat a large, heavy bottomed saute pan with a lid, or a heavy bottomed pot with a lid over medium high heat. A 12 inch saute pan or a pot with a width of at least 8 inches will help the okra fry in the oil initially, reducing the viscous texture. If the pot or pan is too small, the ingredients will steam more. When the pan or pot is hot, add 2 Tbsp plus 2 Tsp olive oil, the onion and the okra and stir continuously. After about 5 minutes the onion and okra start to soften and get a little brown on the edges. Now clear a small space in the pan, add the remaining Tsp of olive oil, the garlic, smoked paprika, pepper and salt and fry the spices for about 15 seconds before mixing into the okra and onions.

Reduce the pan to just below medium heat, cover tightly and allow to stew for 15 minutes. Stir a couple of times in the first few minutes to make sure the heat is low enough, the contents are not sticking, and the juice is coming out of the tomatoes. You should not need to add any water but if you see the mixture is too dry, add a few Tbsp at a time.

After 15 minutes, check the okra to see if it is tender. If you would like it slightly more done, cook for 5 minutes more. Serve hot. The okra will be best for 5 days refrigerated.

Yield: 4 to 6 servings


July 07, 2017 /Rachel Brumitt
Tomato, Okra, gluten free
Veggie Sides
2 Comments

Powered by Squarespace