Kinship Cooking

Veg-Forward Fare For All Tastes

  • About
  • Services
  • Get in Touch
  • Blog
  • Archive
IMG_5796.JPG

Black Trumpet and Crimini Mushroom Fried Brown Rice

Kinship Cooking
January 26, 2018 by Rachel Brumitt in Gluten Free, Grains

Time for me to join mushrooms anonymous. I know I am hitting the mycological edibles pretty hard lately (hey, that sounds like a good name for a blog, or a band...hmmm), but I have to go where the spirit takes me. This week it's a hearty heap of chewy, umami-laden brown rice. My neighbors are kind enough to sample my recipe tests, and they have reported that the flavors are, and I quote, "edibly satisfying" with five smiley faces. Now that's an endorsement! I have to agree, when only something savory will do, this might just be the thing.

IMG_5672.JPG
IMG_5699.JPG

I can pose a pretty good argument against the conventional wisdom that white rice, as opposed to brown rice, makes a better blank canvas for sauces, flavors, etc. I think this idea has simply become an assumption that isn't challenged often enough because there is a lack of will. Well, the chef will not abide.

Do I eat white rice? Yep. It is indeed a great sop for flavors. It's fast and delicious and needs no defending, especially on nights when I have 20 minutes to whip up dinner. This doesn't mean that brown rice isn't also a great accompaniment to sauces and flavors. One doesn't exclude the other.

I've been eeking brown back into my life, and in my life B.C. (before child) I almost never ate white rice, I ate brown. Why? Because it has lots of flavor, it's chewy and nutty, and it's delicious, that's why. And I took the time, that's why. And fiber, there is always that. Then, P.C. (post child), it became easy to make excuses for my white rice habit and I got a bit lazy. No more!

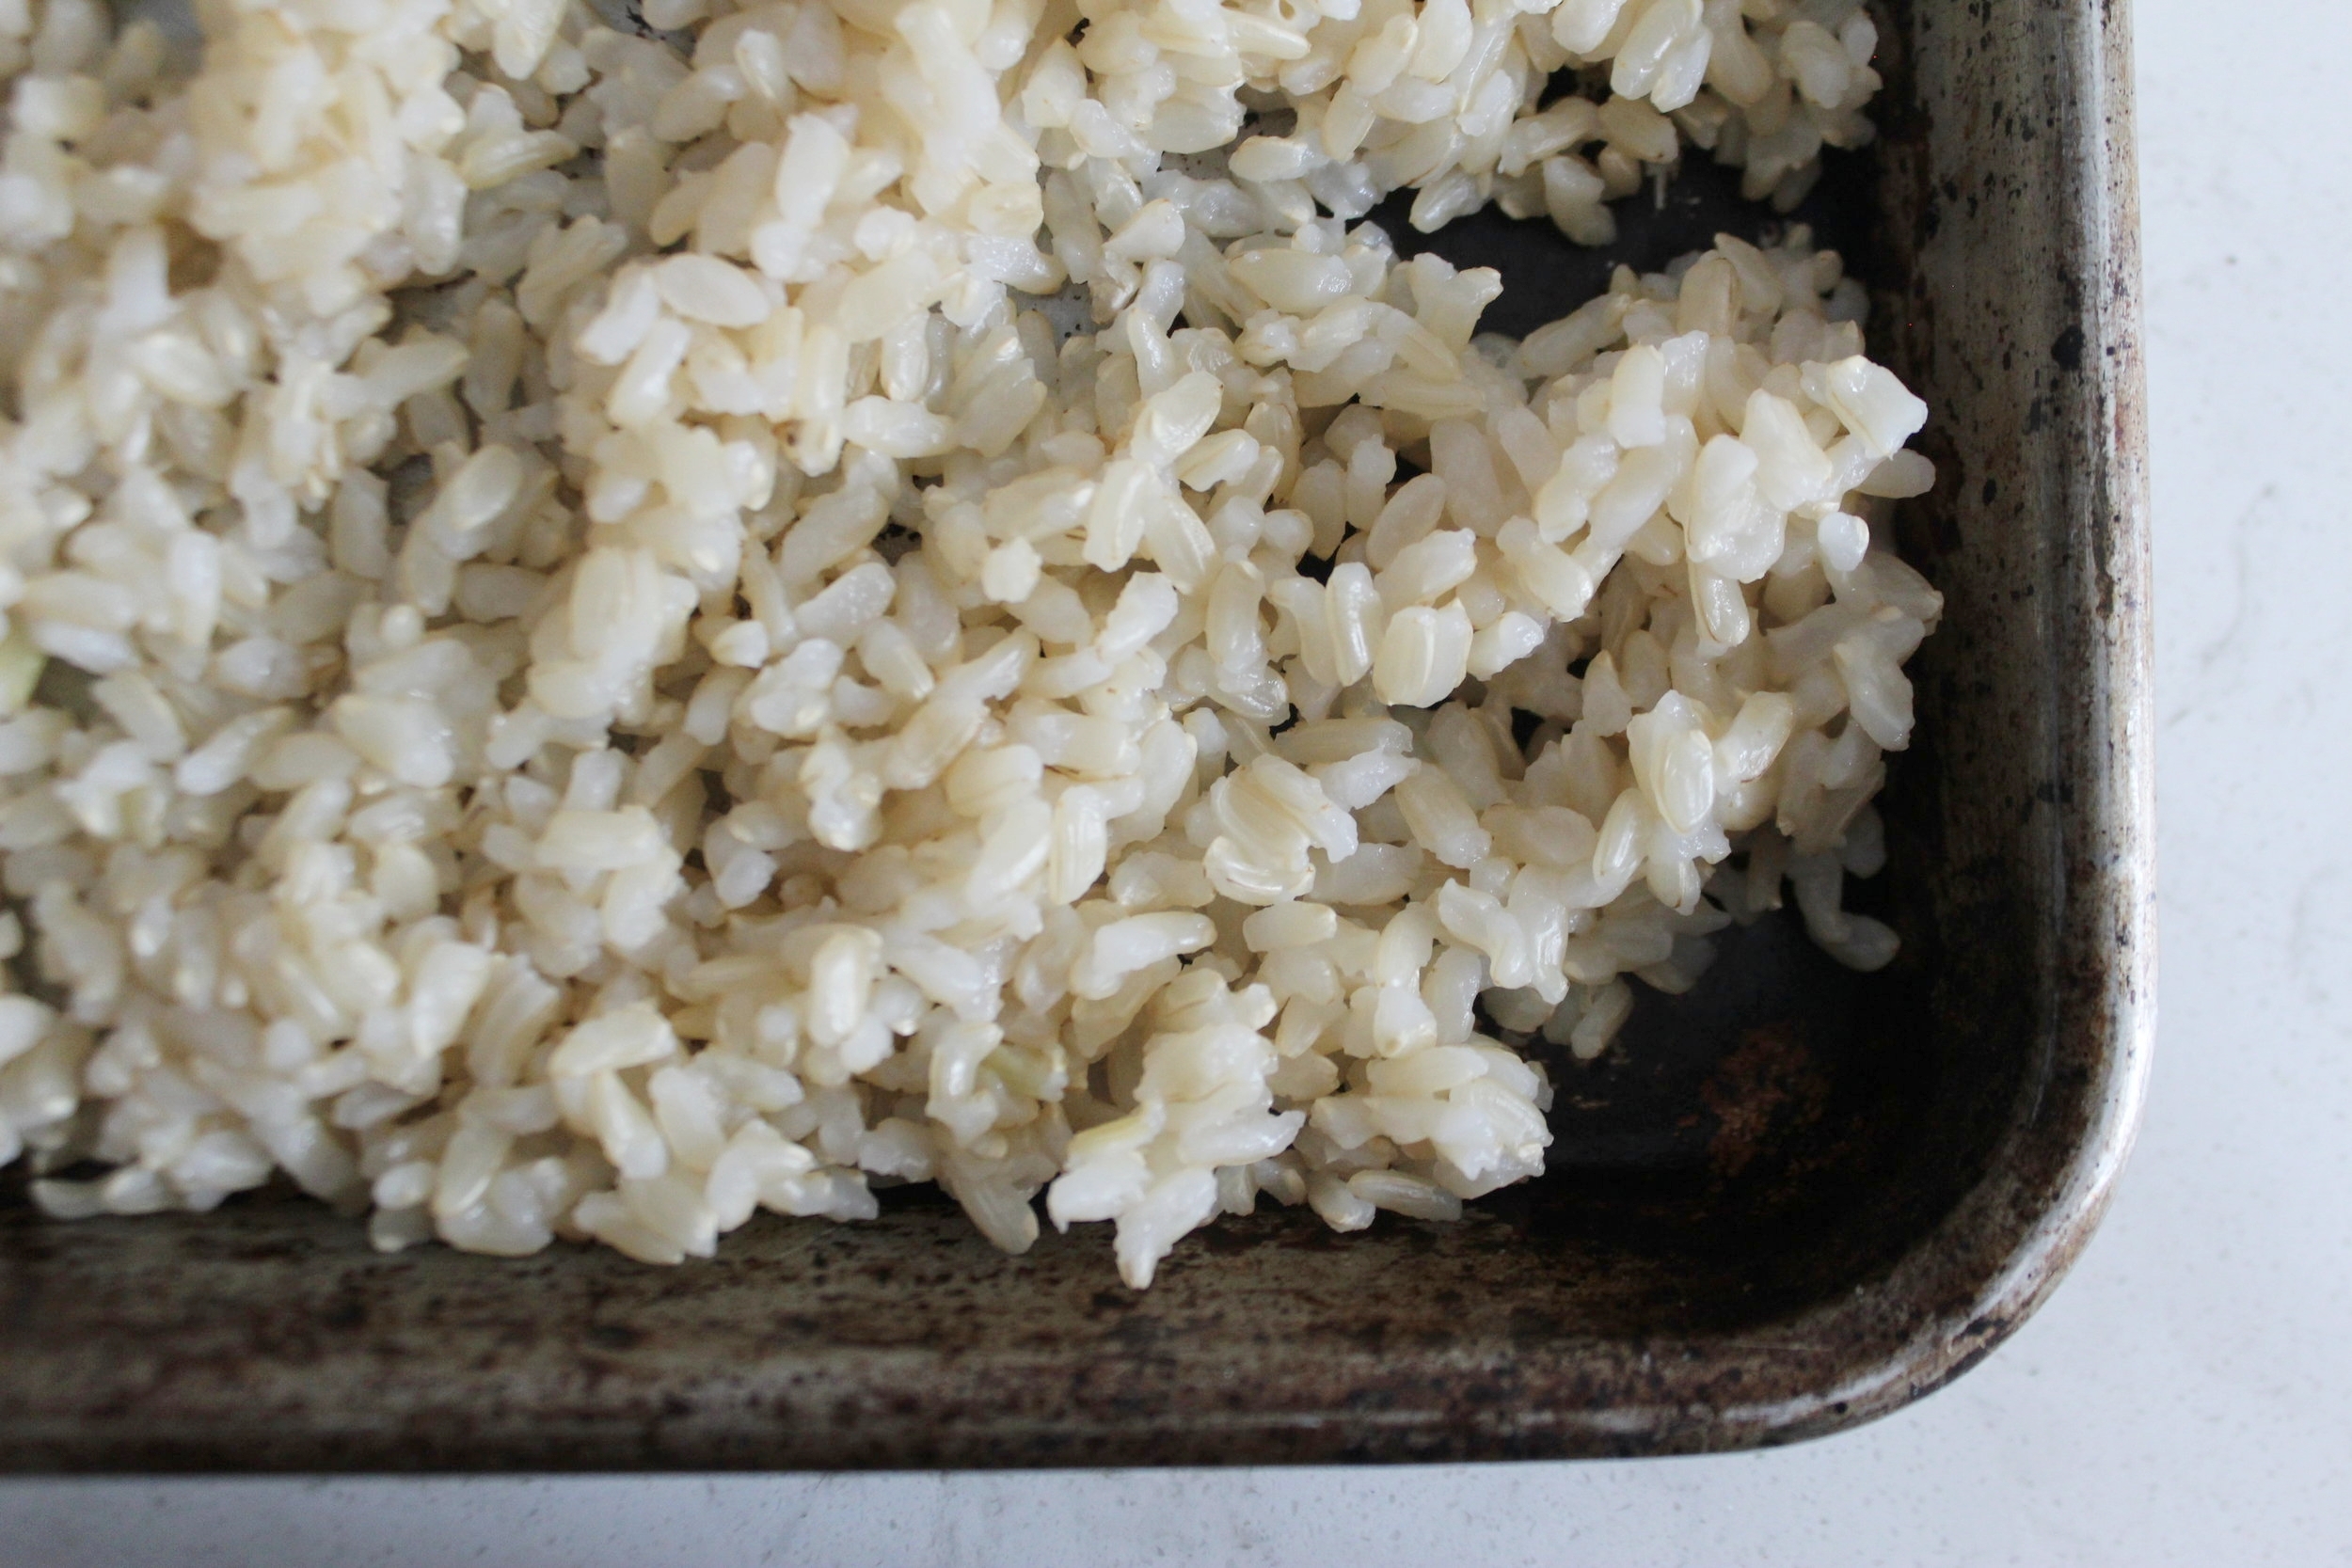
How much extra time does brown rice take? Well, considering that I cook a pot of white rice for about 15 minutes, then let it steam for another 5, and I cook a pot of brown rice for 40 minutes and let it steam for another 5, that's a little more than twice the time. I think it's worth it to plan ahead and make a pot of brown rice one night of the week that can be used multiple times. Once in a while. Just for a change. We must simply clear our minds of the notion that brown rice is somehow pedestrian. Ok, I will get off of my soapbox.

One note about the rice for fried rice. You do not want it too soft. You will find many recipes call for a 1:2 ratio of rice to water. I NEVER cook rice at this ratio. I always use slightly less. Sometimes 1/4 less, especially with white rice. This is where having a tight fitting lid comes in. If your lid leaks steam, the rice will loose TOO MUCH water, and may be crunchy. If you use too high a ratio of water to rice, it will be too soft. So, make sure you have a trusty, heavy bottomed, tight lidded pot that you always use for rice. That way the measurements for this recipe will produce perfectly chewy, separate little grains. The steaming process in the end allows the rice to absorb the last bits of moisture in the pot as well, avoiding a soupy wet texture on the outside of the rice. Having the correct cookware is always a good investment.

IMG_5697.JPG

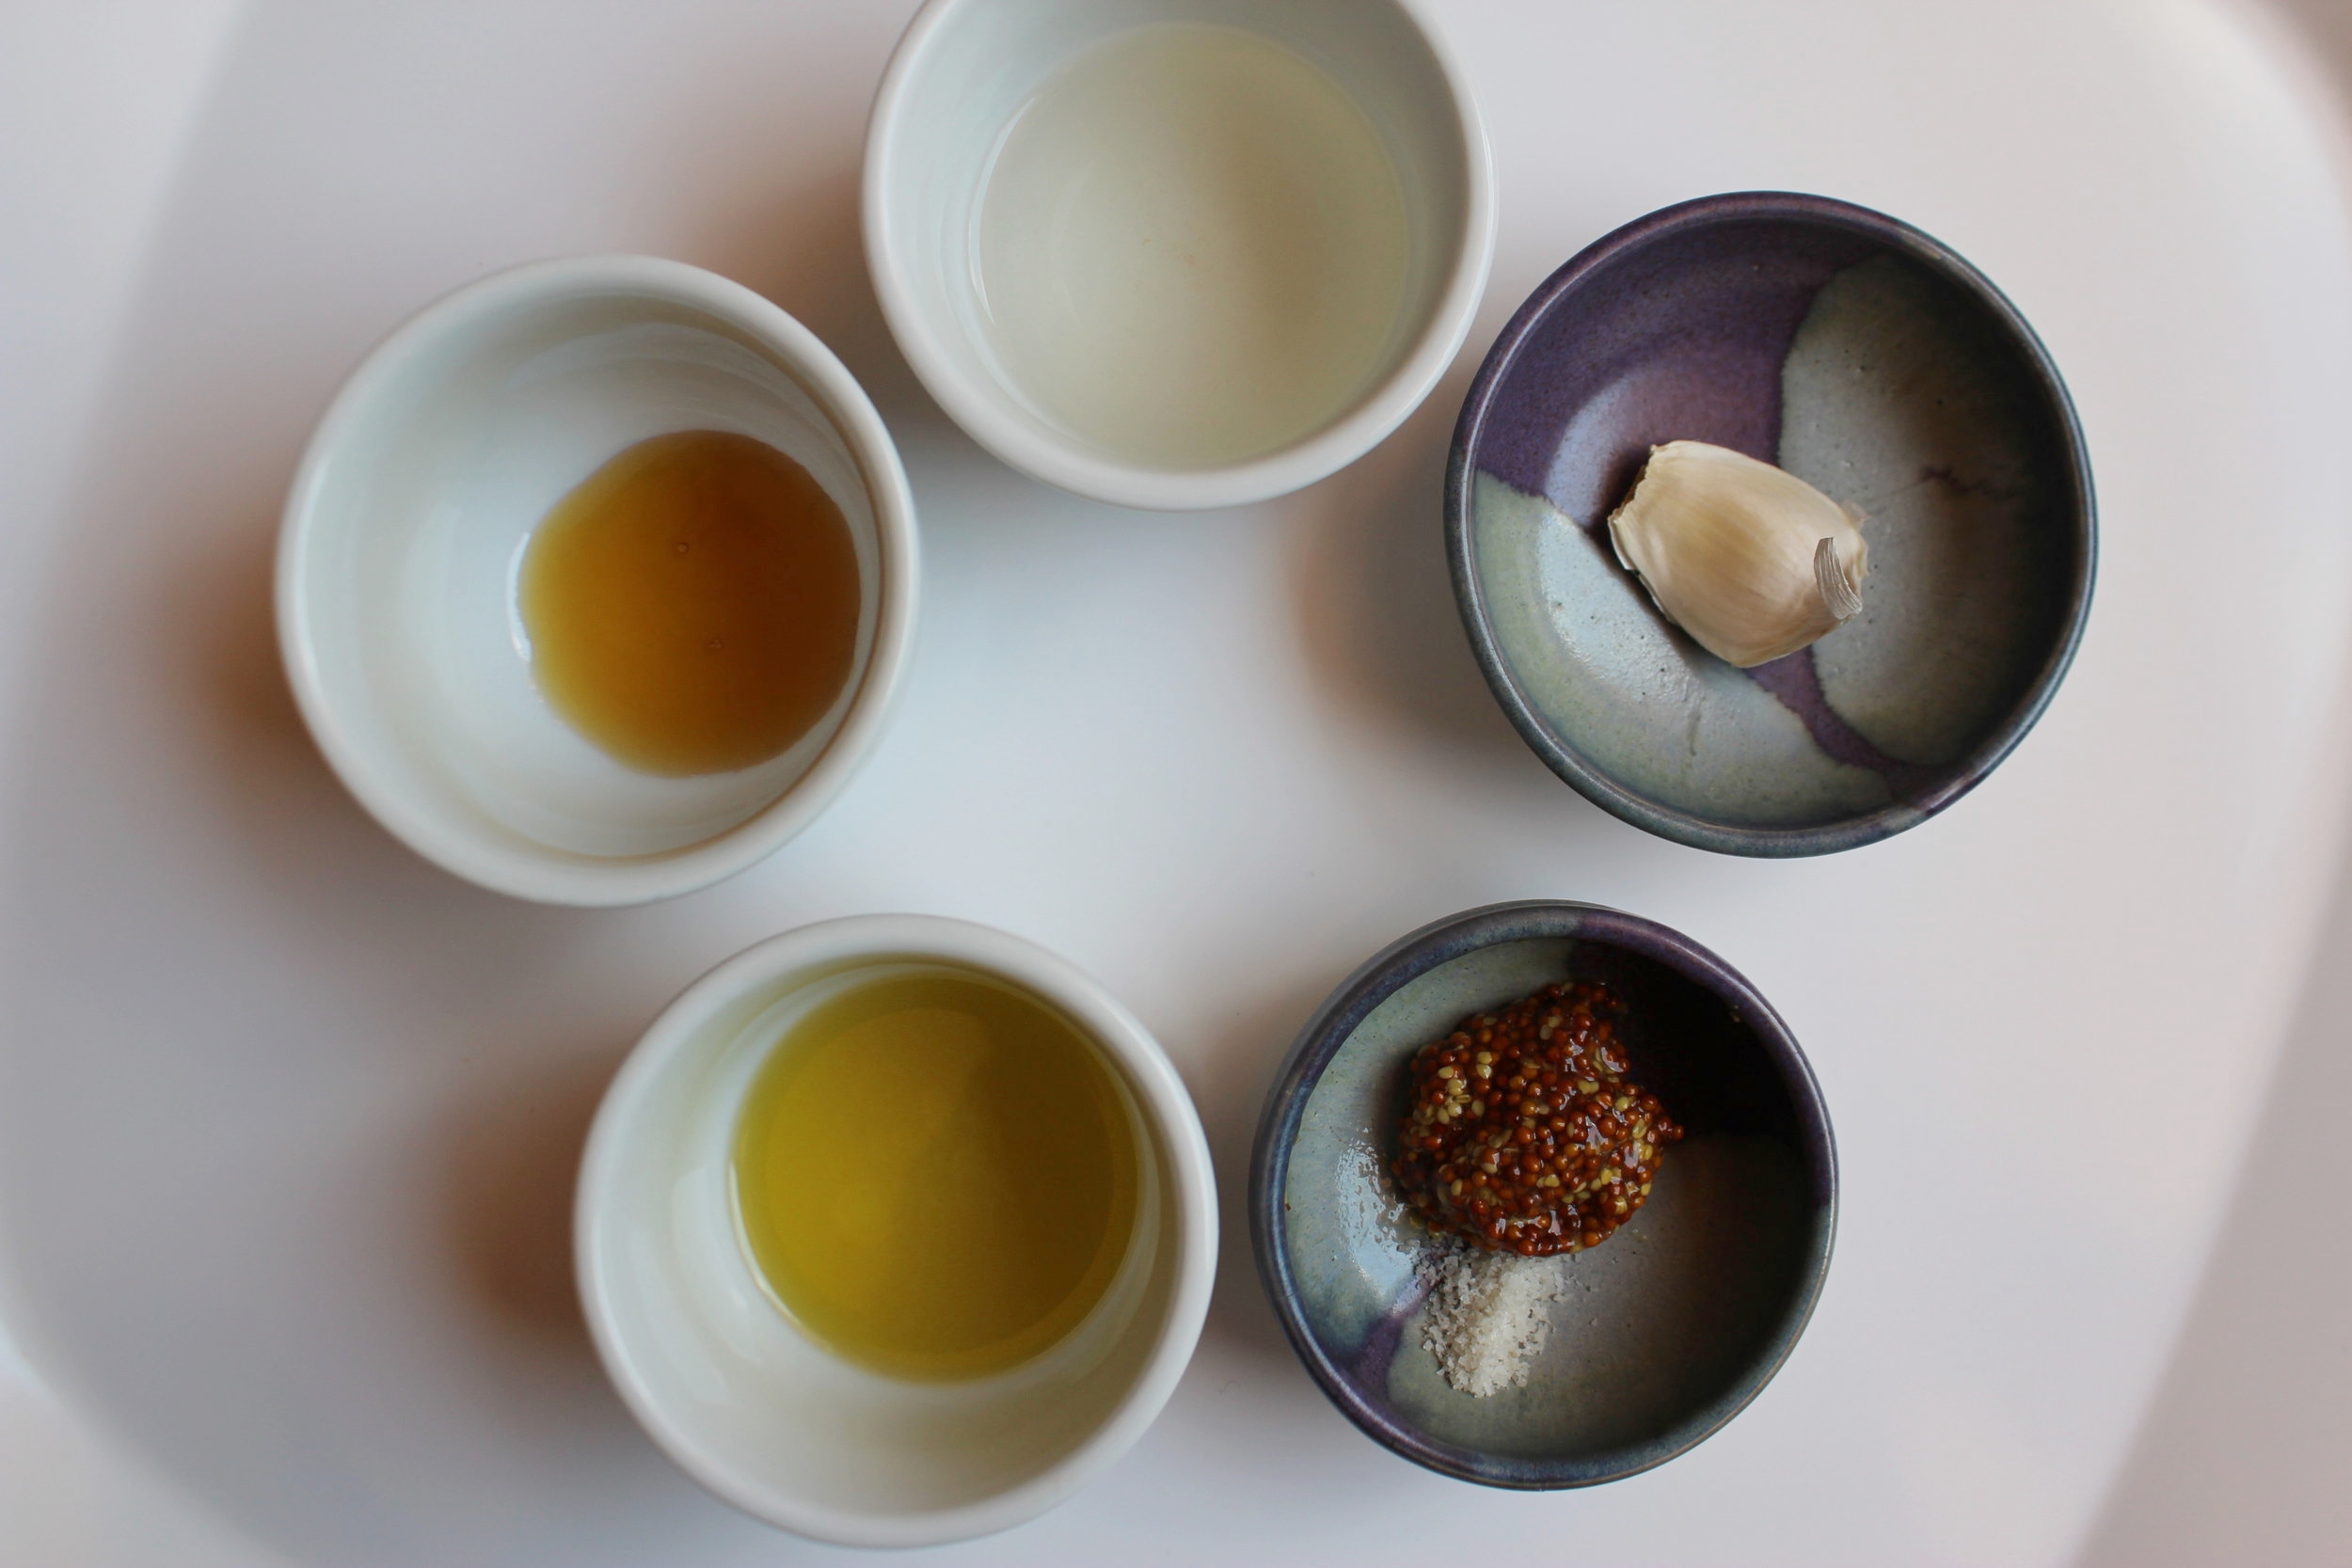
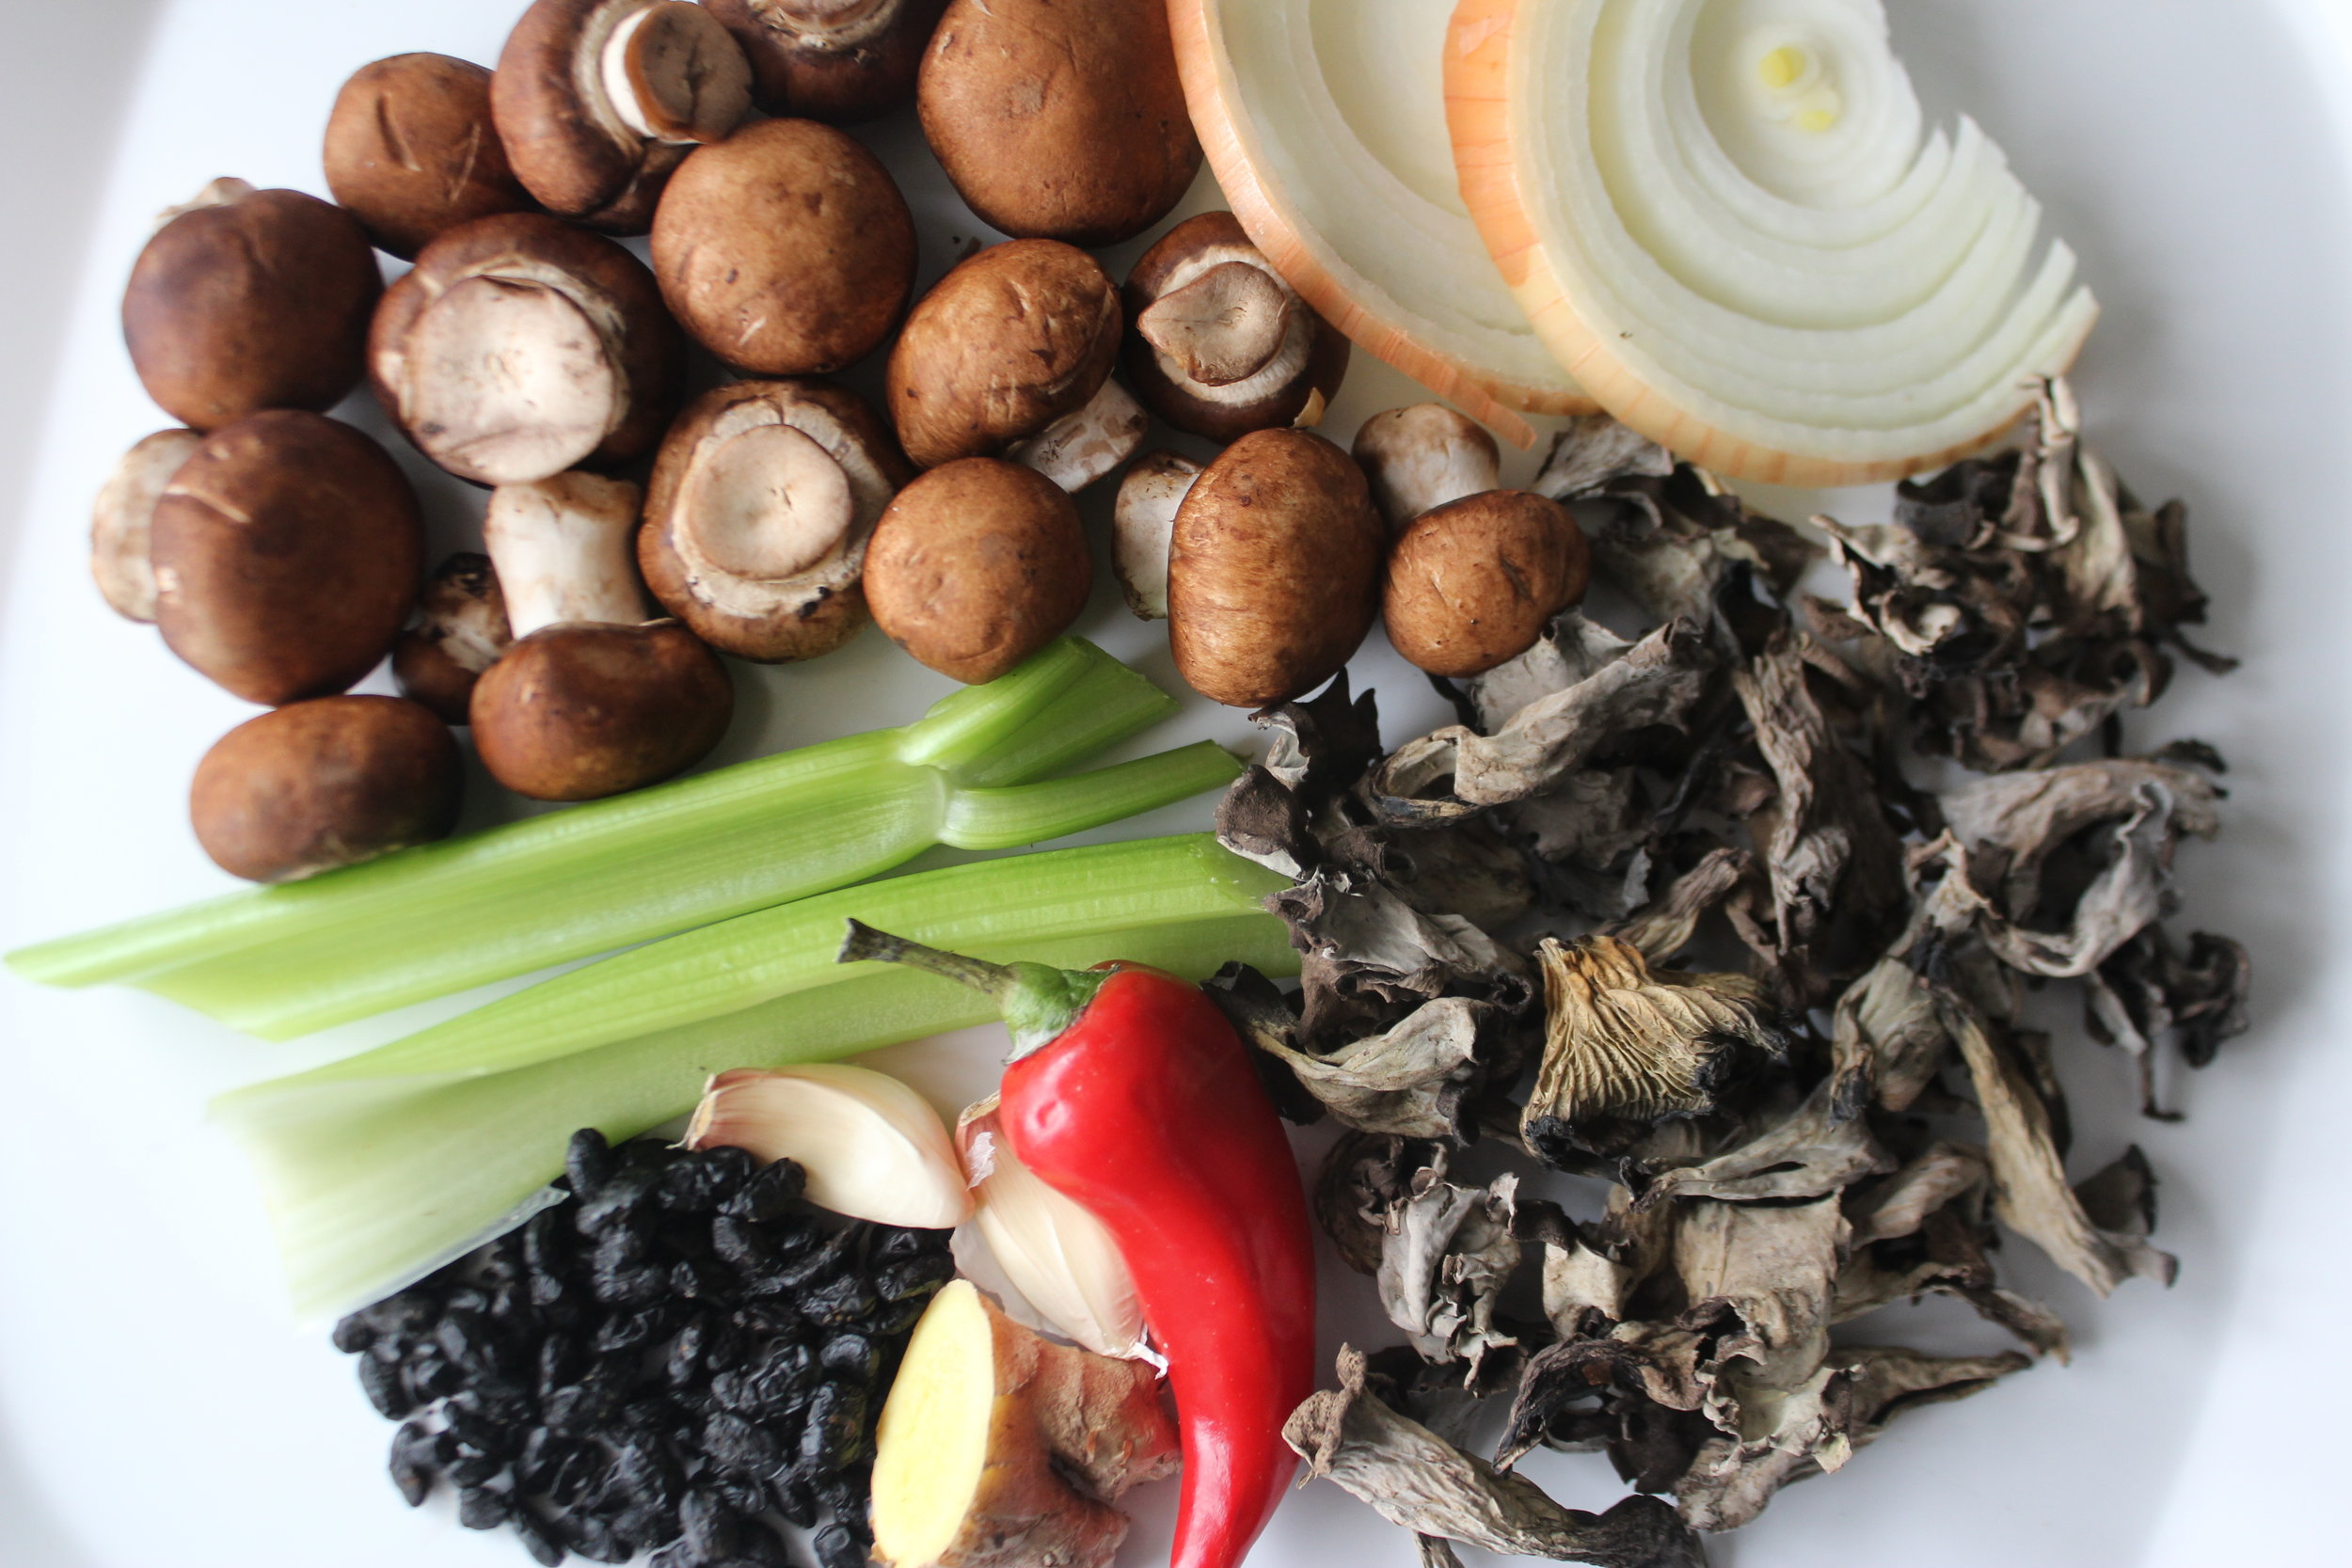
Now here is a fun ingredient. Fermented black soy beans. Salty, nutty, and a little sweet like miso, this ingredient is found in Chinese and Korean cuisine and dishes like Kung Pao Chicken (Gung Bao), seafood dishes, and one of my favorites, Ma Po Tofu among others. Easy to find at an Asian grocer, the whole beans are usually rinsed before using to slightly reduce the saltiness. You will also find fermented black bean paste, which I used in my recipe for Cold Udon with Roasted Black Bean Sauce.

IMG_5718.JPG
IMG_5730.JPG
IMG_5735.JPG
IMG_5738.JPG

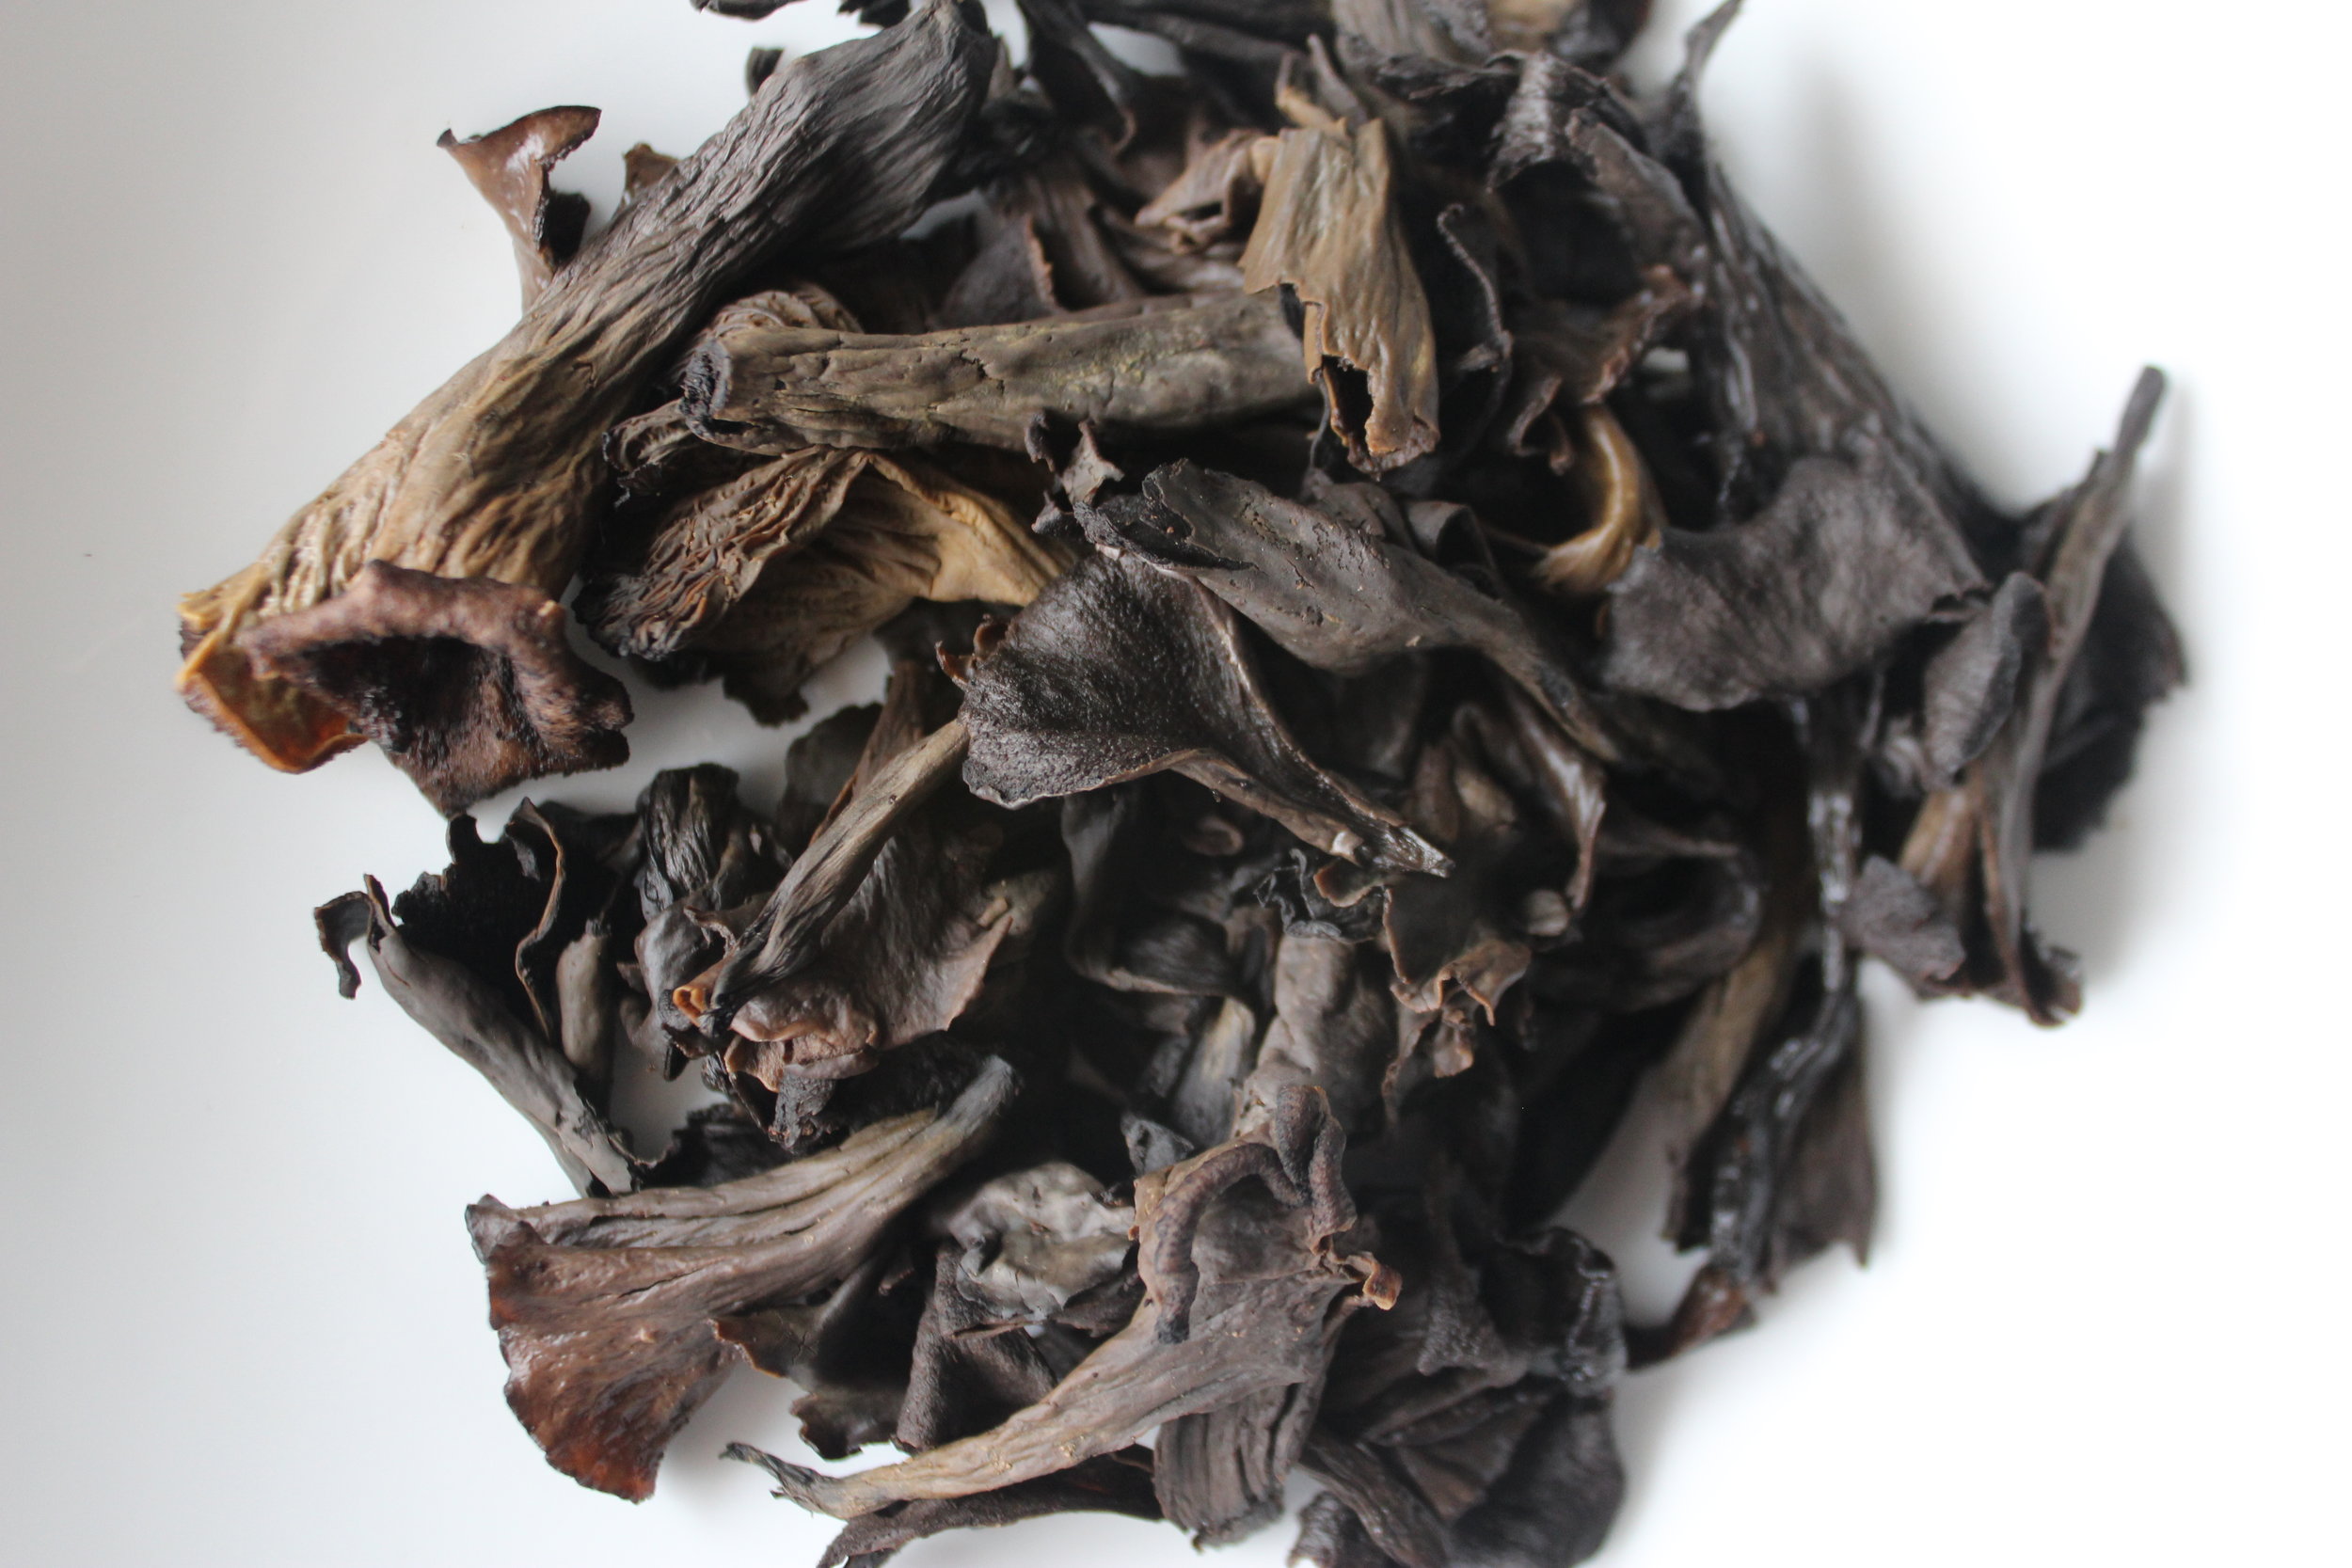
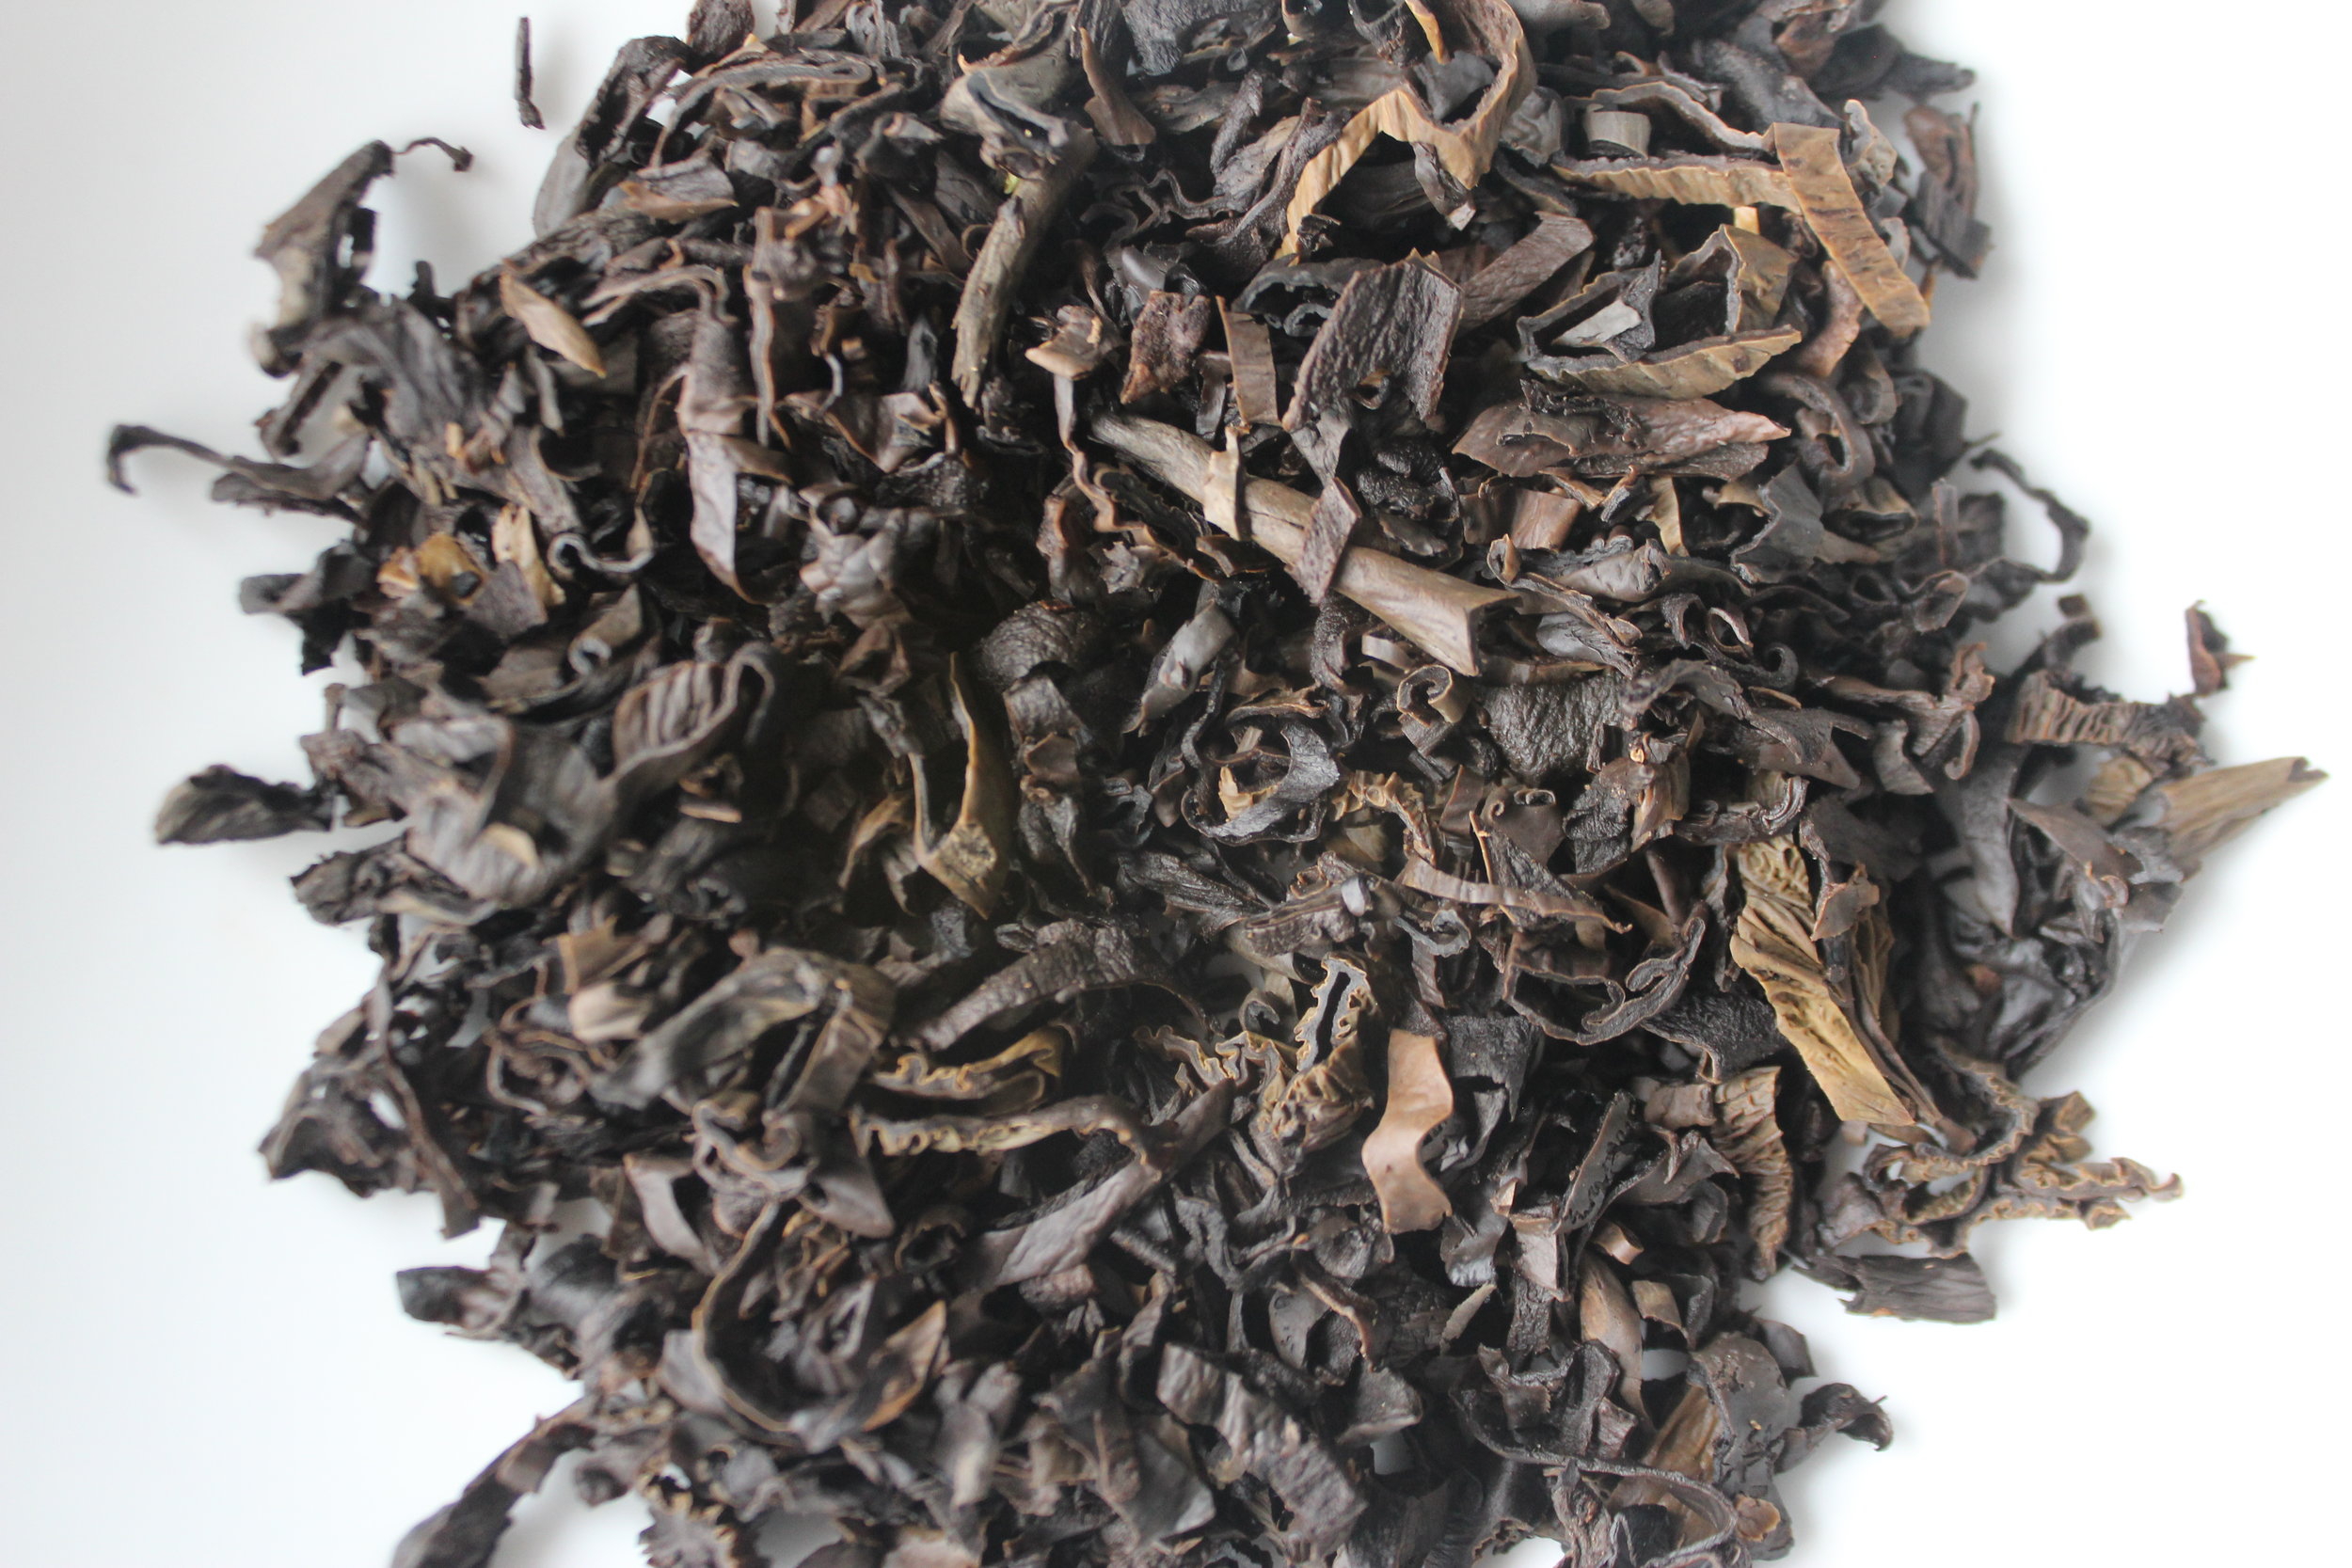
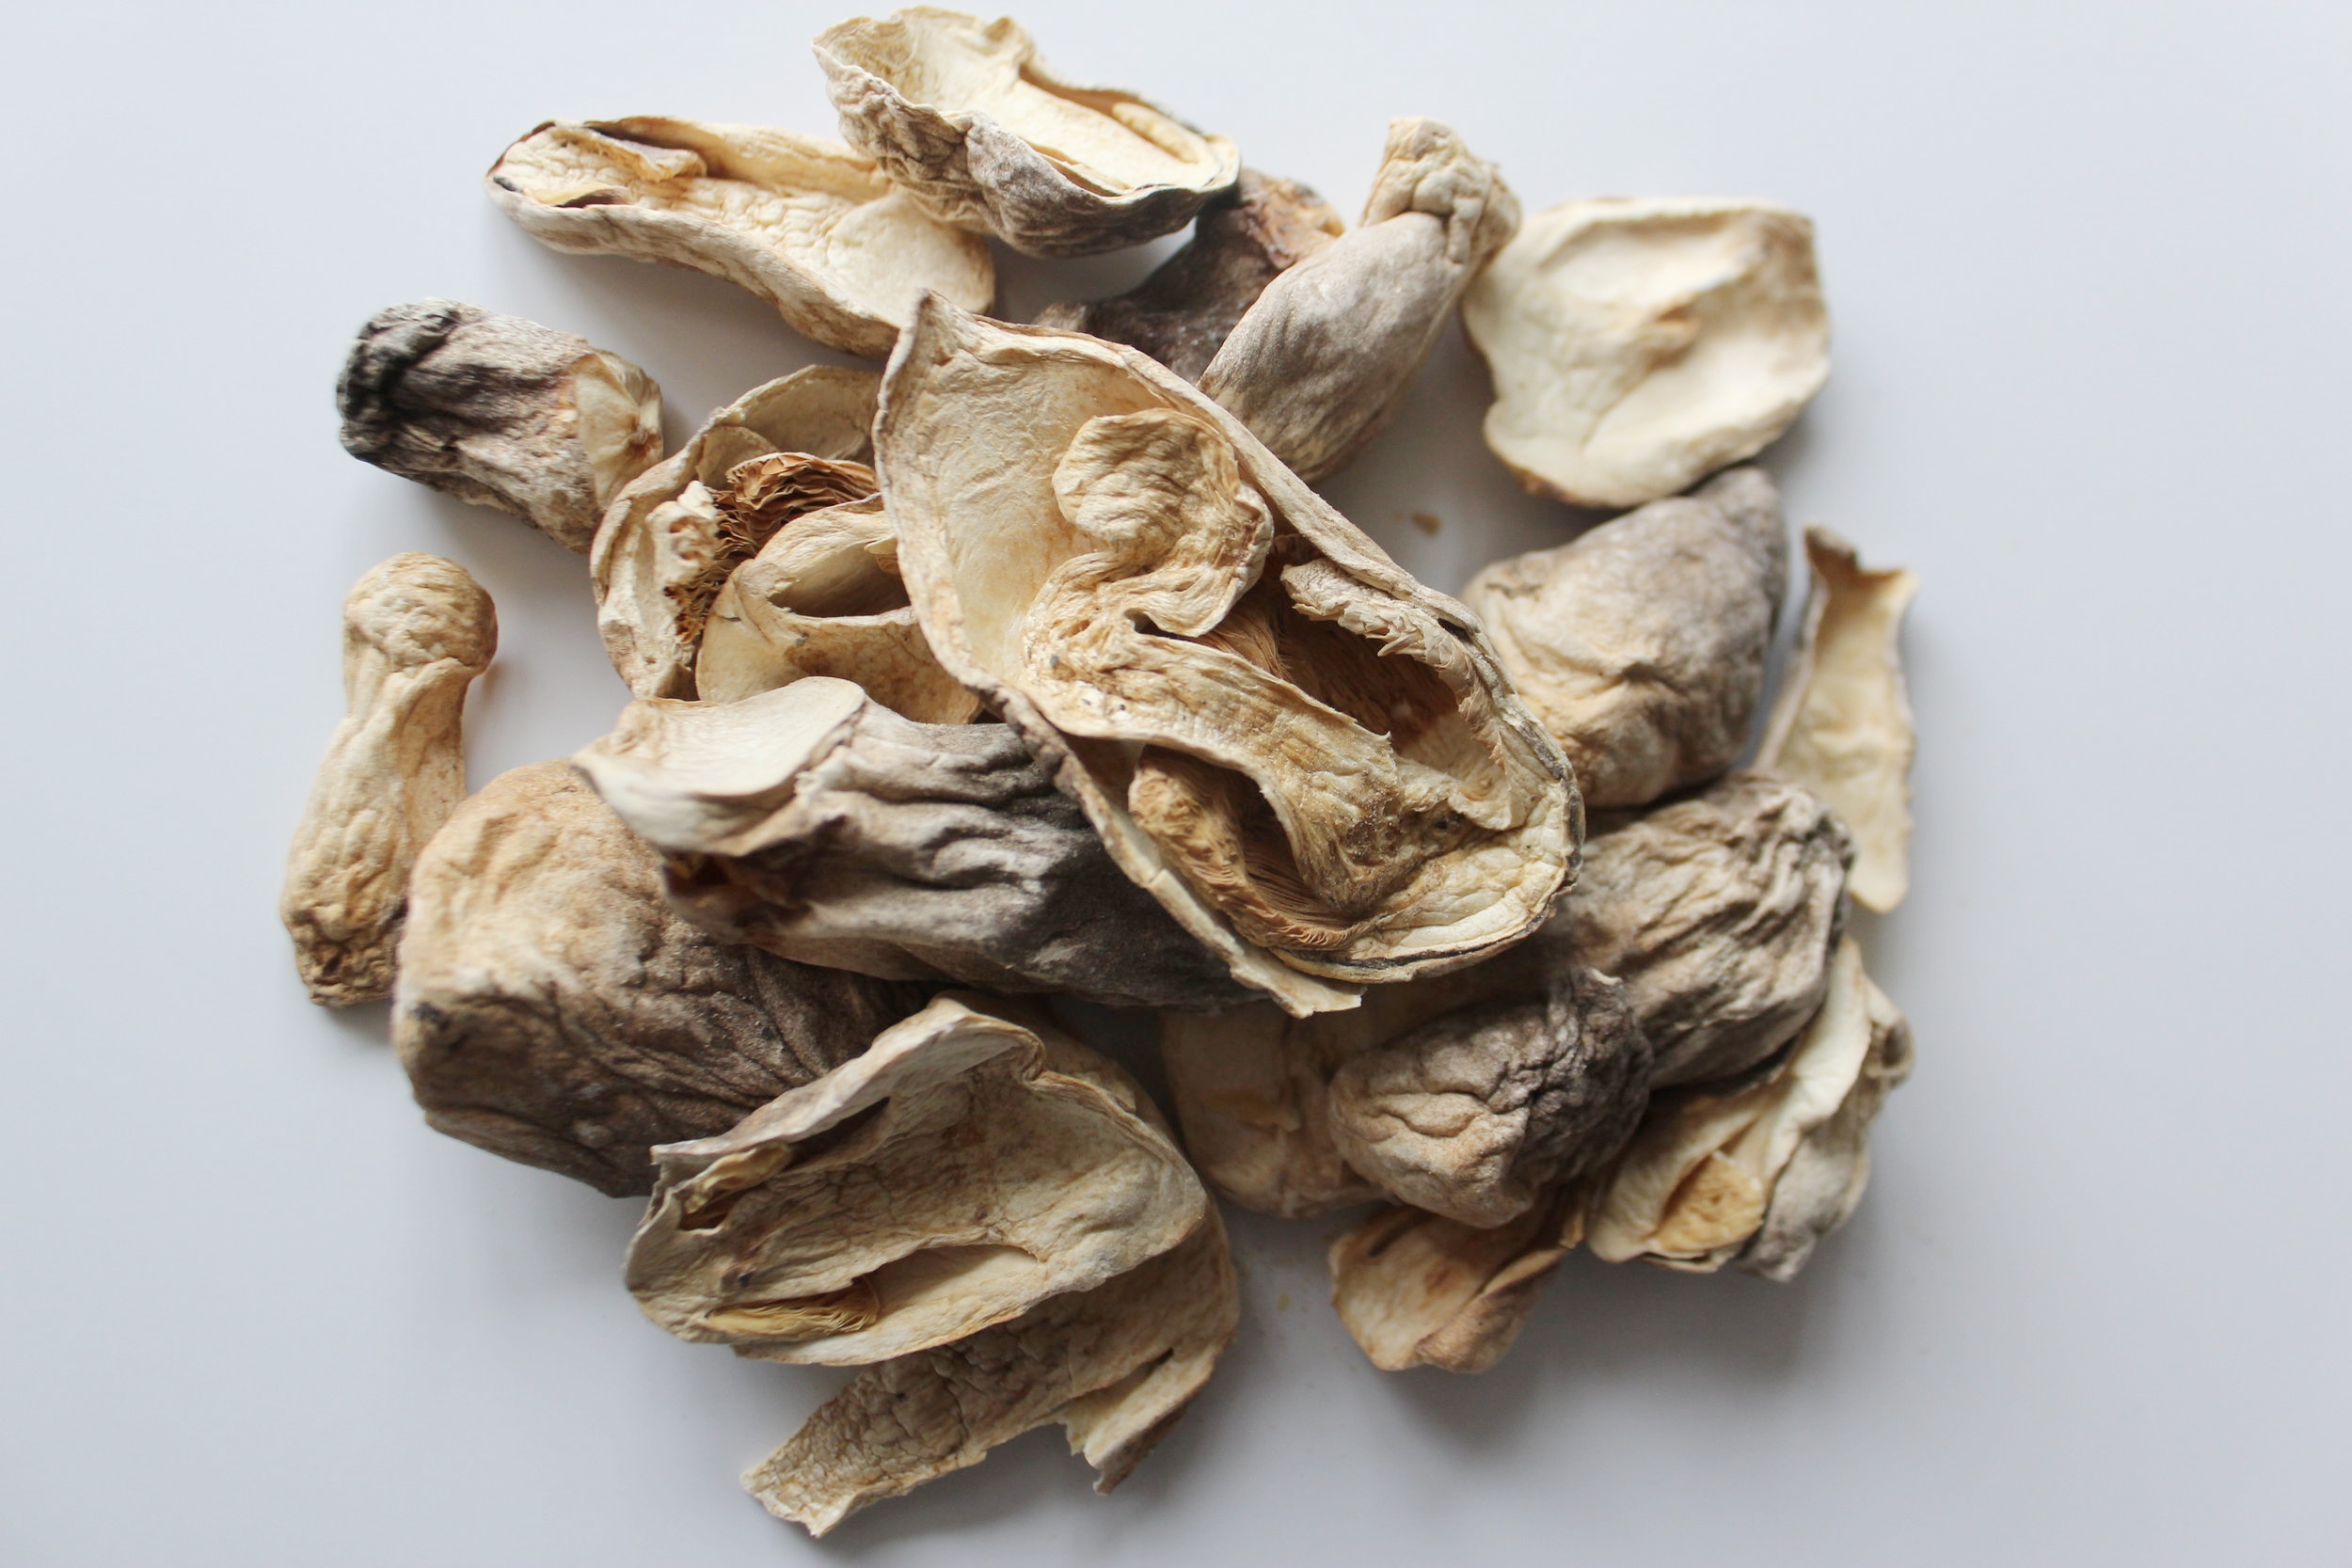
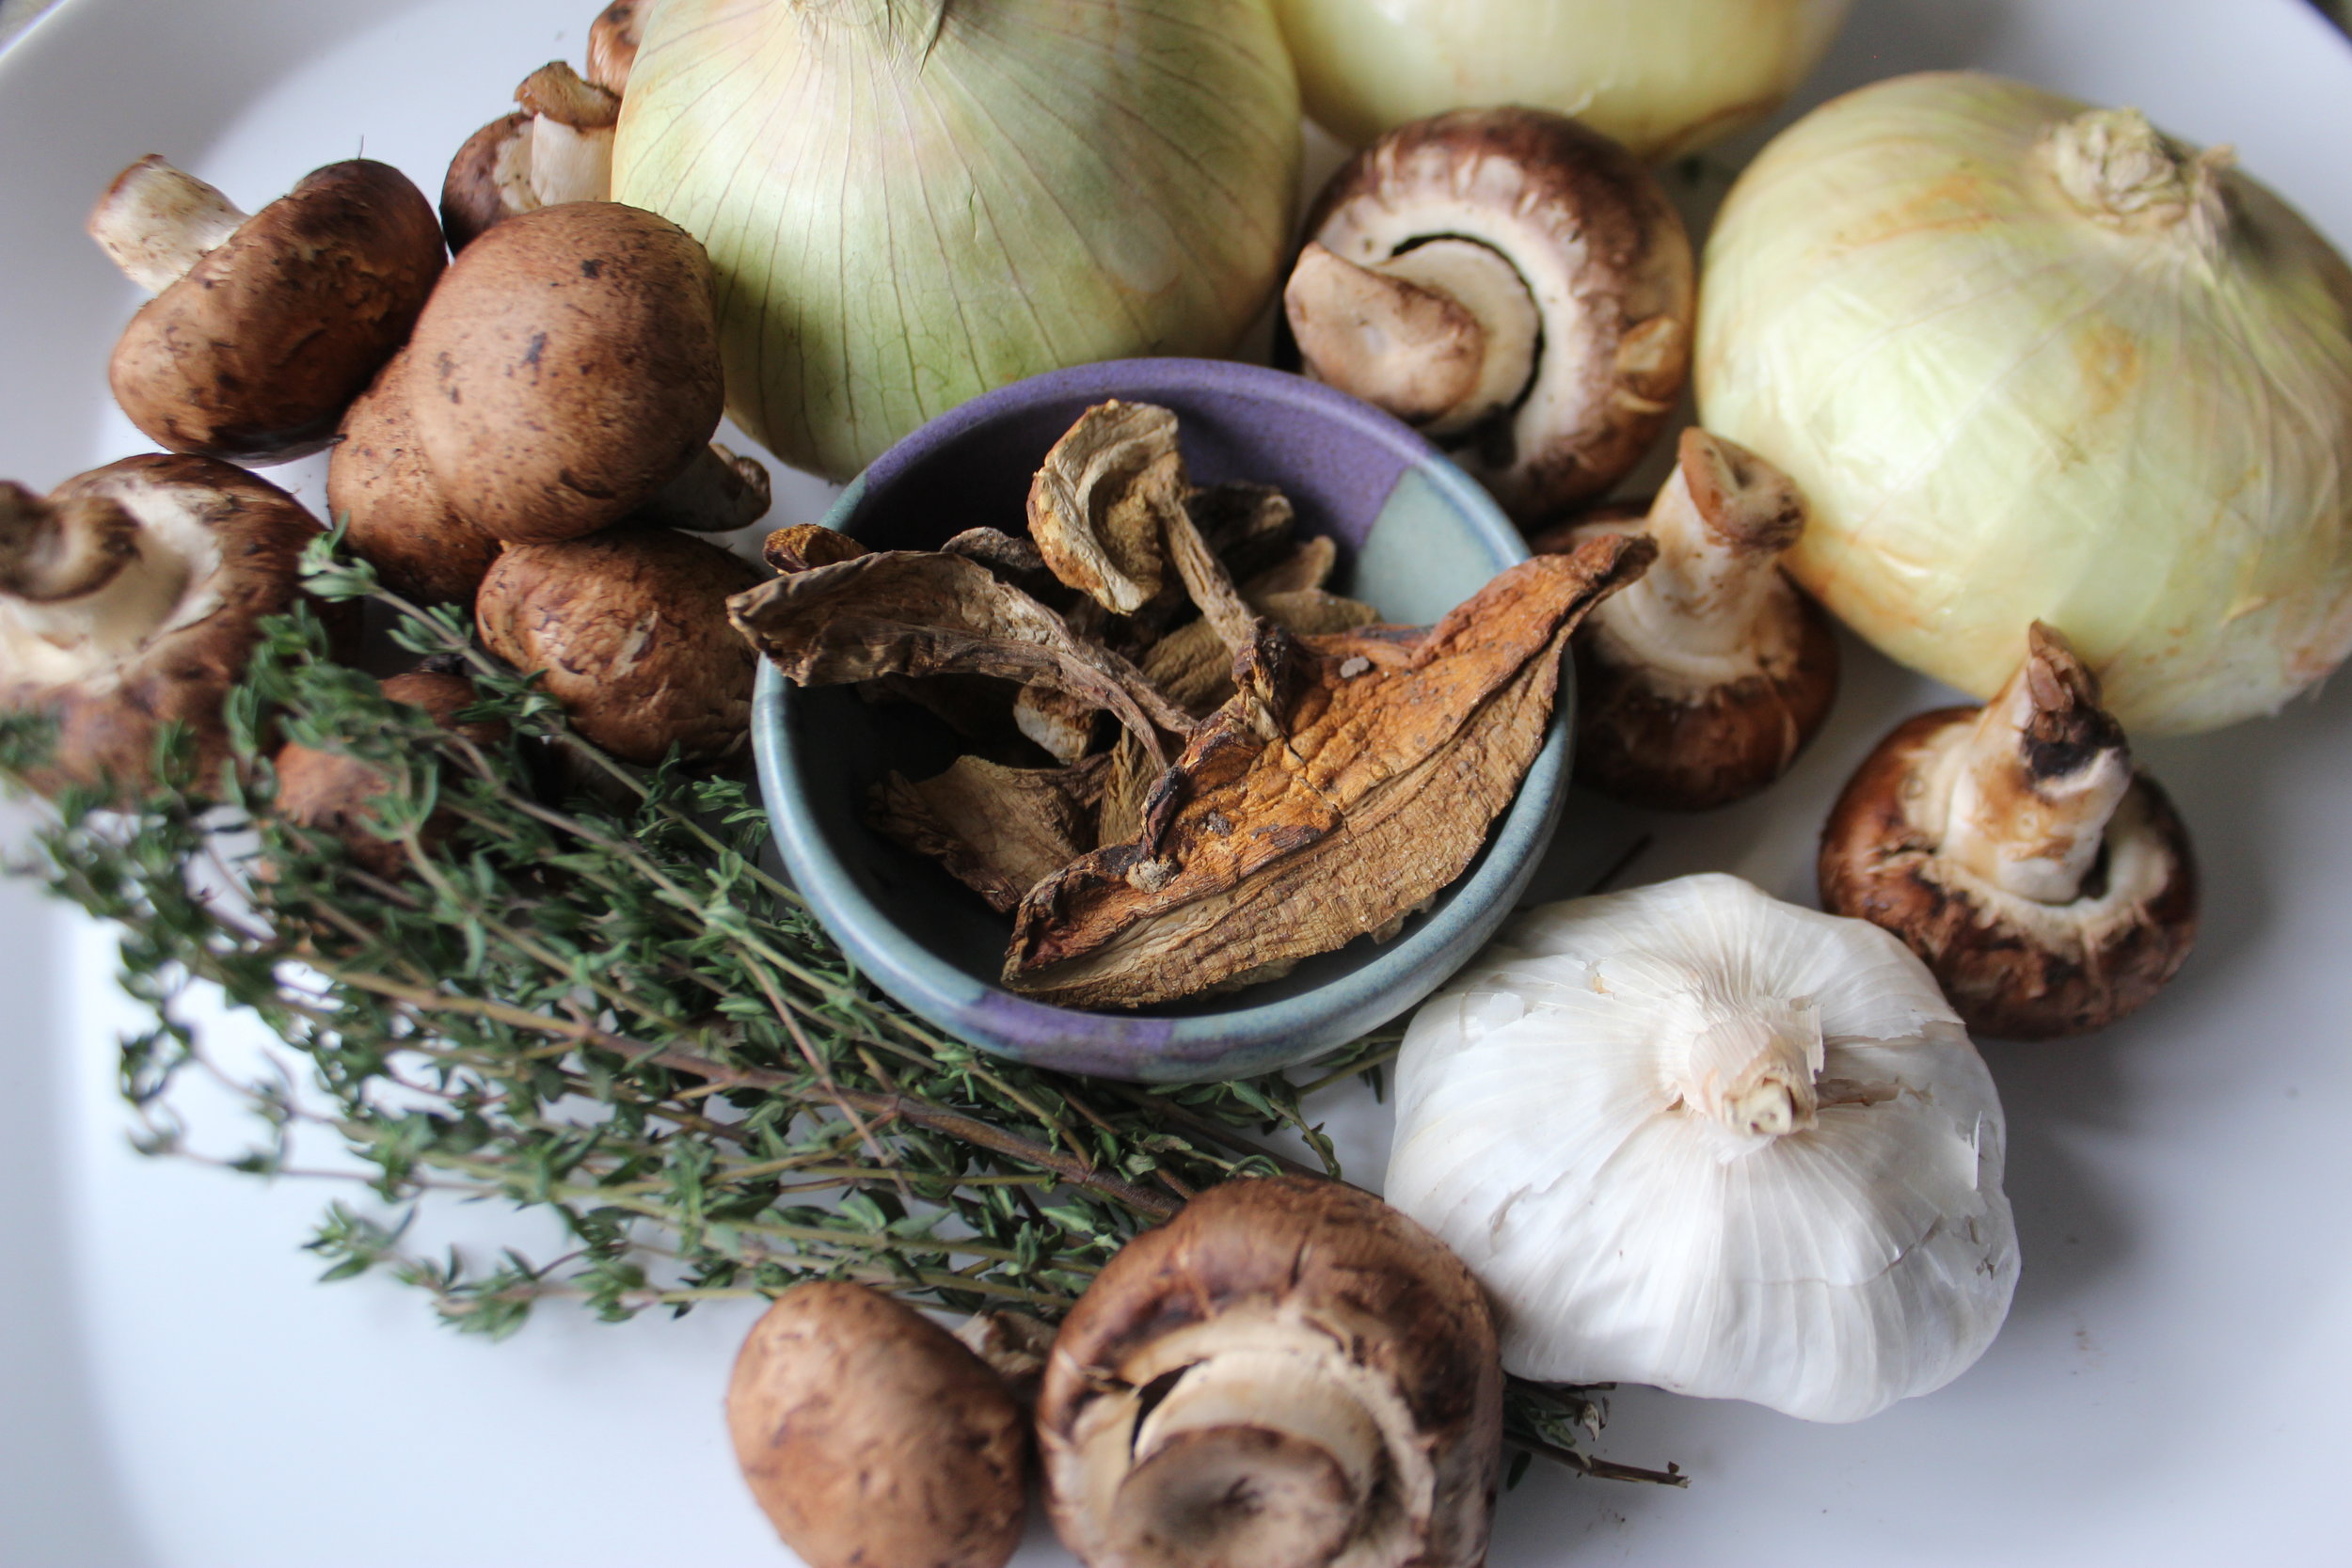
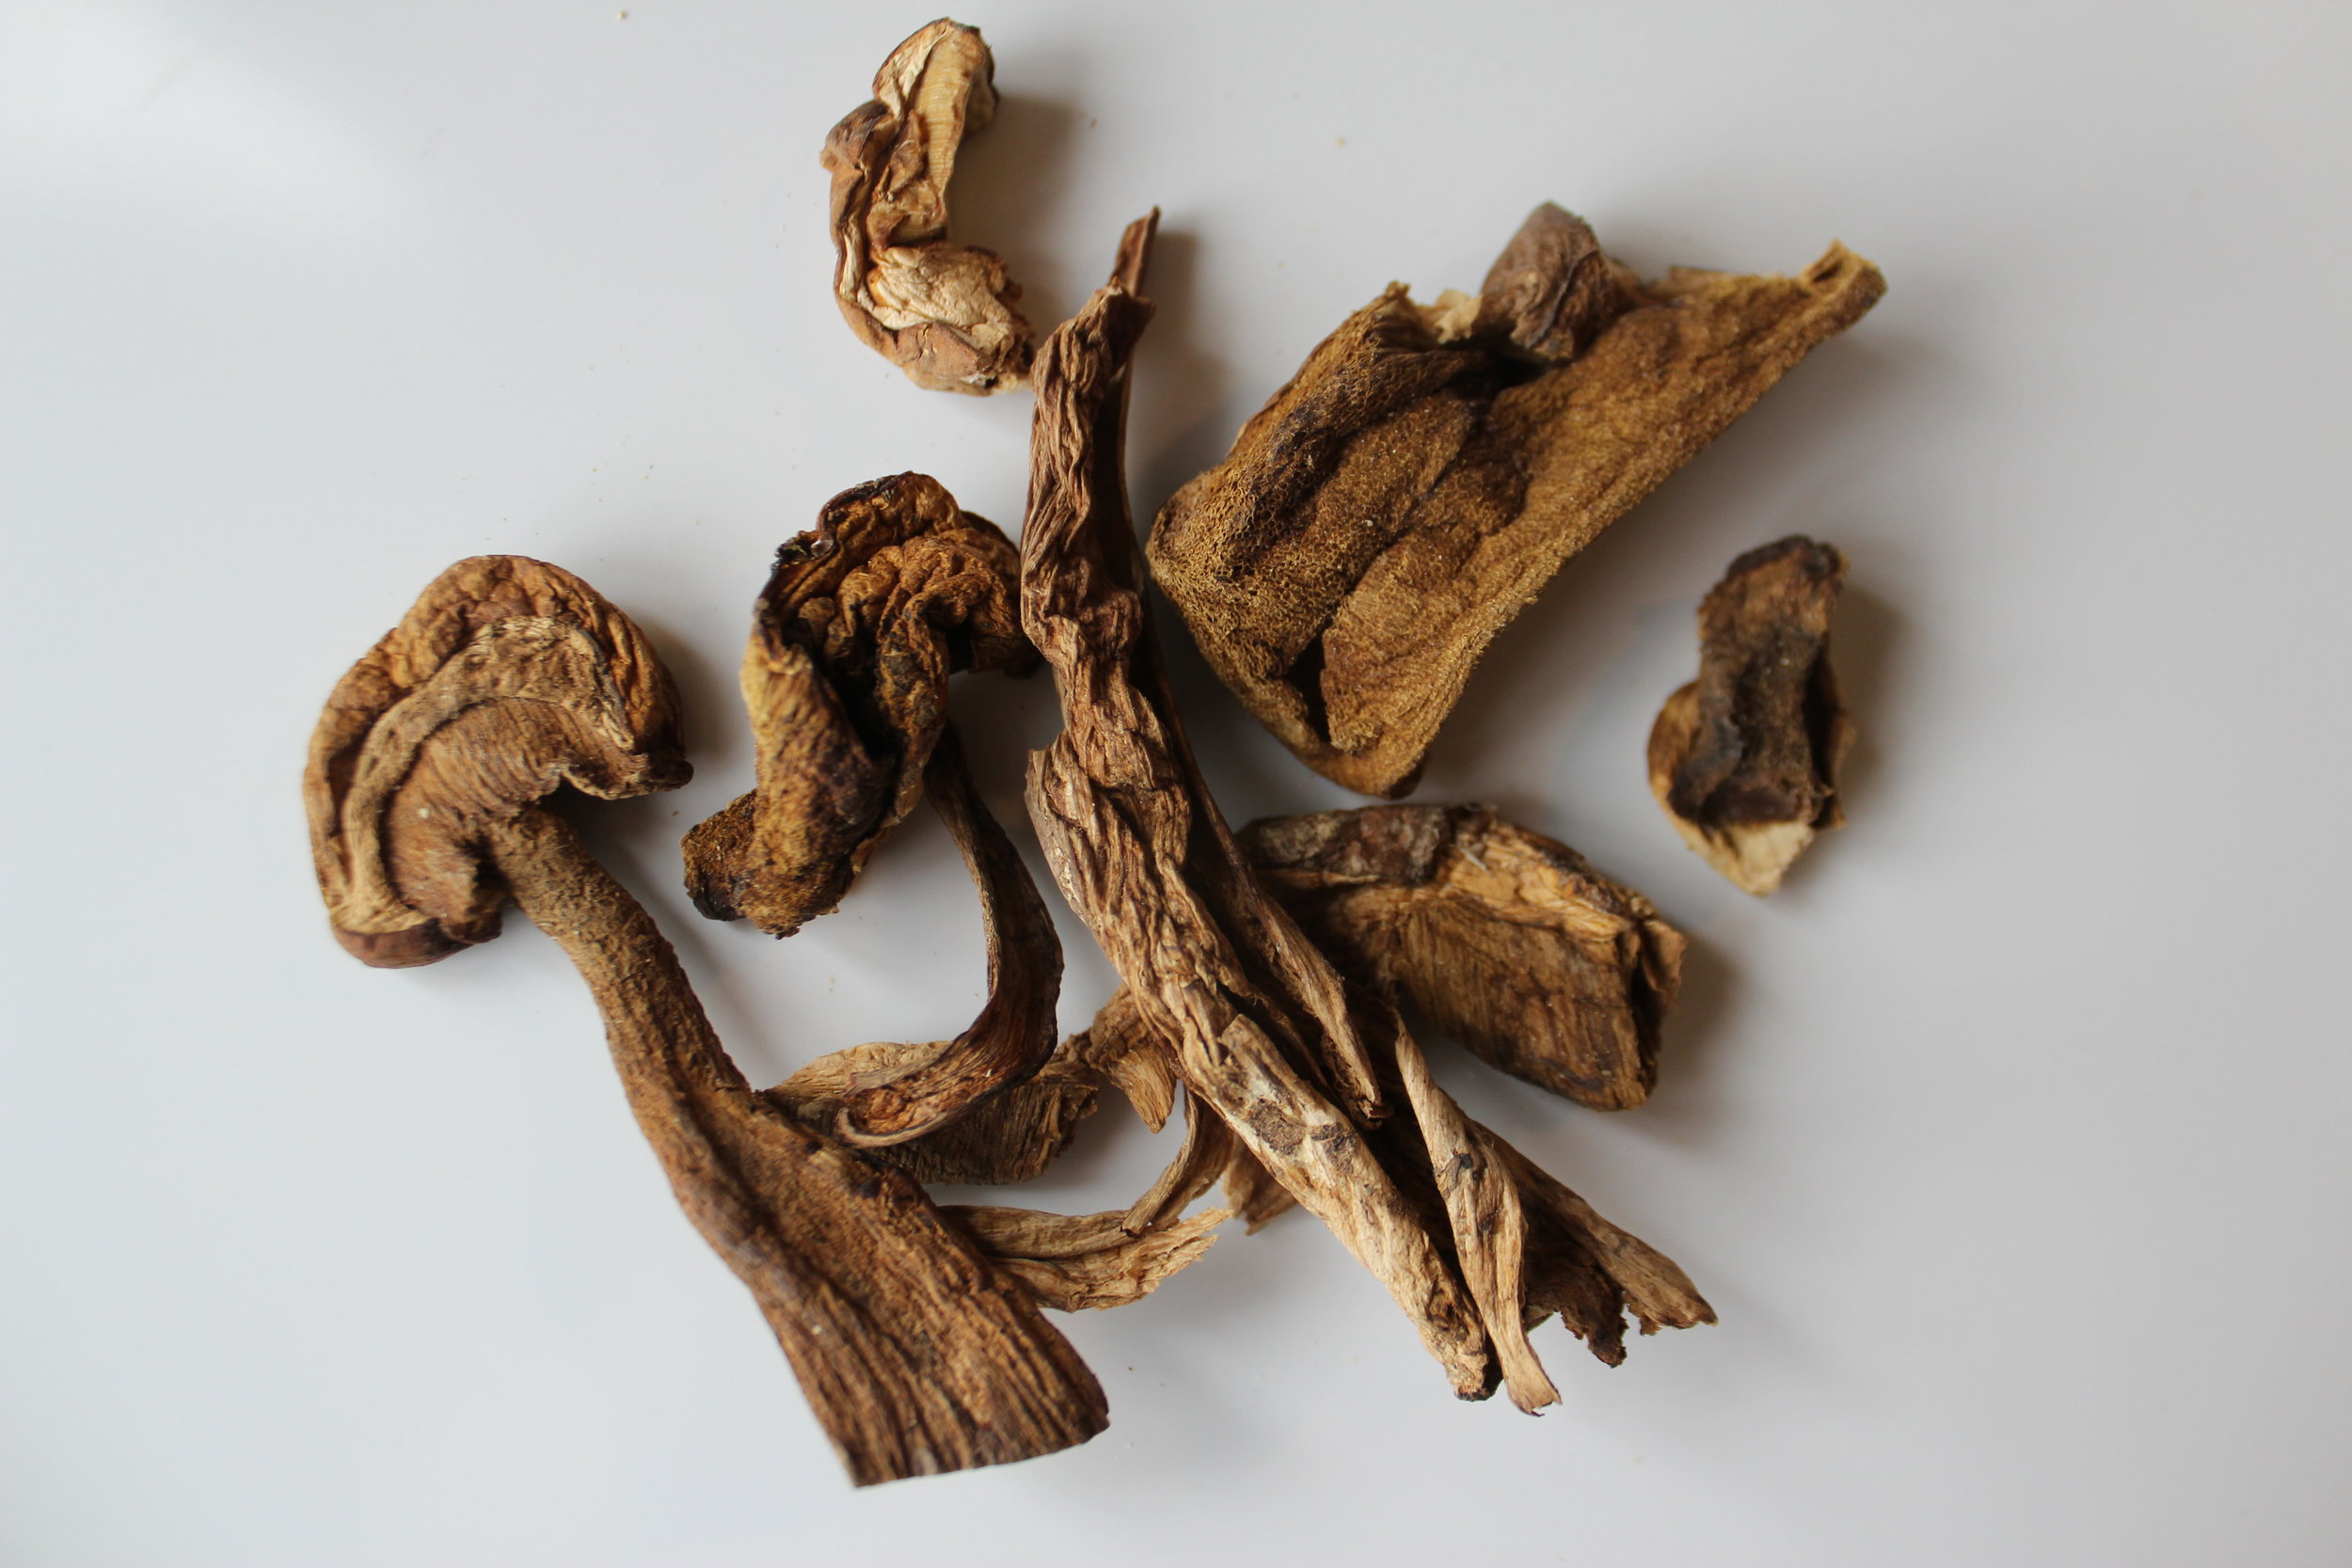
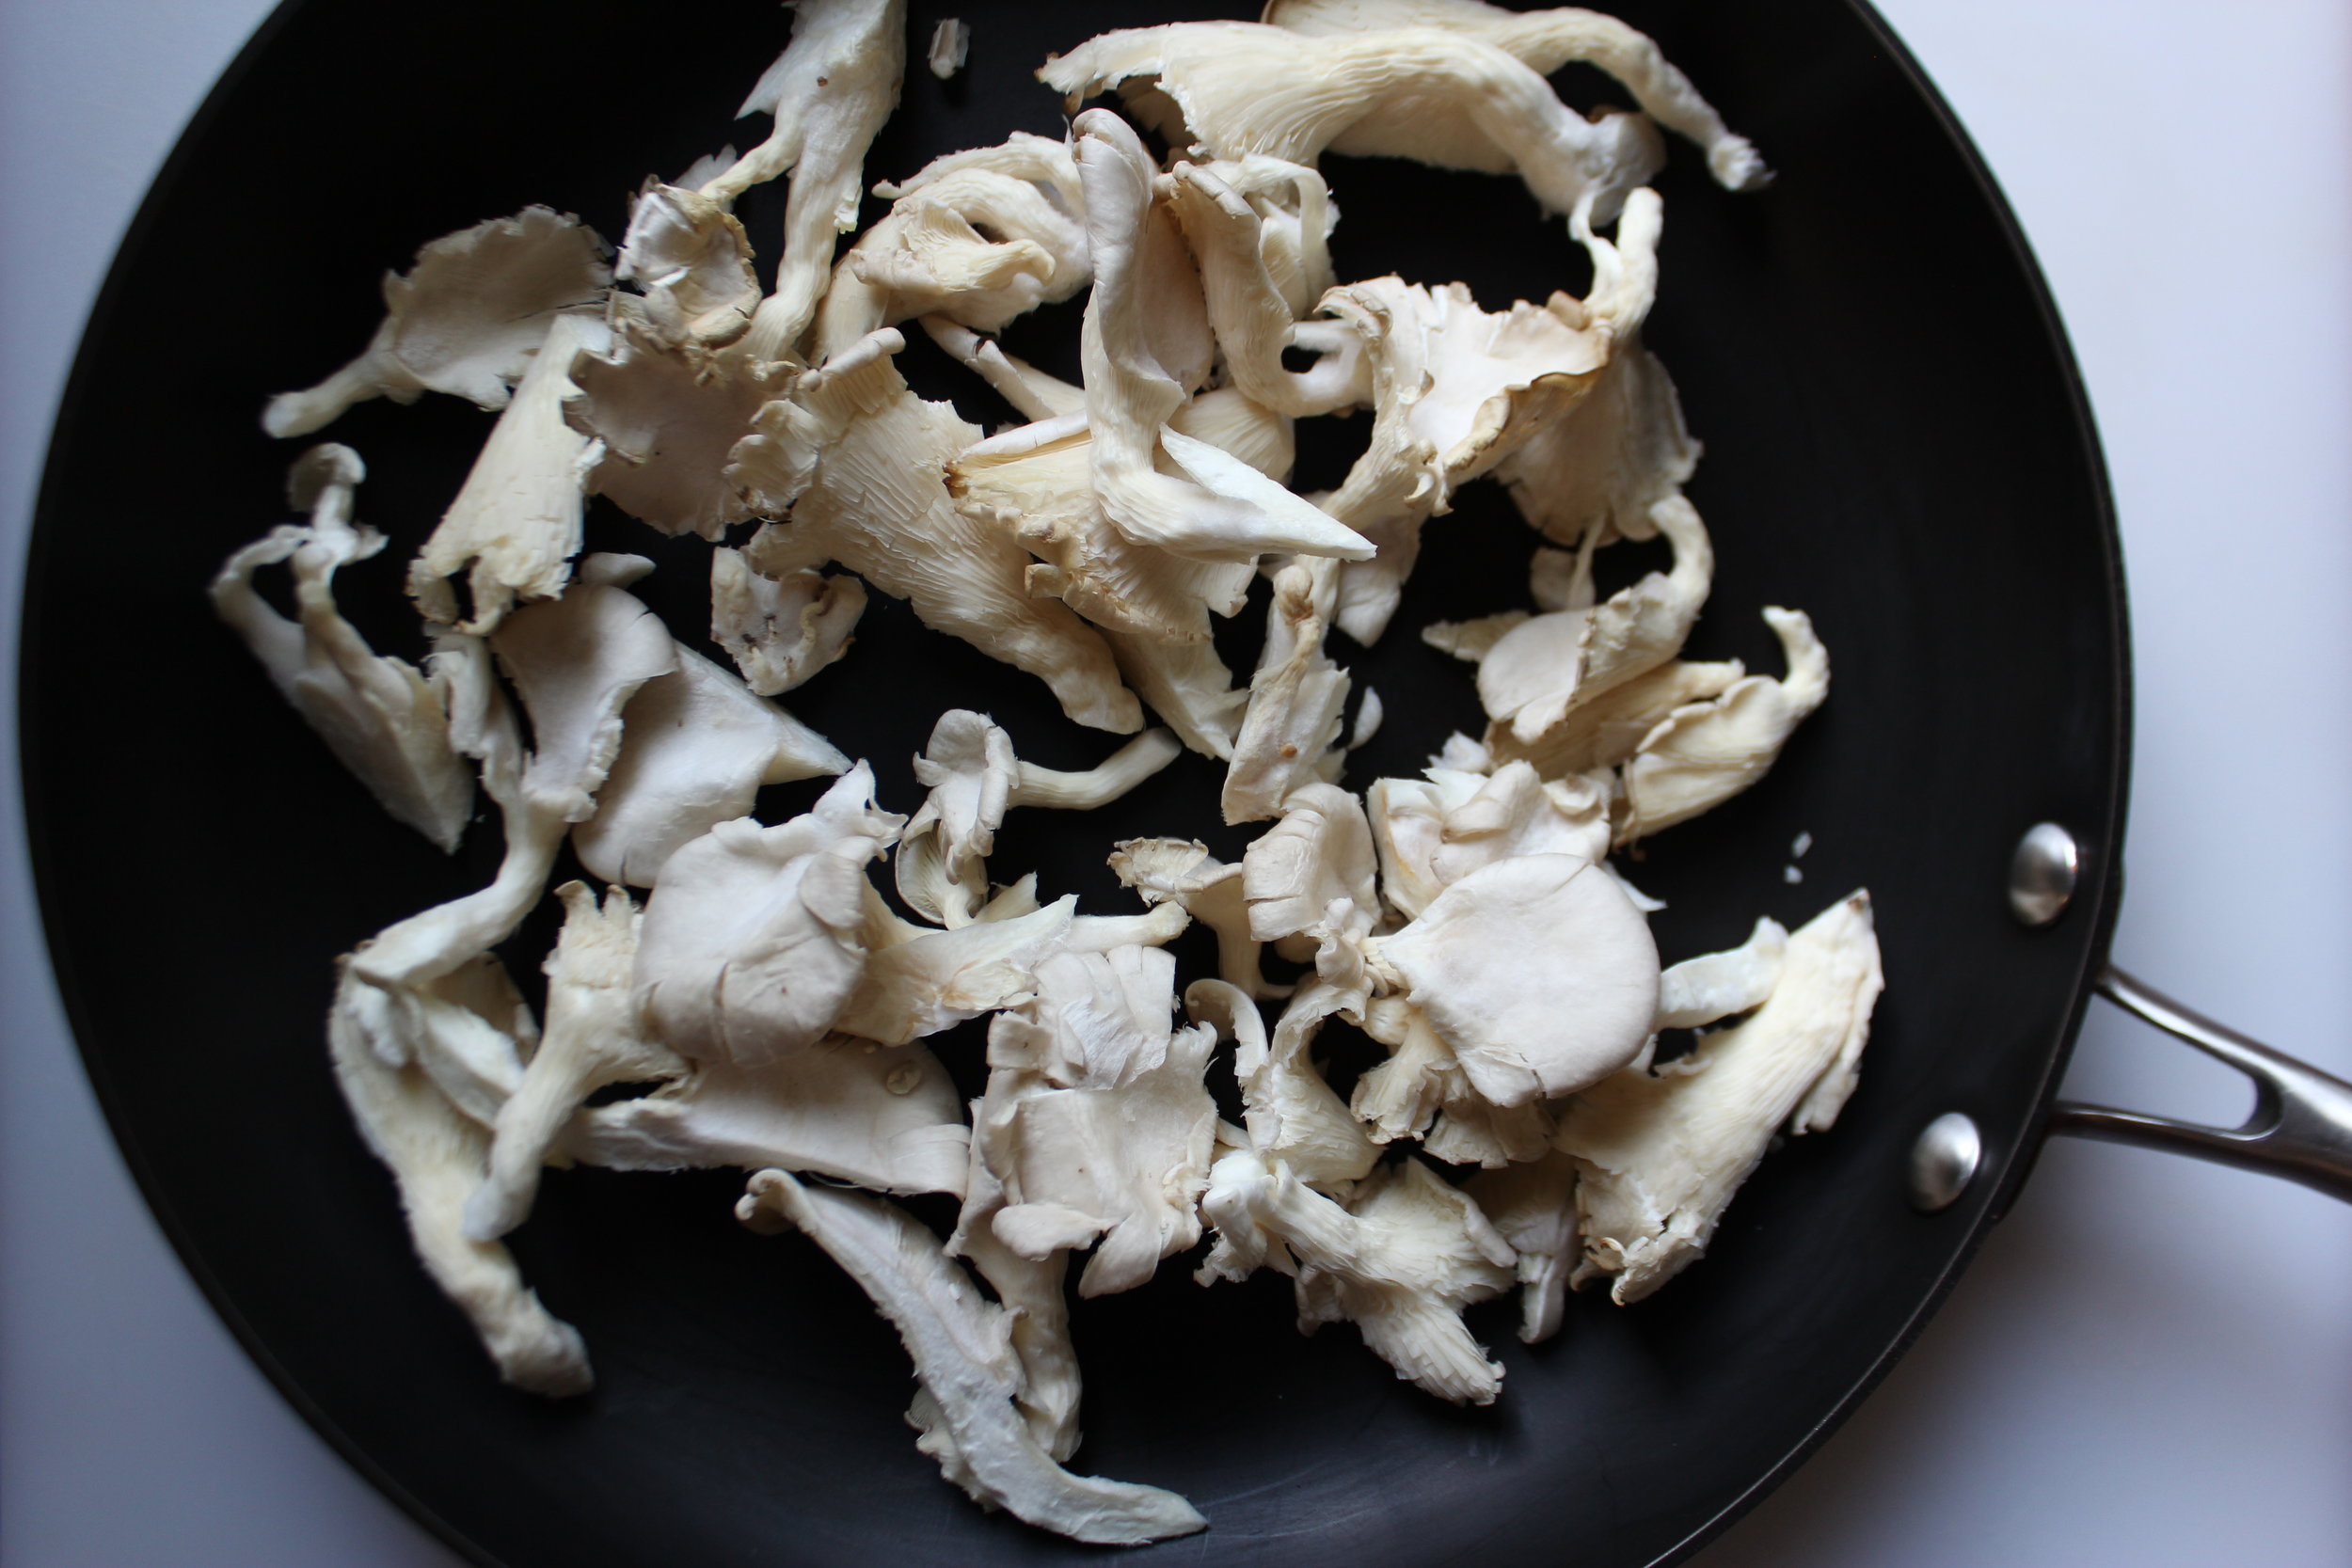
How many types of dried mushrooms do I have in my pantry right now? Black Trumpet (seen above after soaking, and then sliced), mushroom power packed Porcini, beautiful woodsy-orange Chanterelle, pale Oyster mushrooms, and Woodear mushrooms, strange little black and grey undulations that take on an interesting texture when re-hydrated. I have yet to try the Woodear, which are not strong in flavor but prized for their texture and ability to absorb flavors. Most dried mushrooms, save the highly prized morels, are actually relatively inexpensive, and I usually use 1/4 to 1/2 oz. at a time.

Interestingly, the Black Trumpets in this recipe remind me of one of my favorite sea veggies, Arame. Arame, a type of kelp, is black and shredded like the mushrooms when prepped. Arame has a mild, sweeter taste than many other sea veggies. It is also visually striking, so I like the similar effect of the Black Trumpets in the rice.

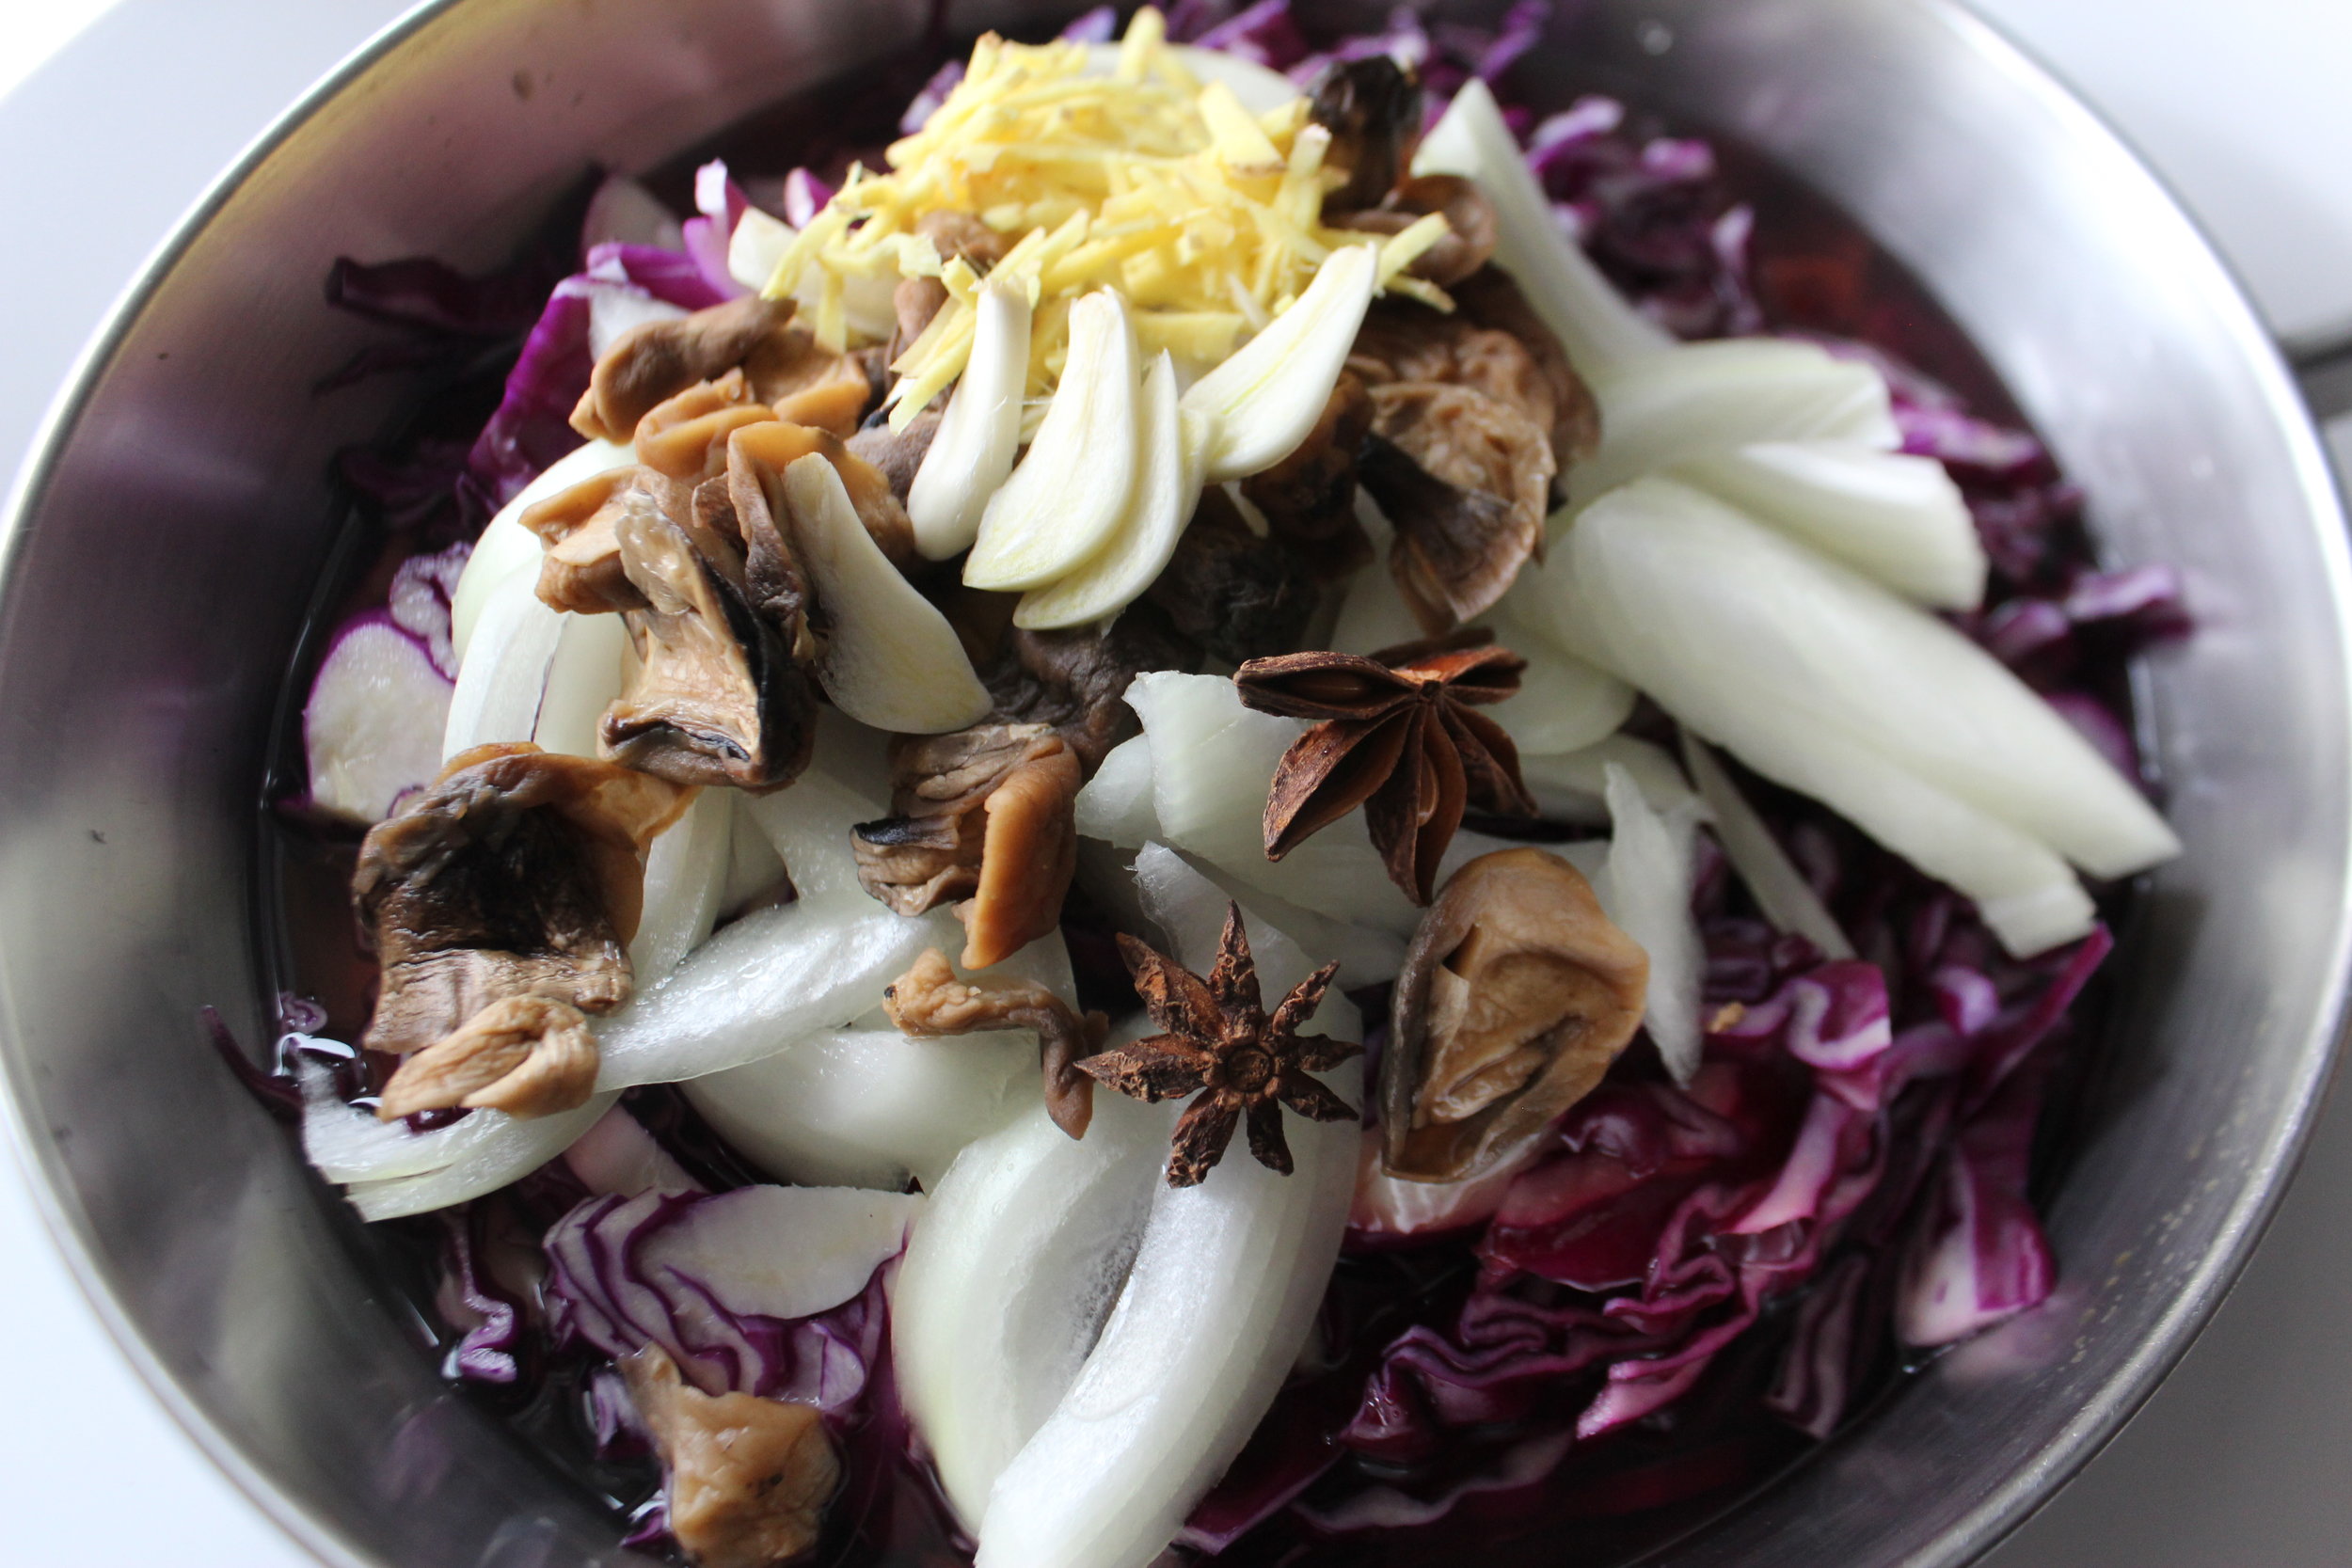
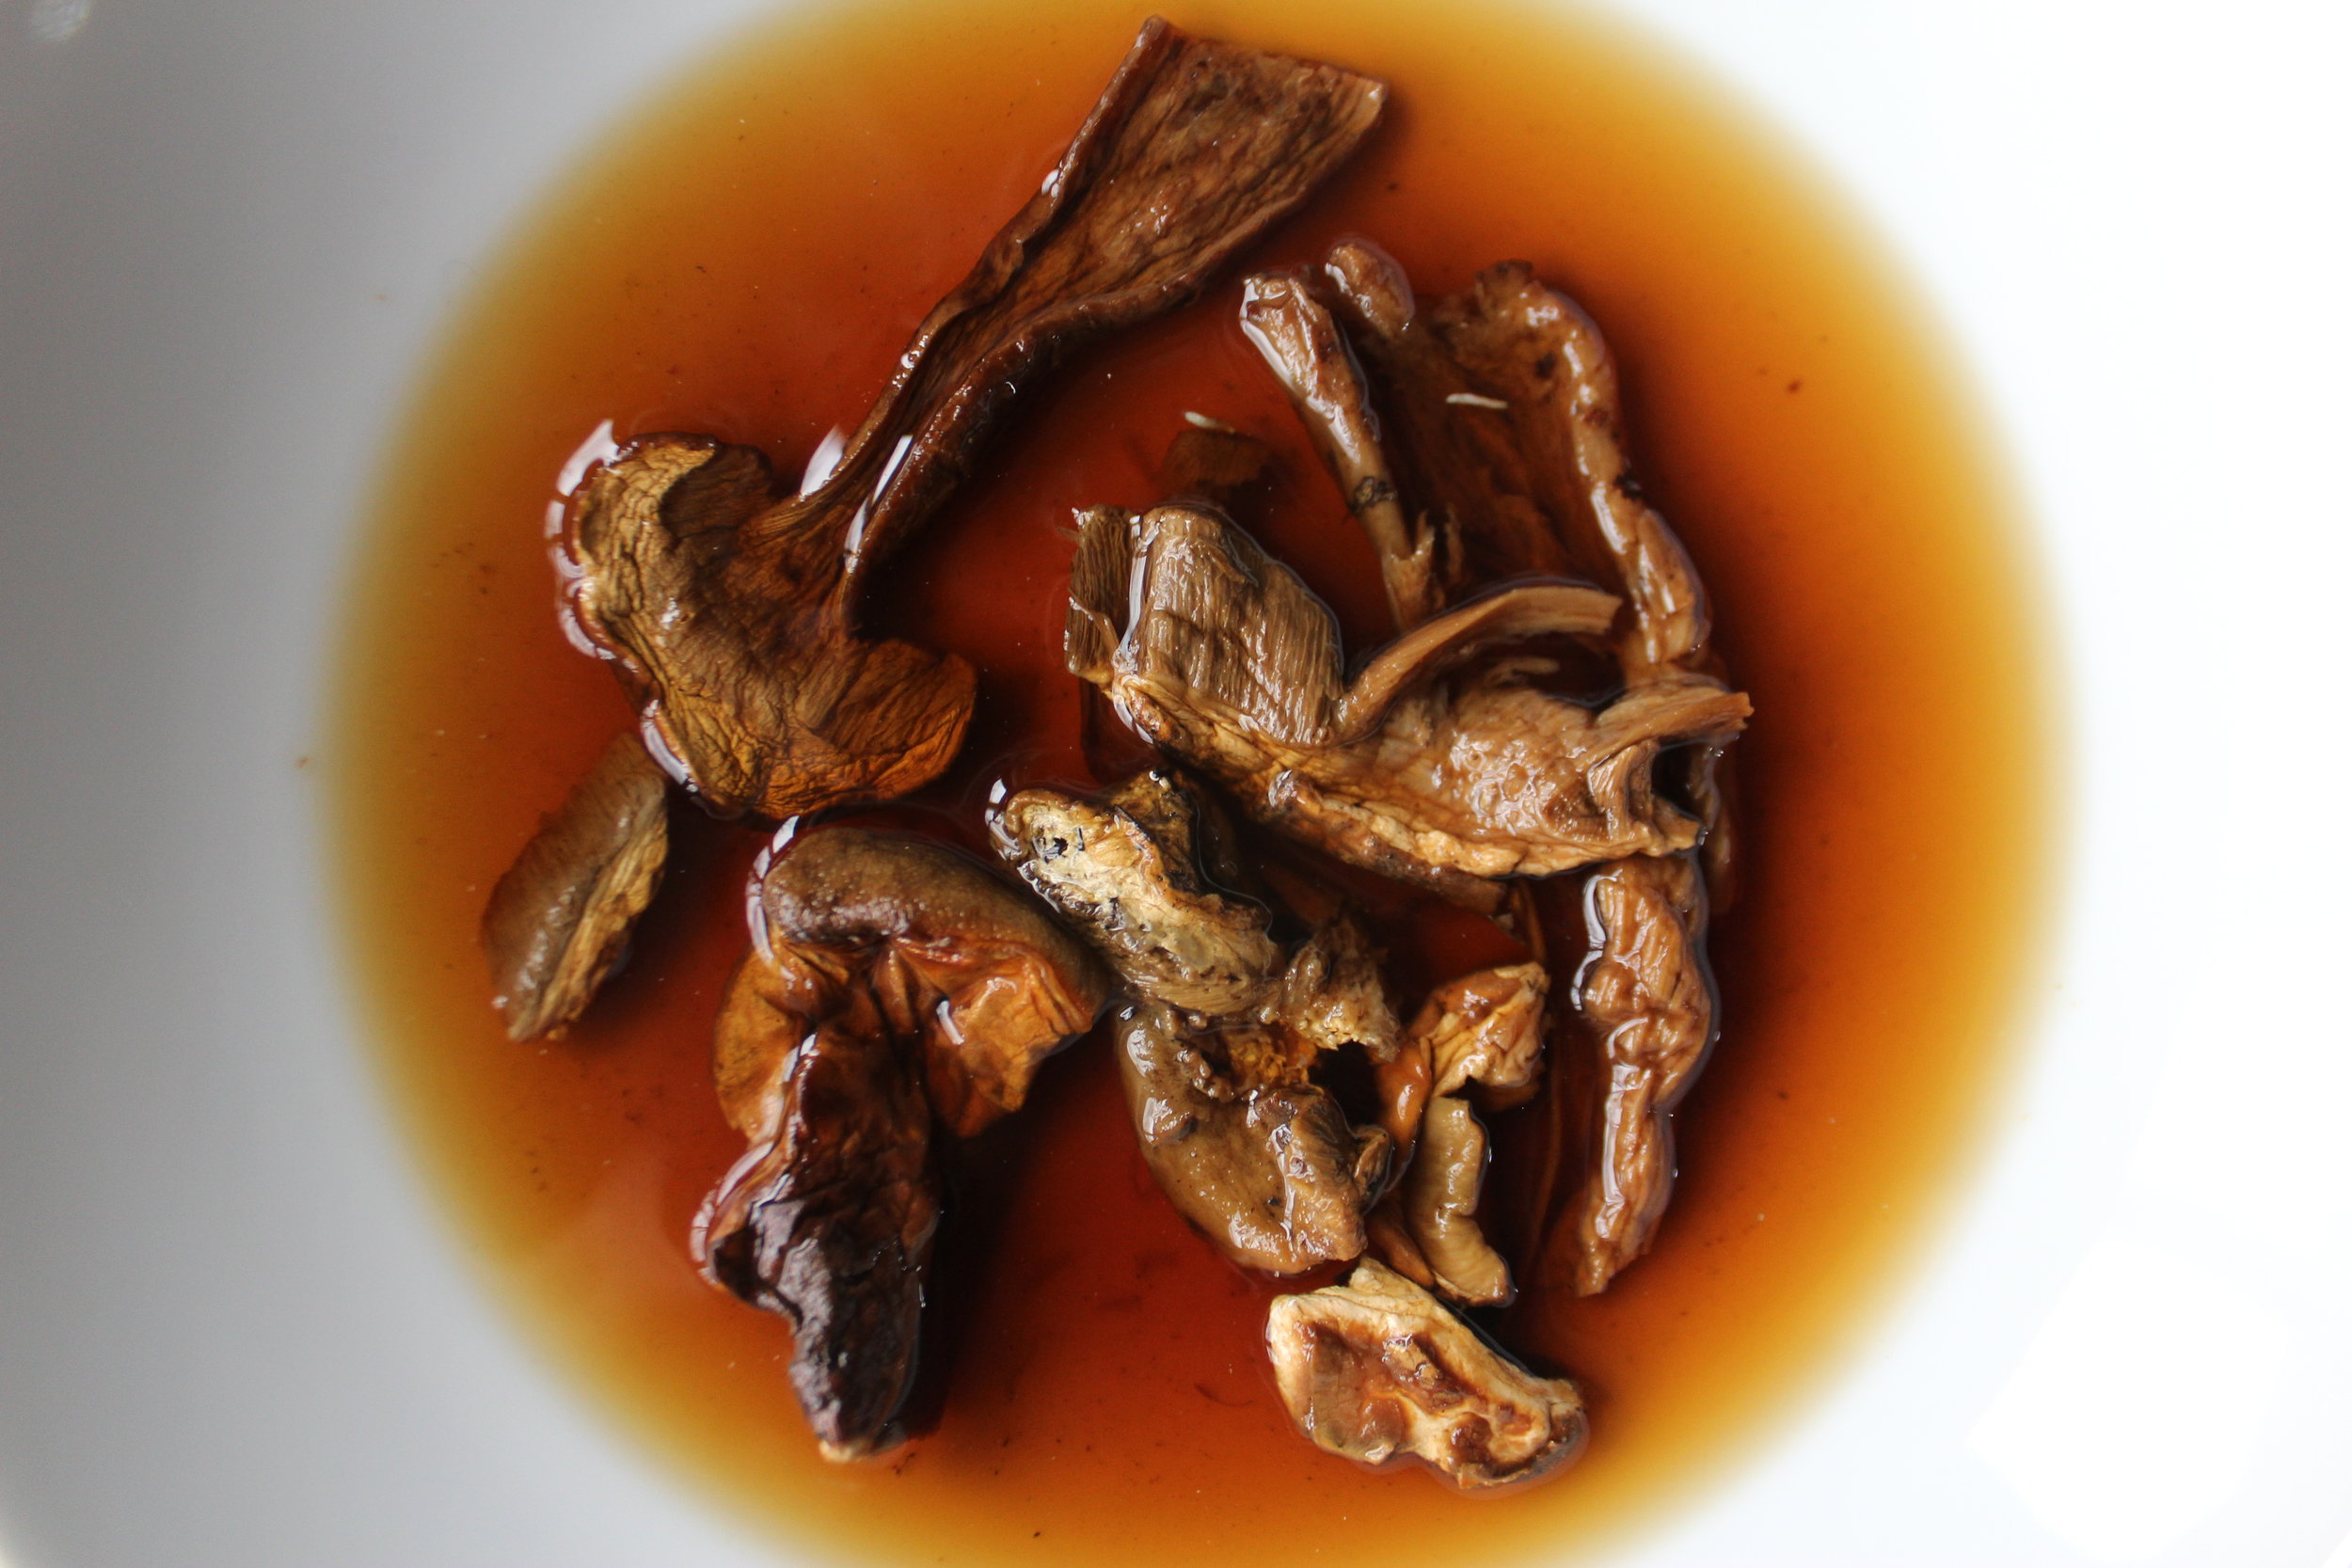
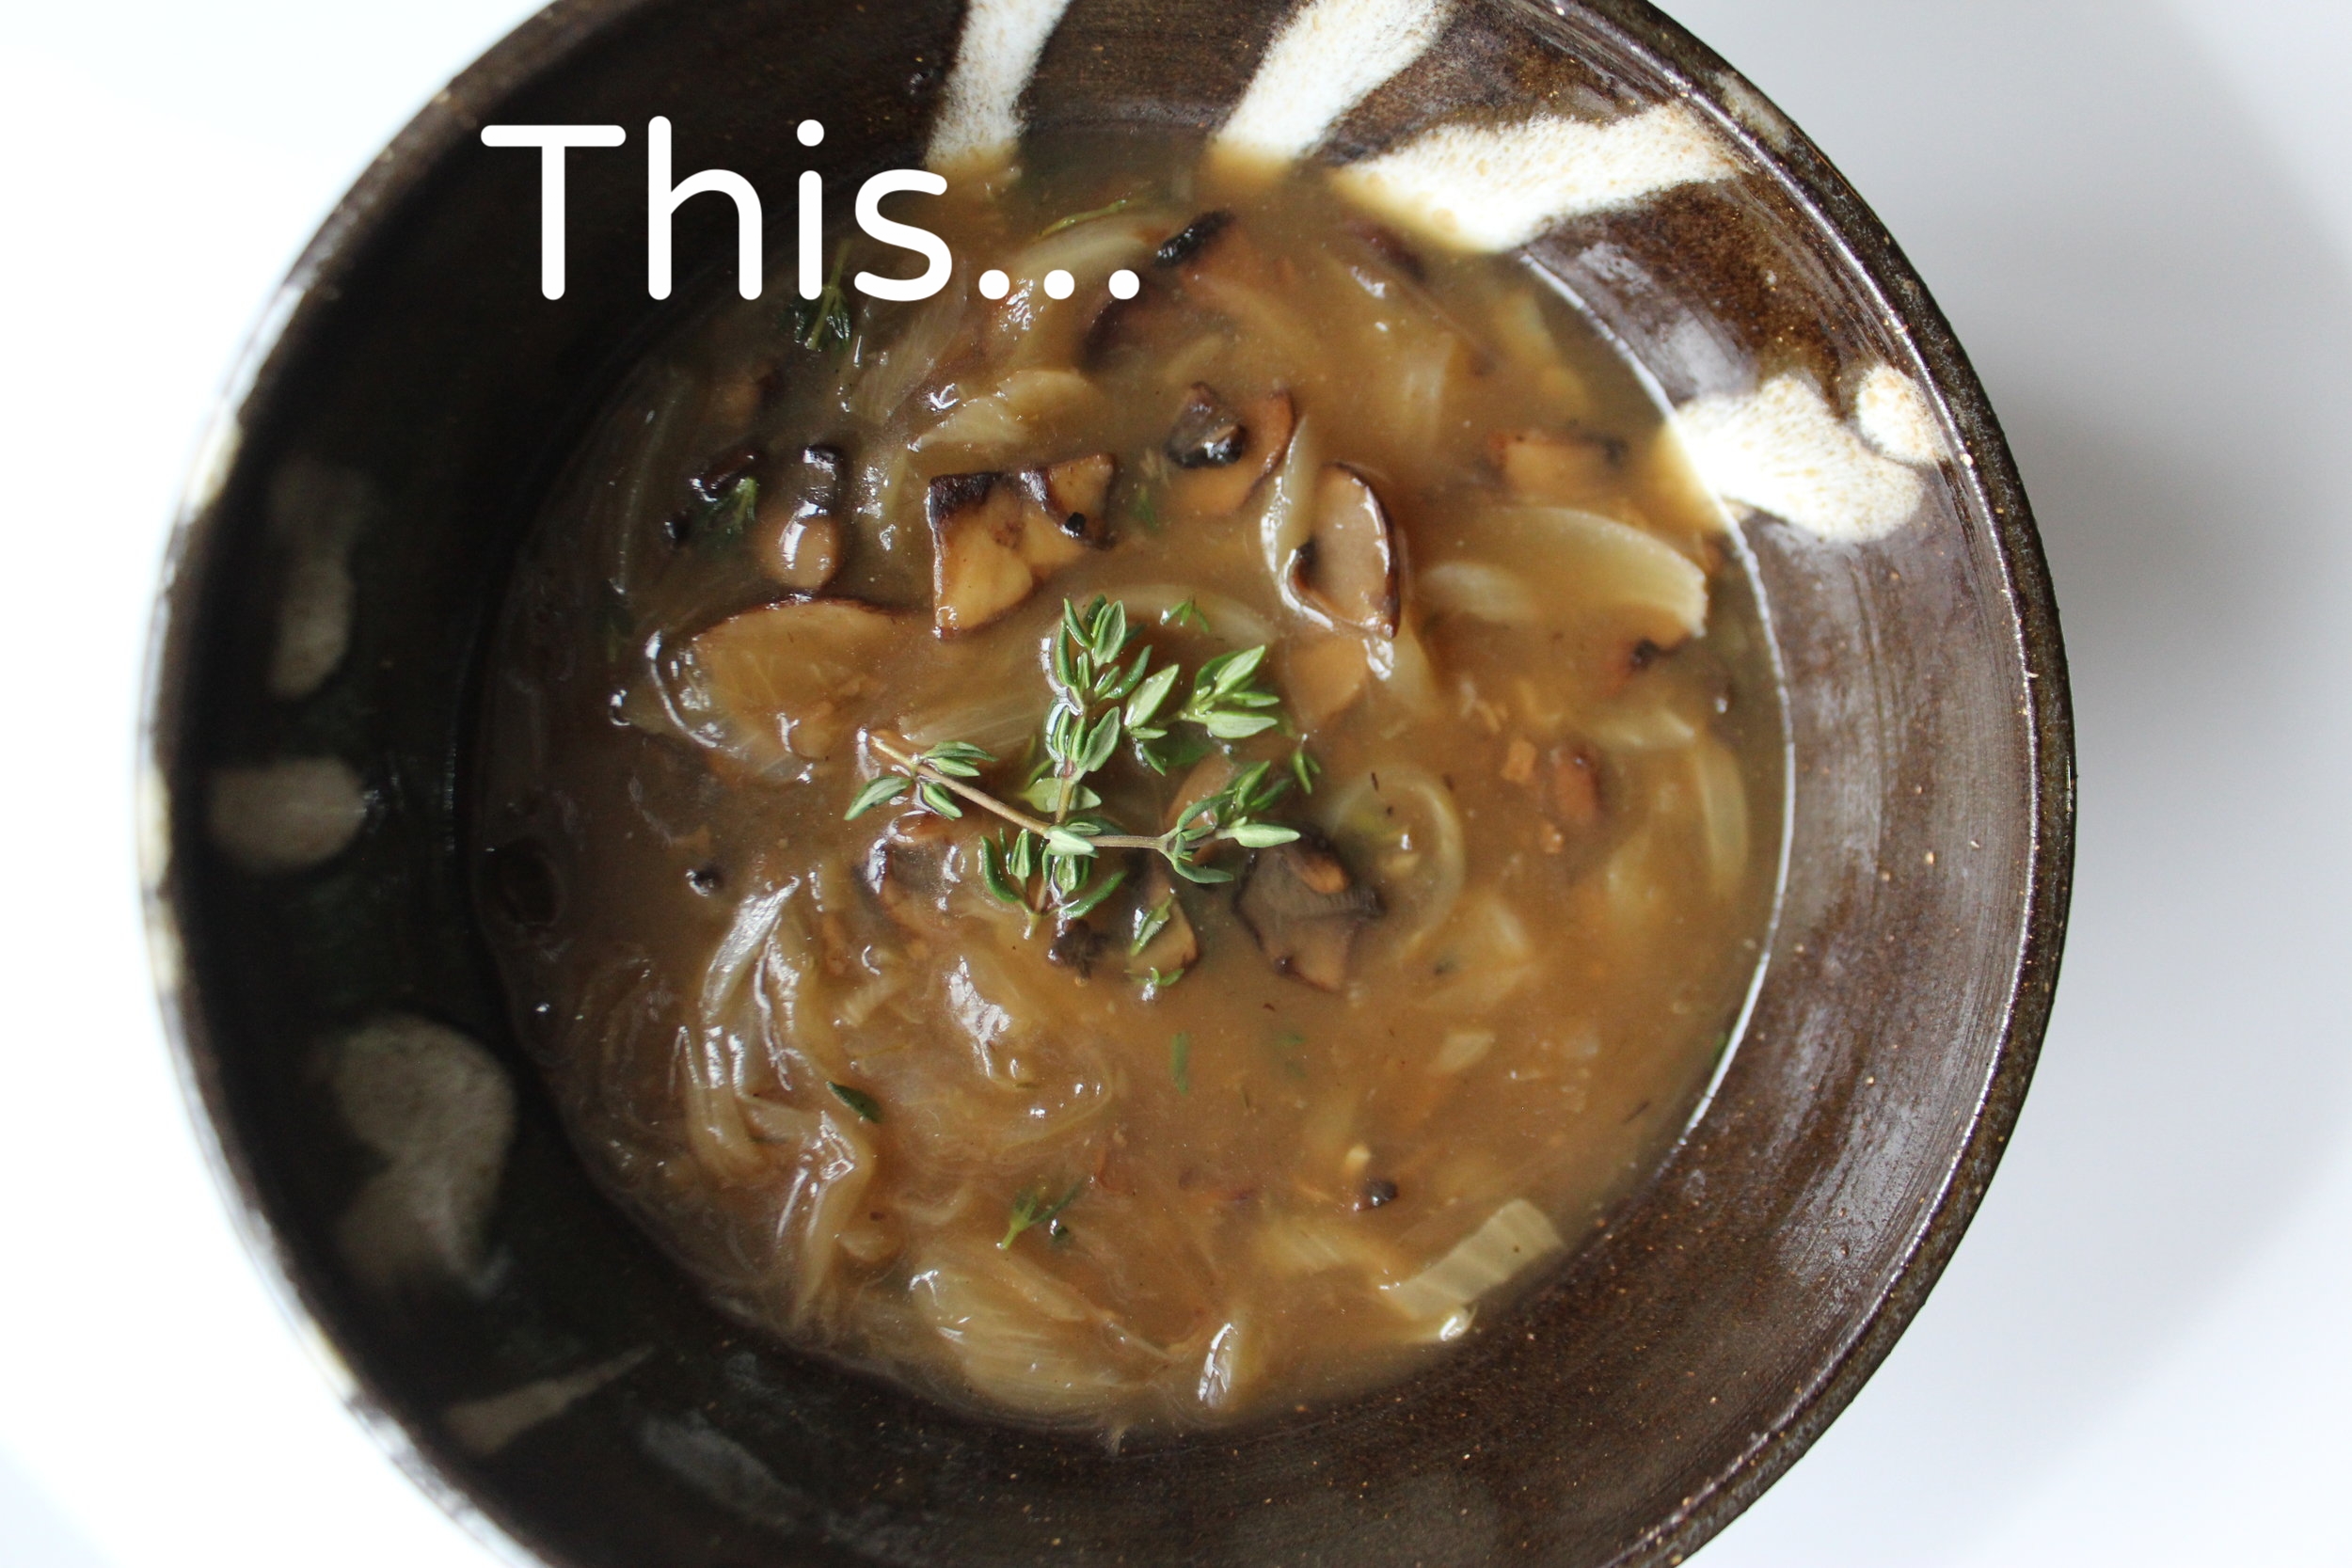
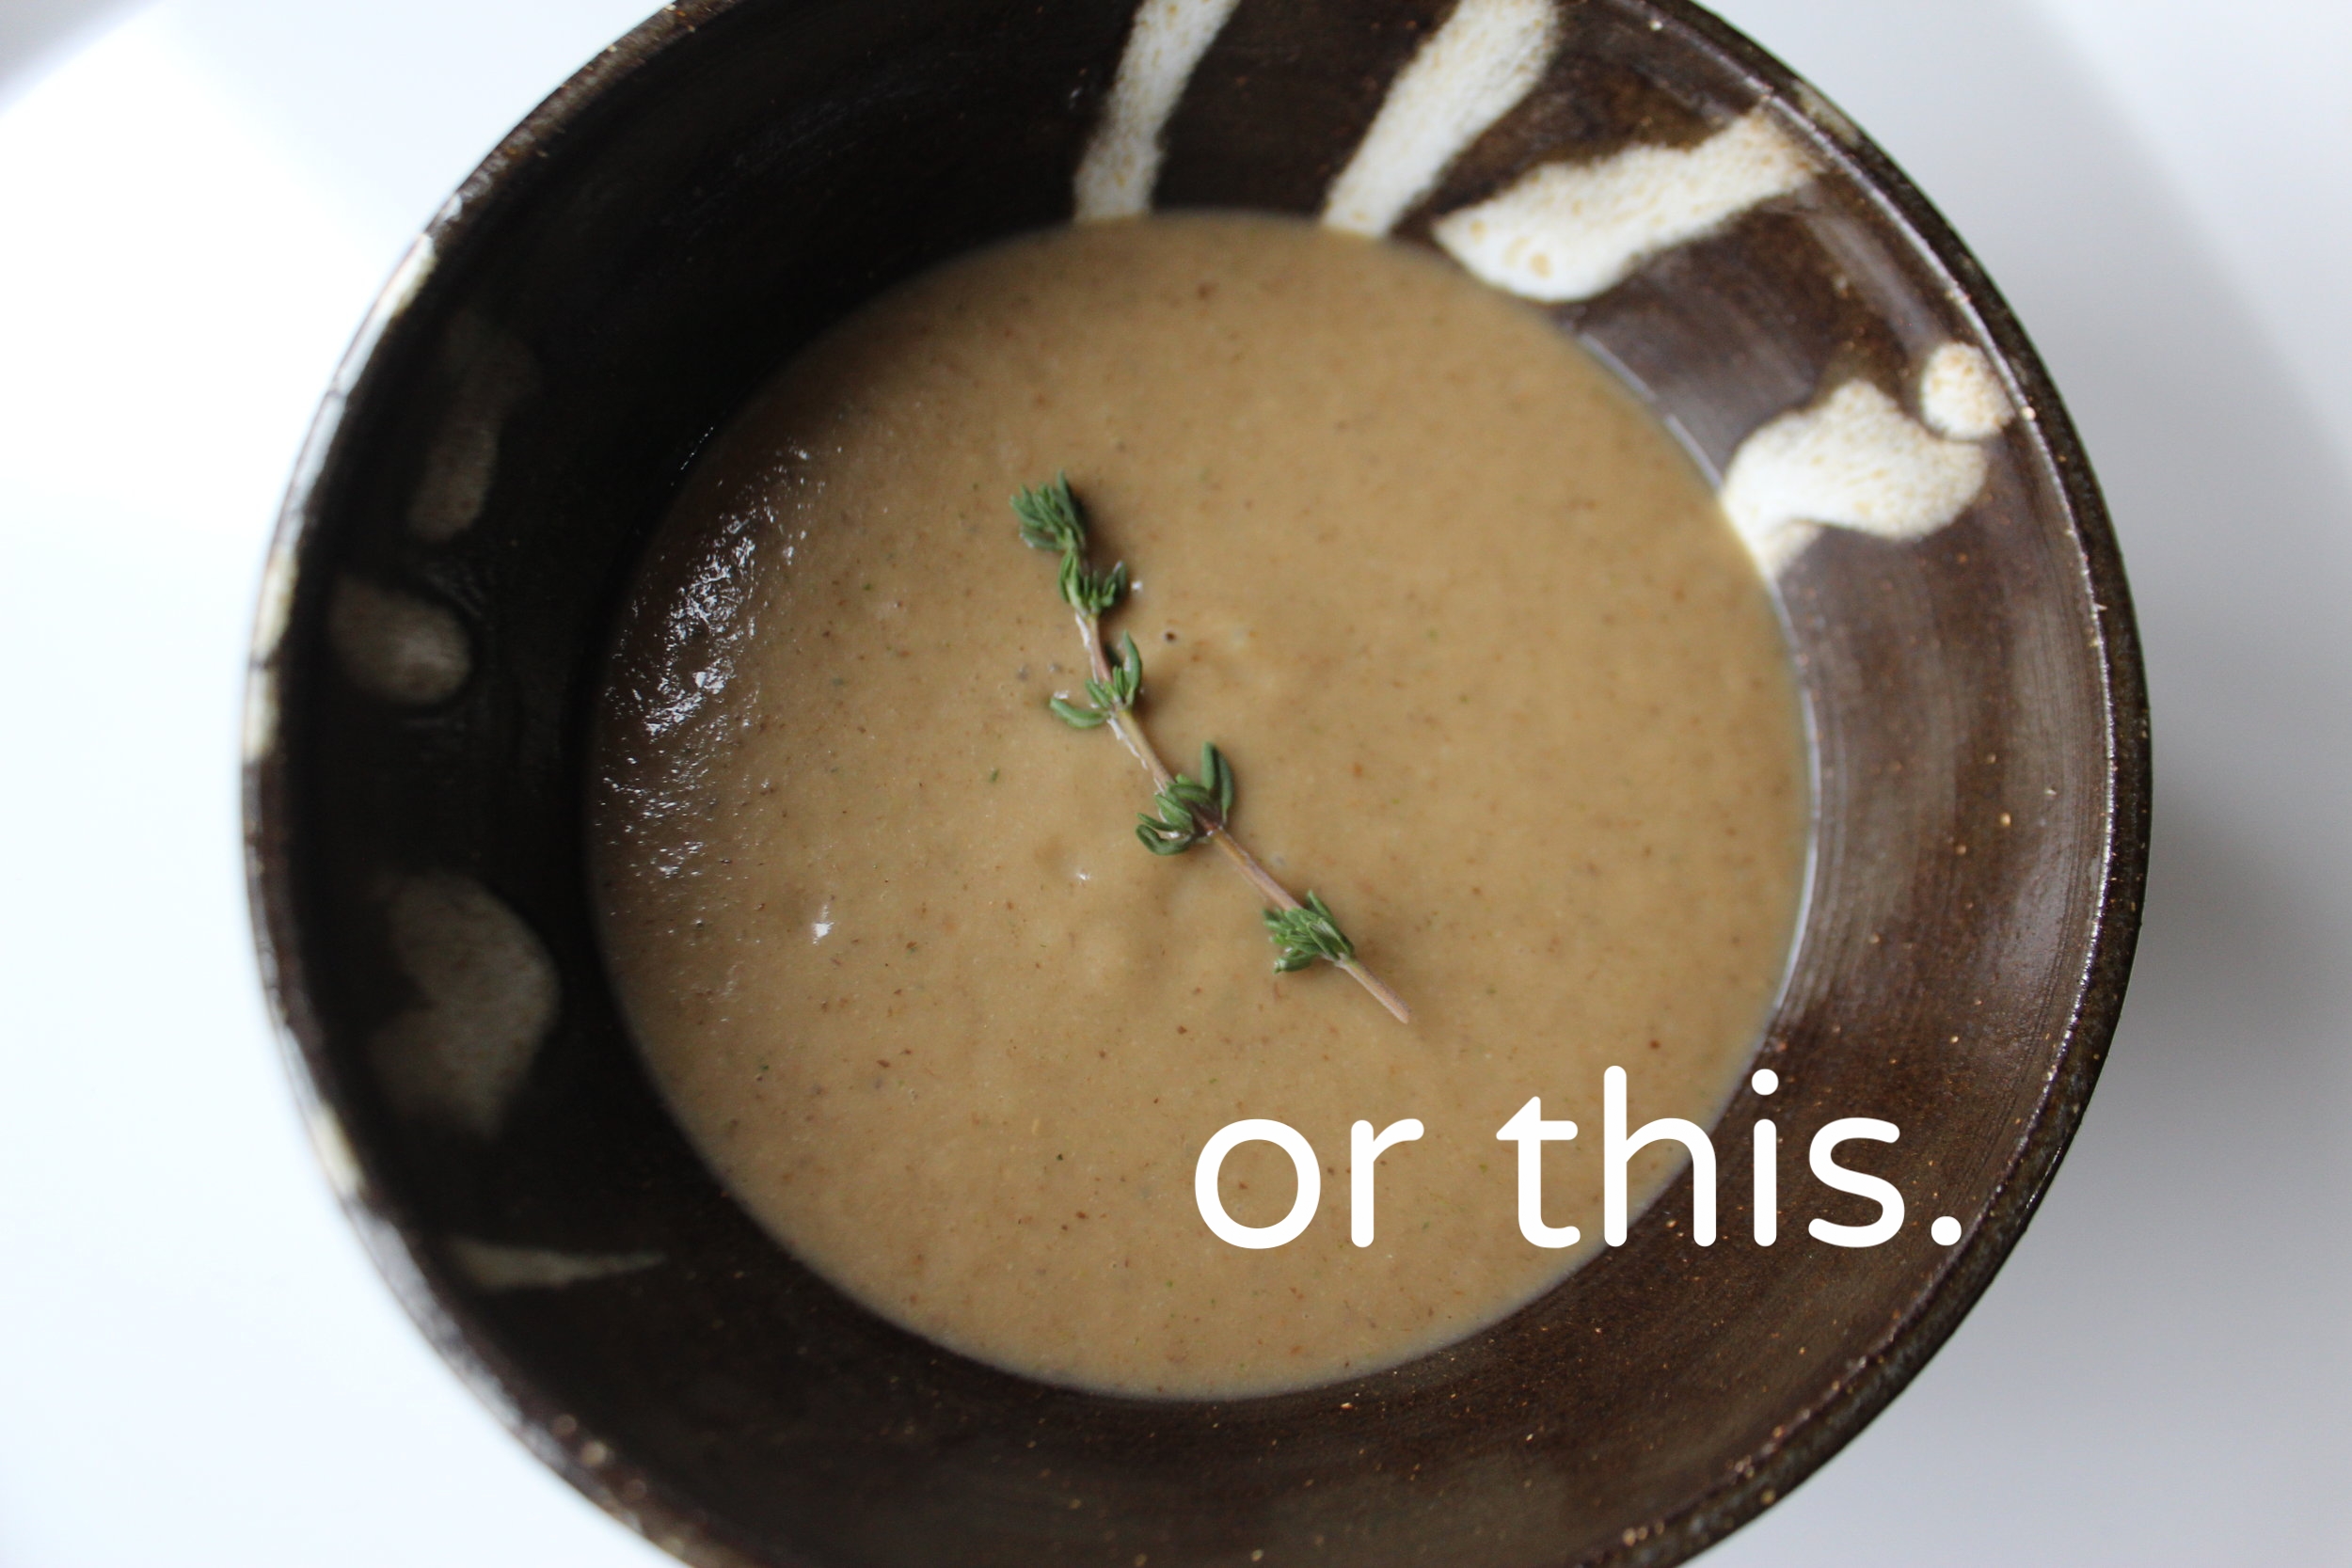
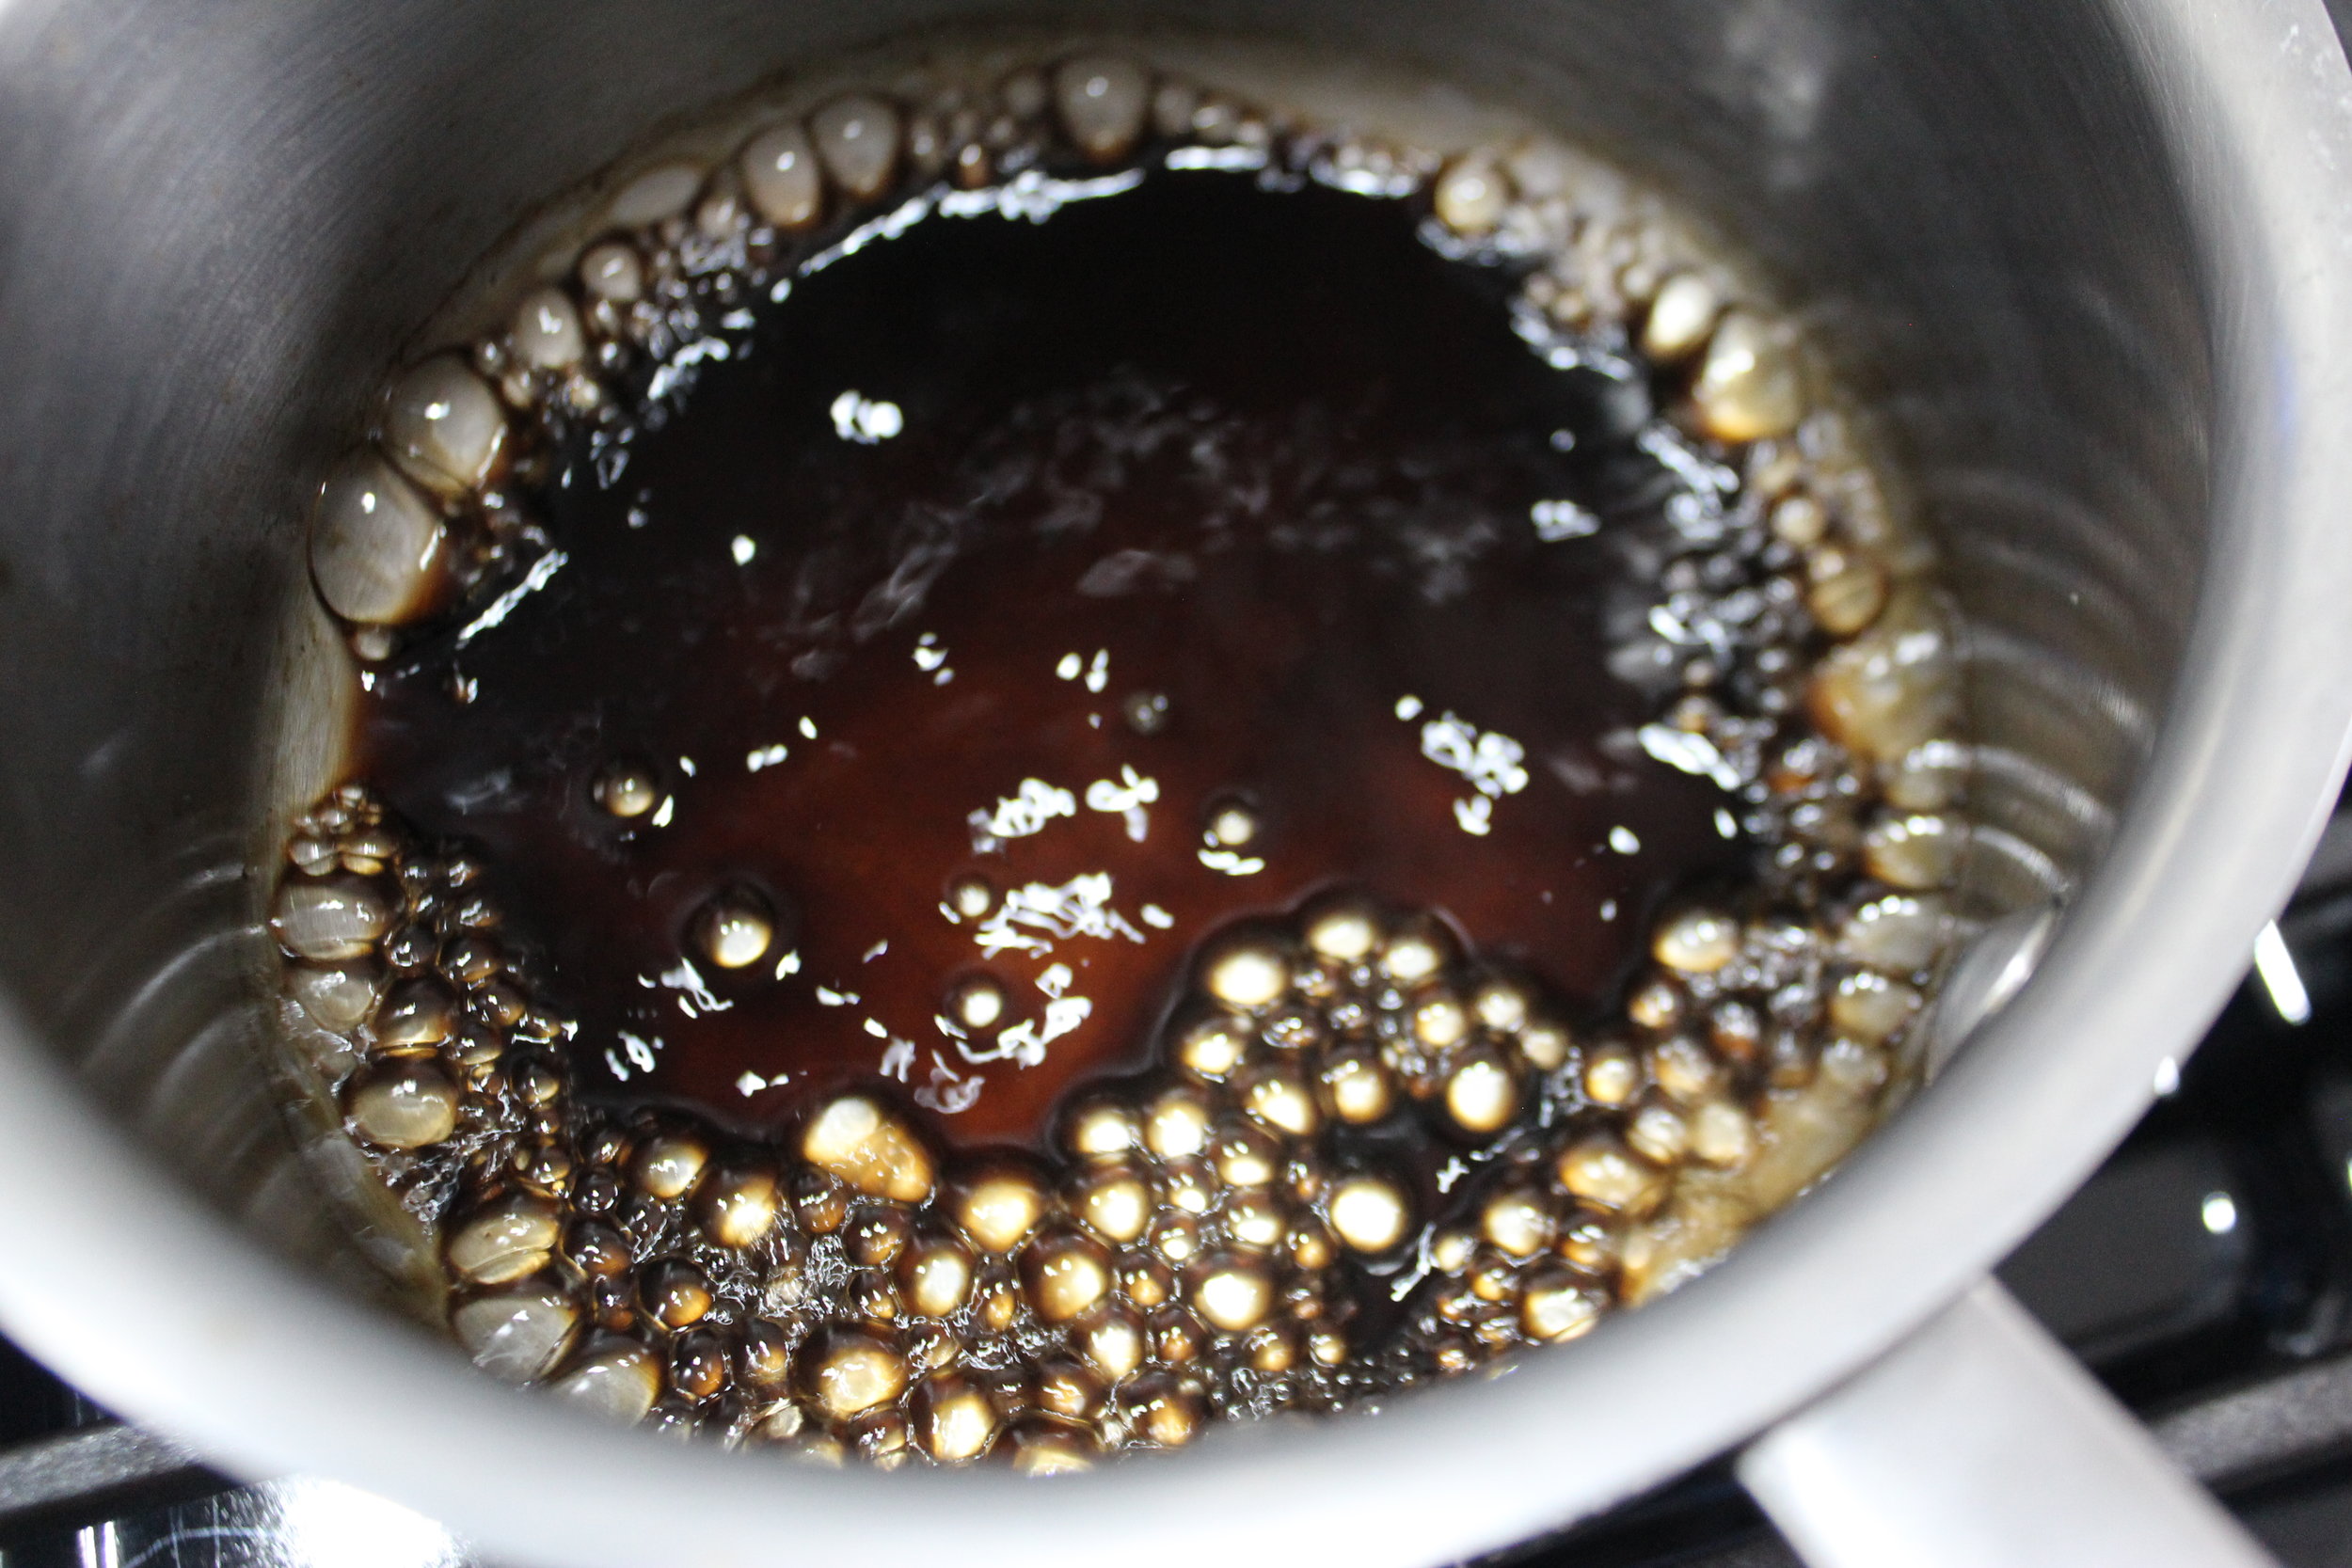
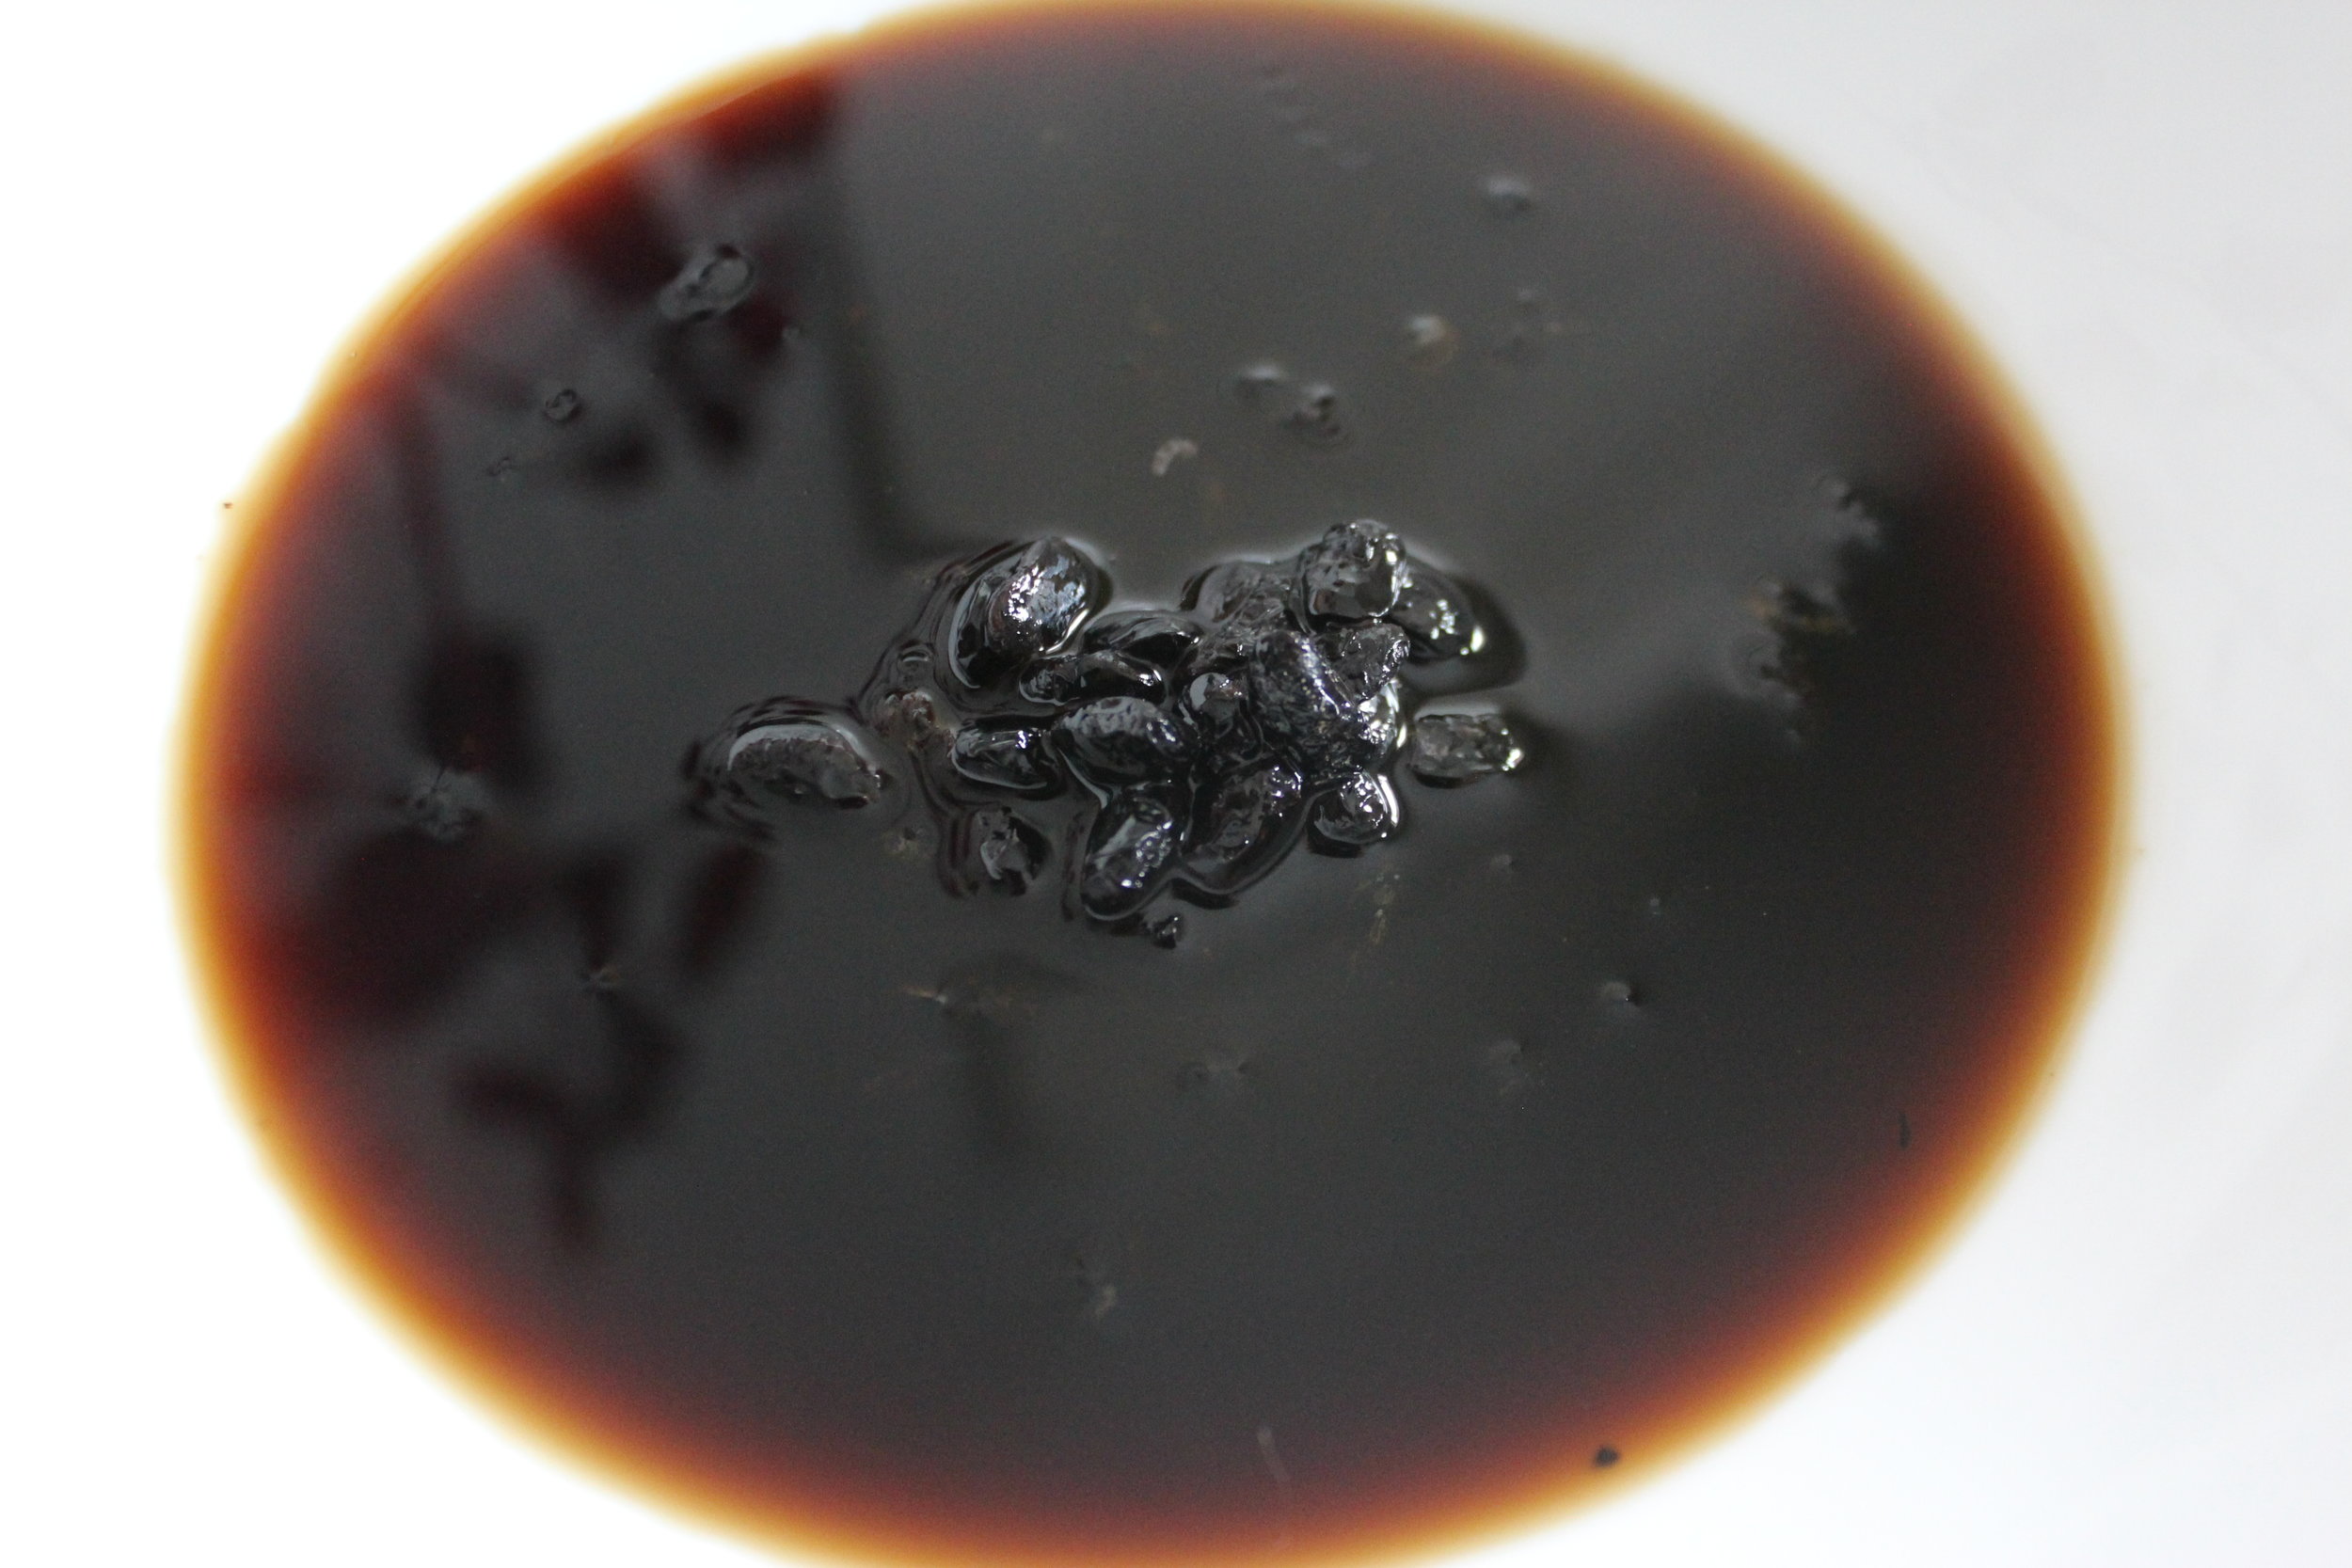
Ok, so the rice is cooked and cooled, or maybe you cooked it the night before, good move. You have your fresh veg prepped: crimini sliced, celery, onion, ginger, garlic, maybe a little chili pepper, all ready to go. The dried Trumpet mushrooms are soaked, squeezed, and thinly sliced. We are not tossing out all the flavor of the soaking liquid, oh no. It is reduced to 2 Tbsp in volume and is a component of the finishing sauce along with the black soybeans, mirin, and soy sauce of your choosing! All that mushroomy flavor is conserved.

IMG_5740.JPG
IMG_5742.JPG
IMG_5745.JPG

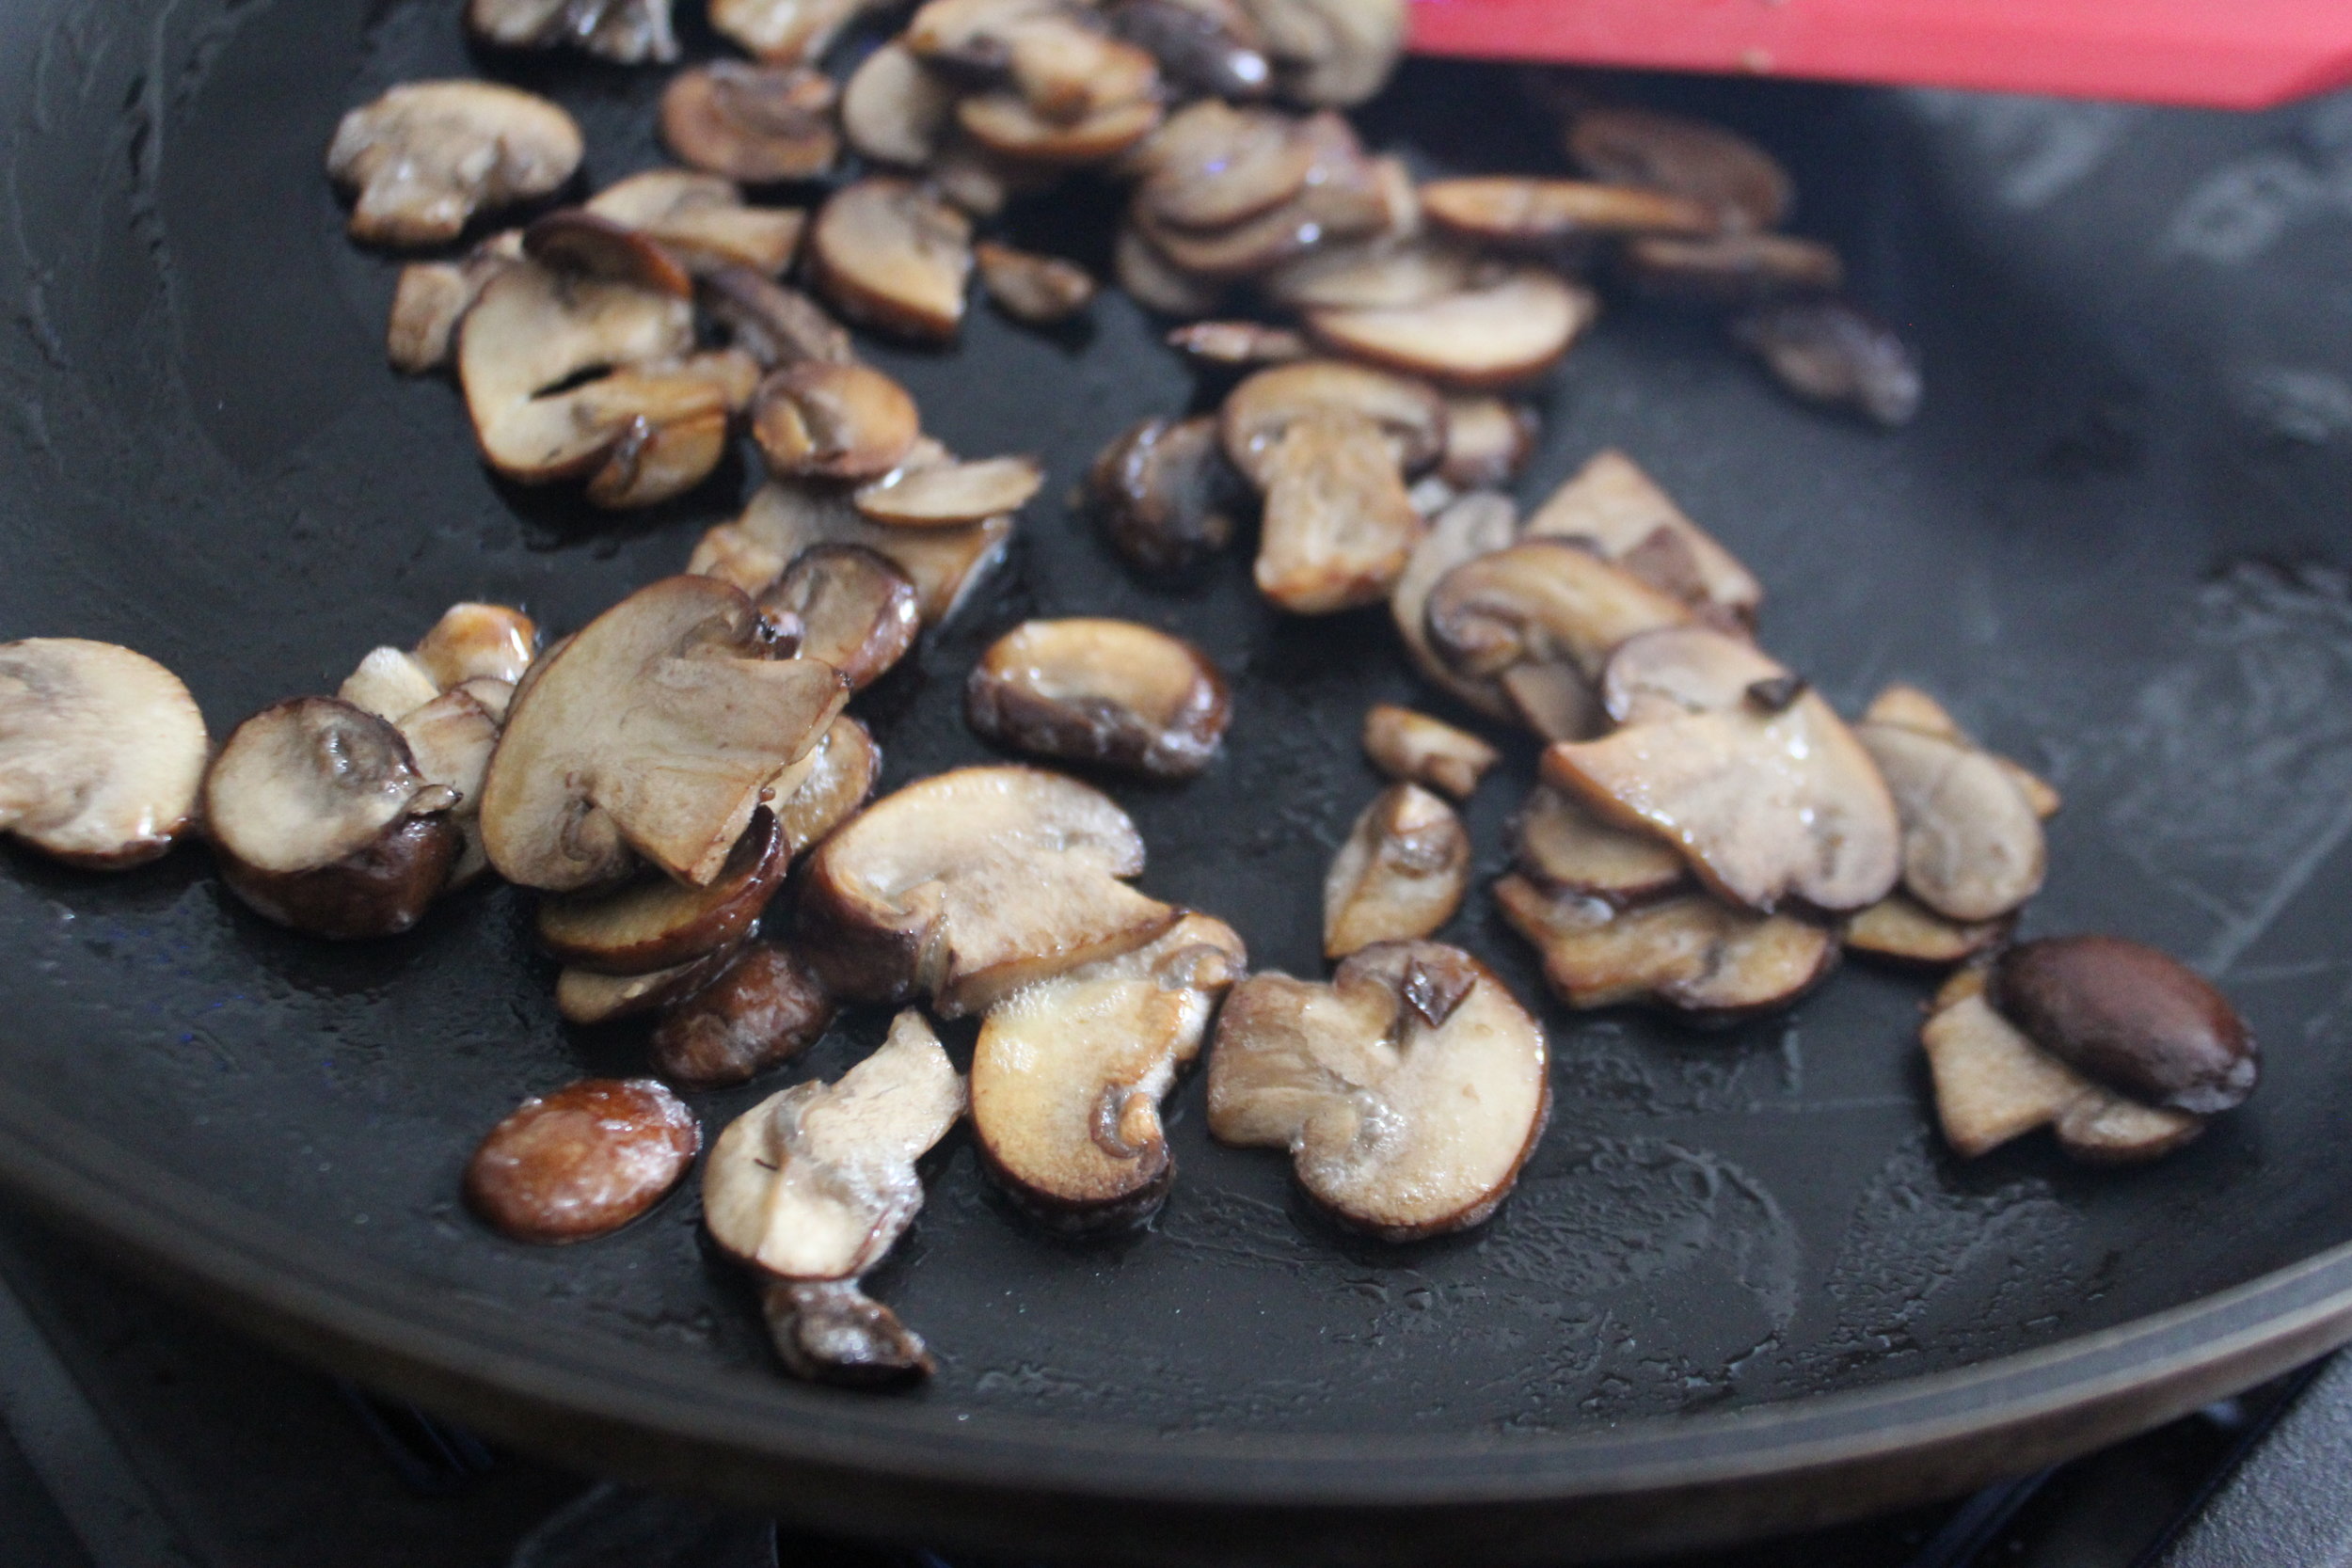
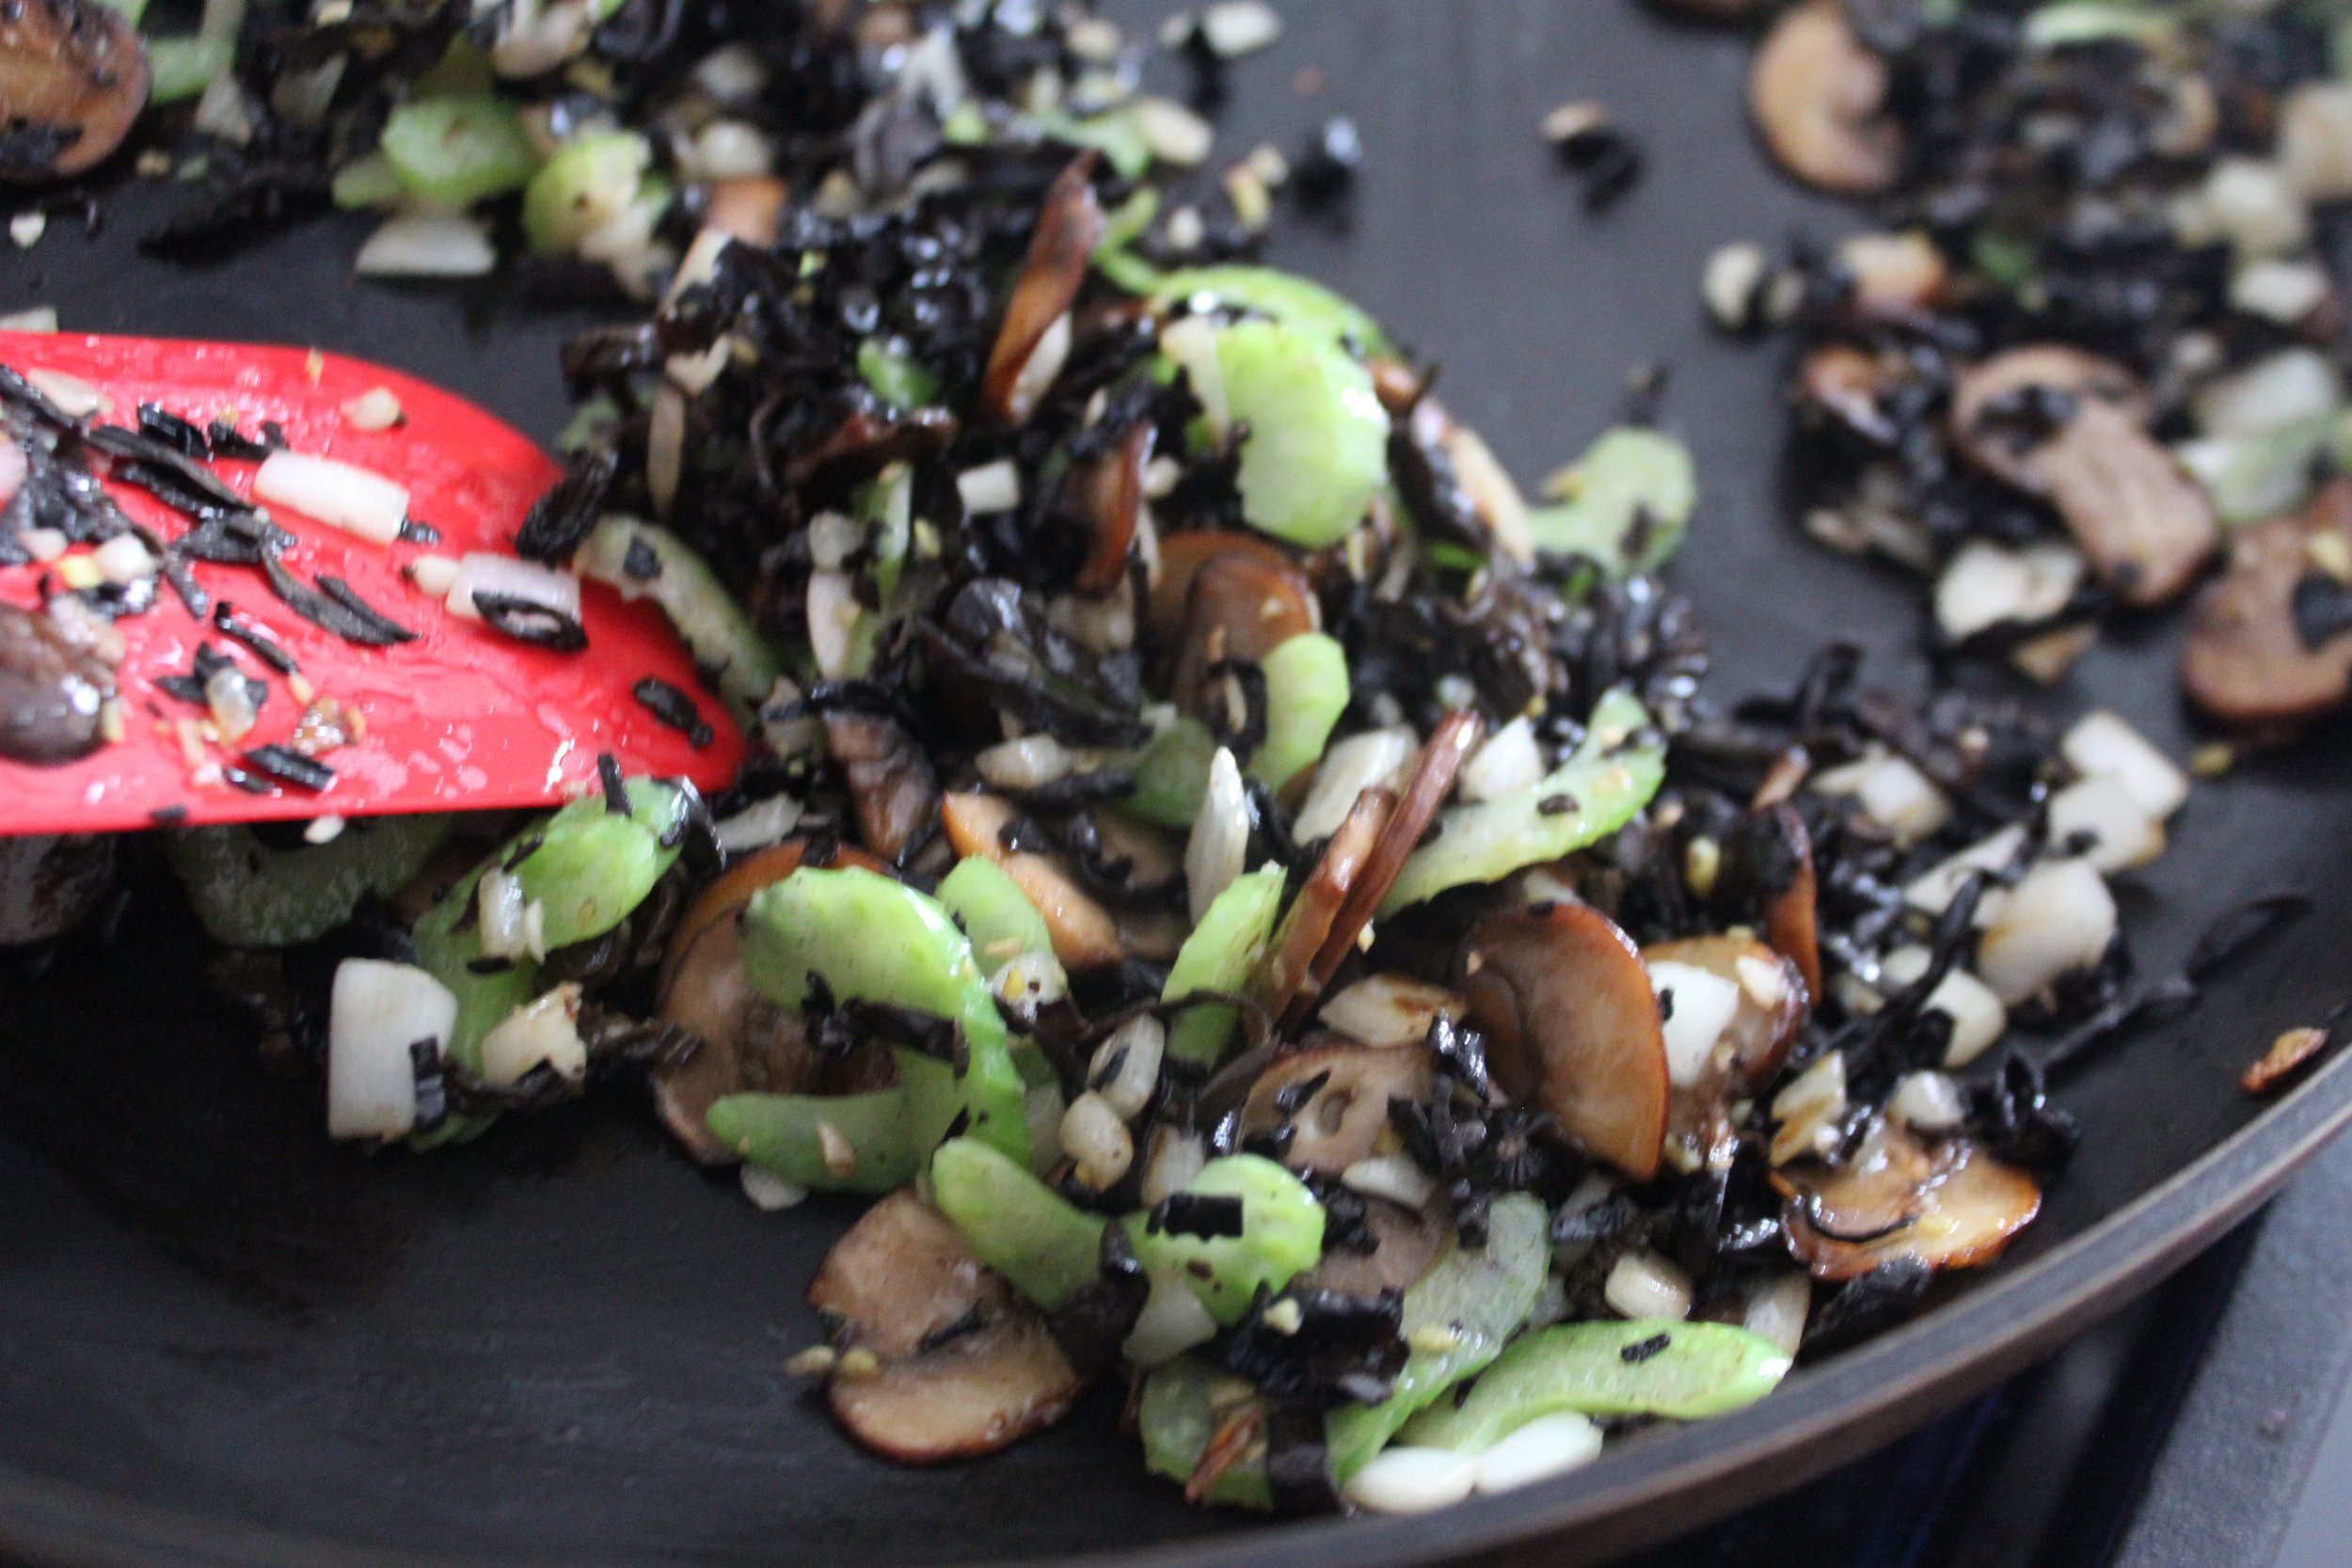
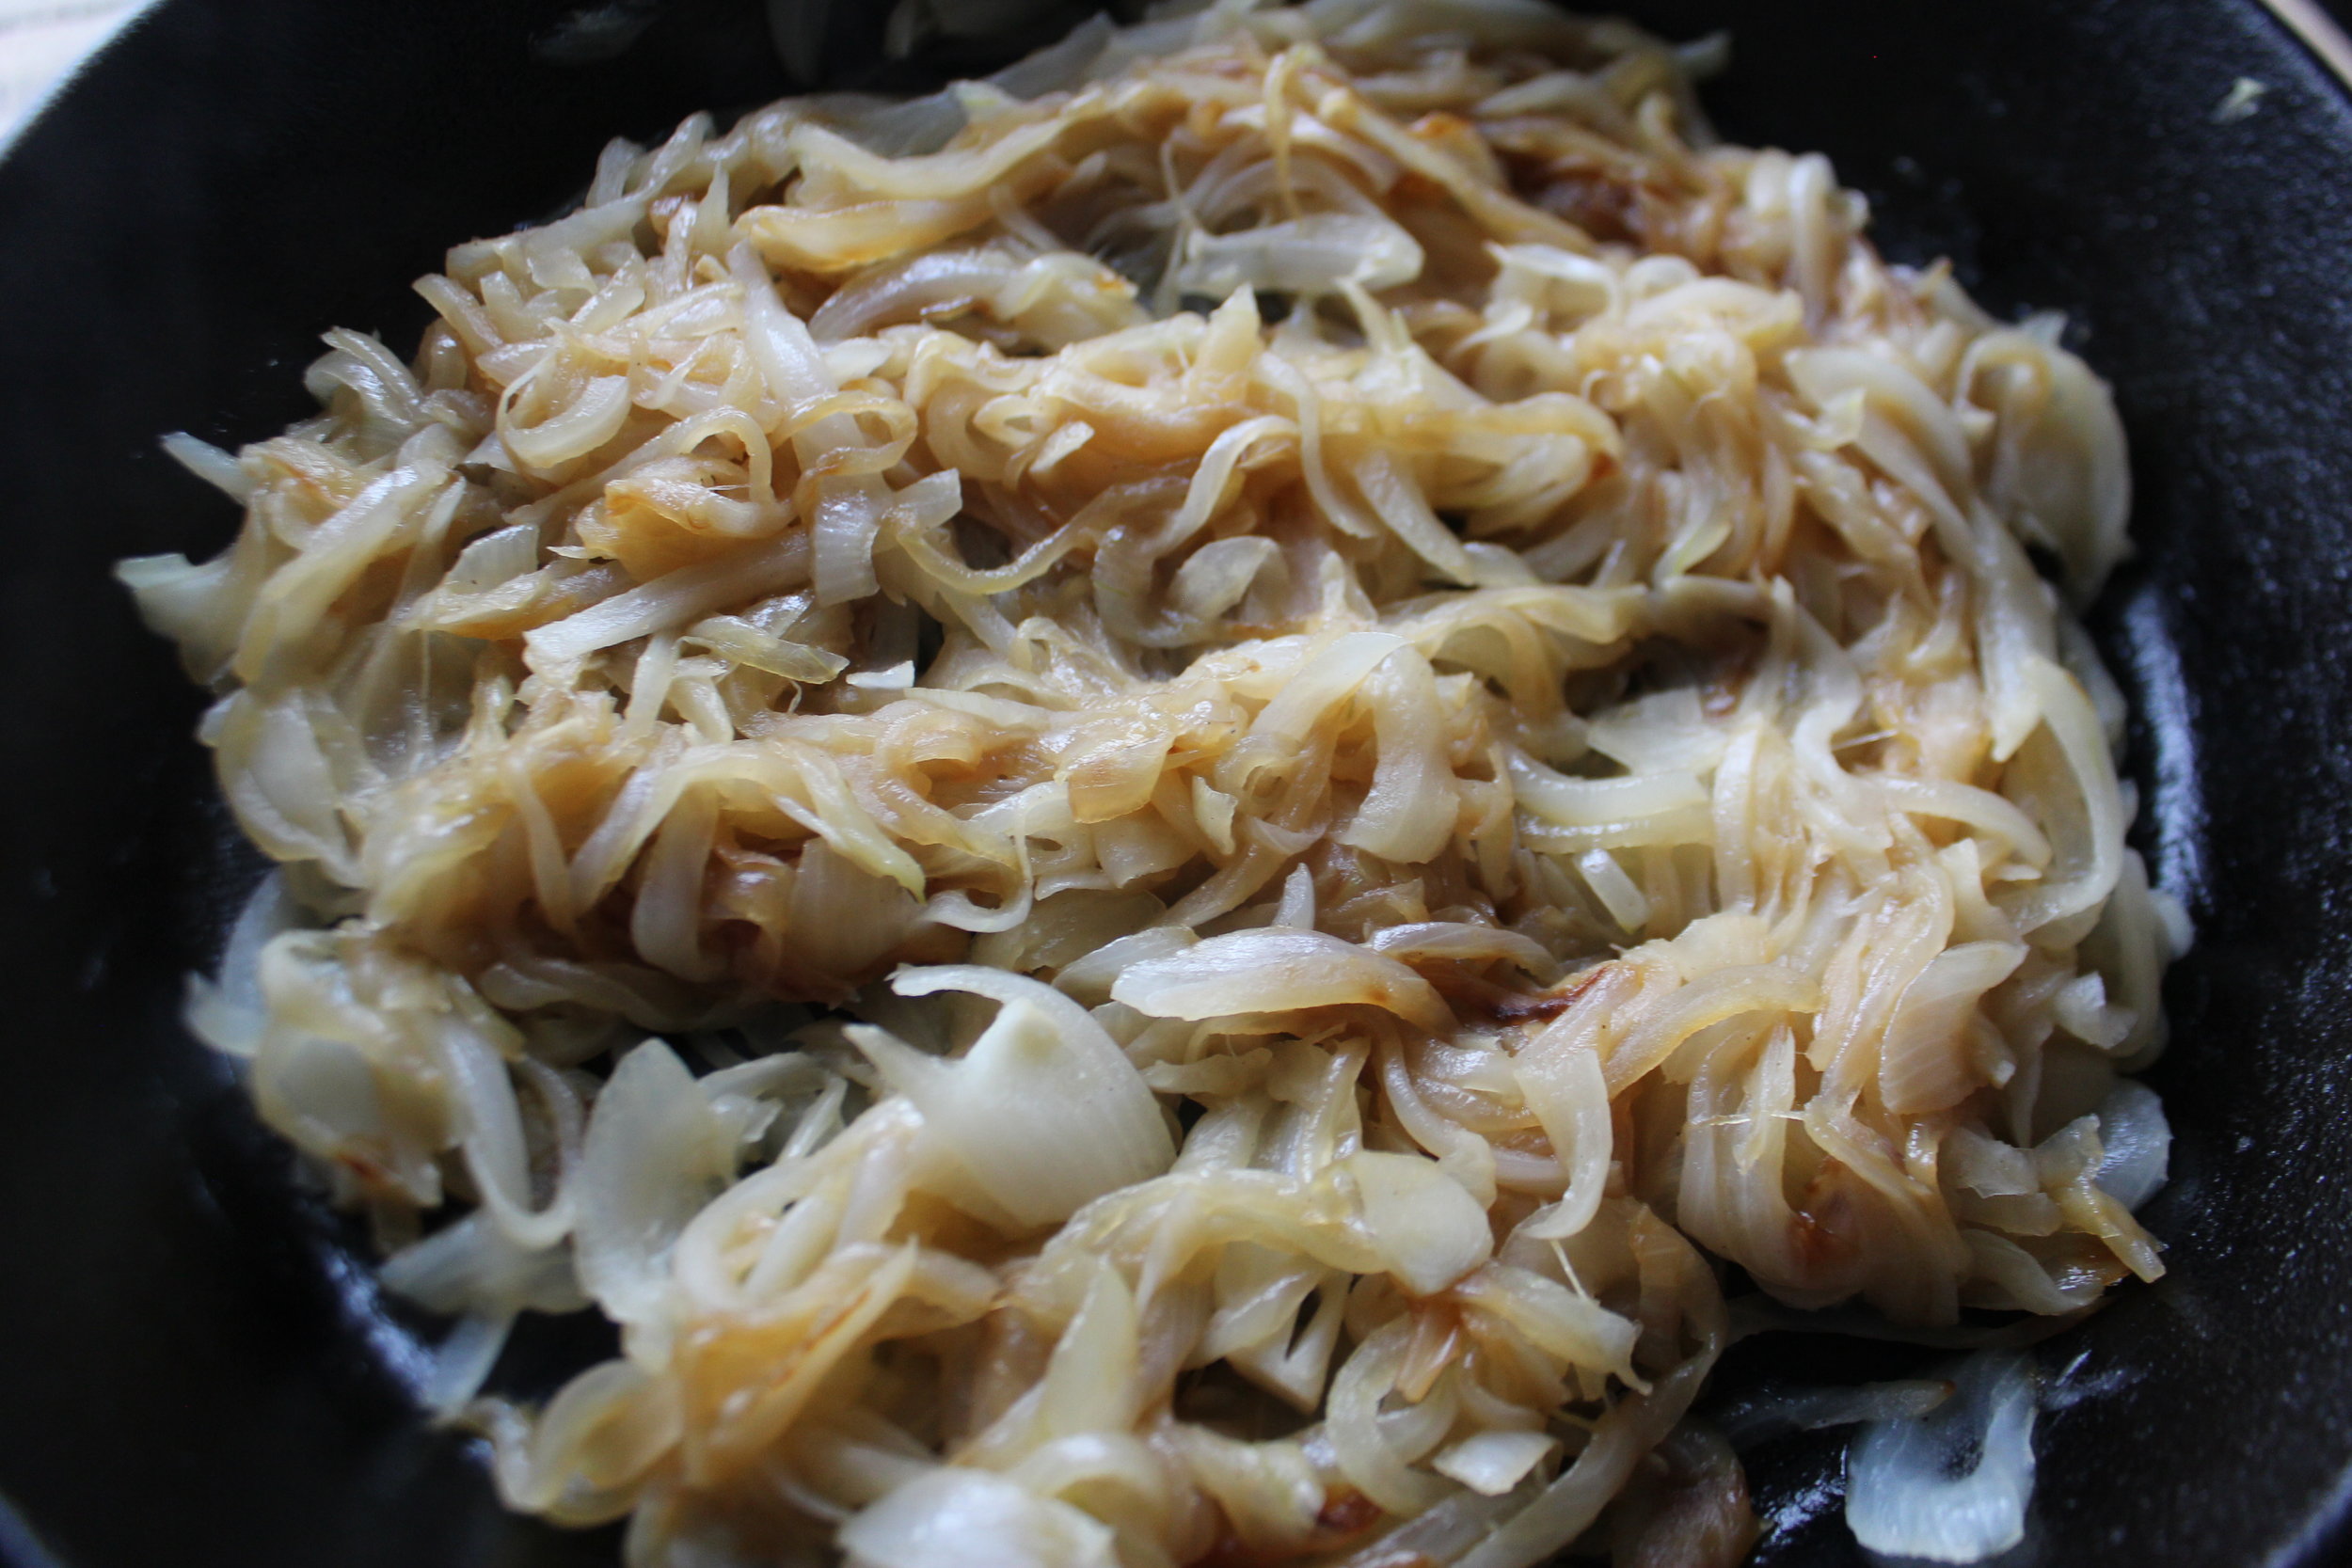
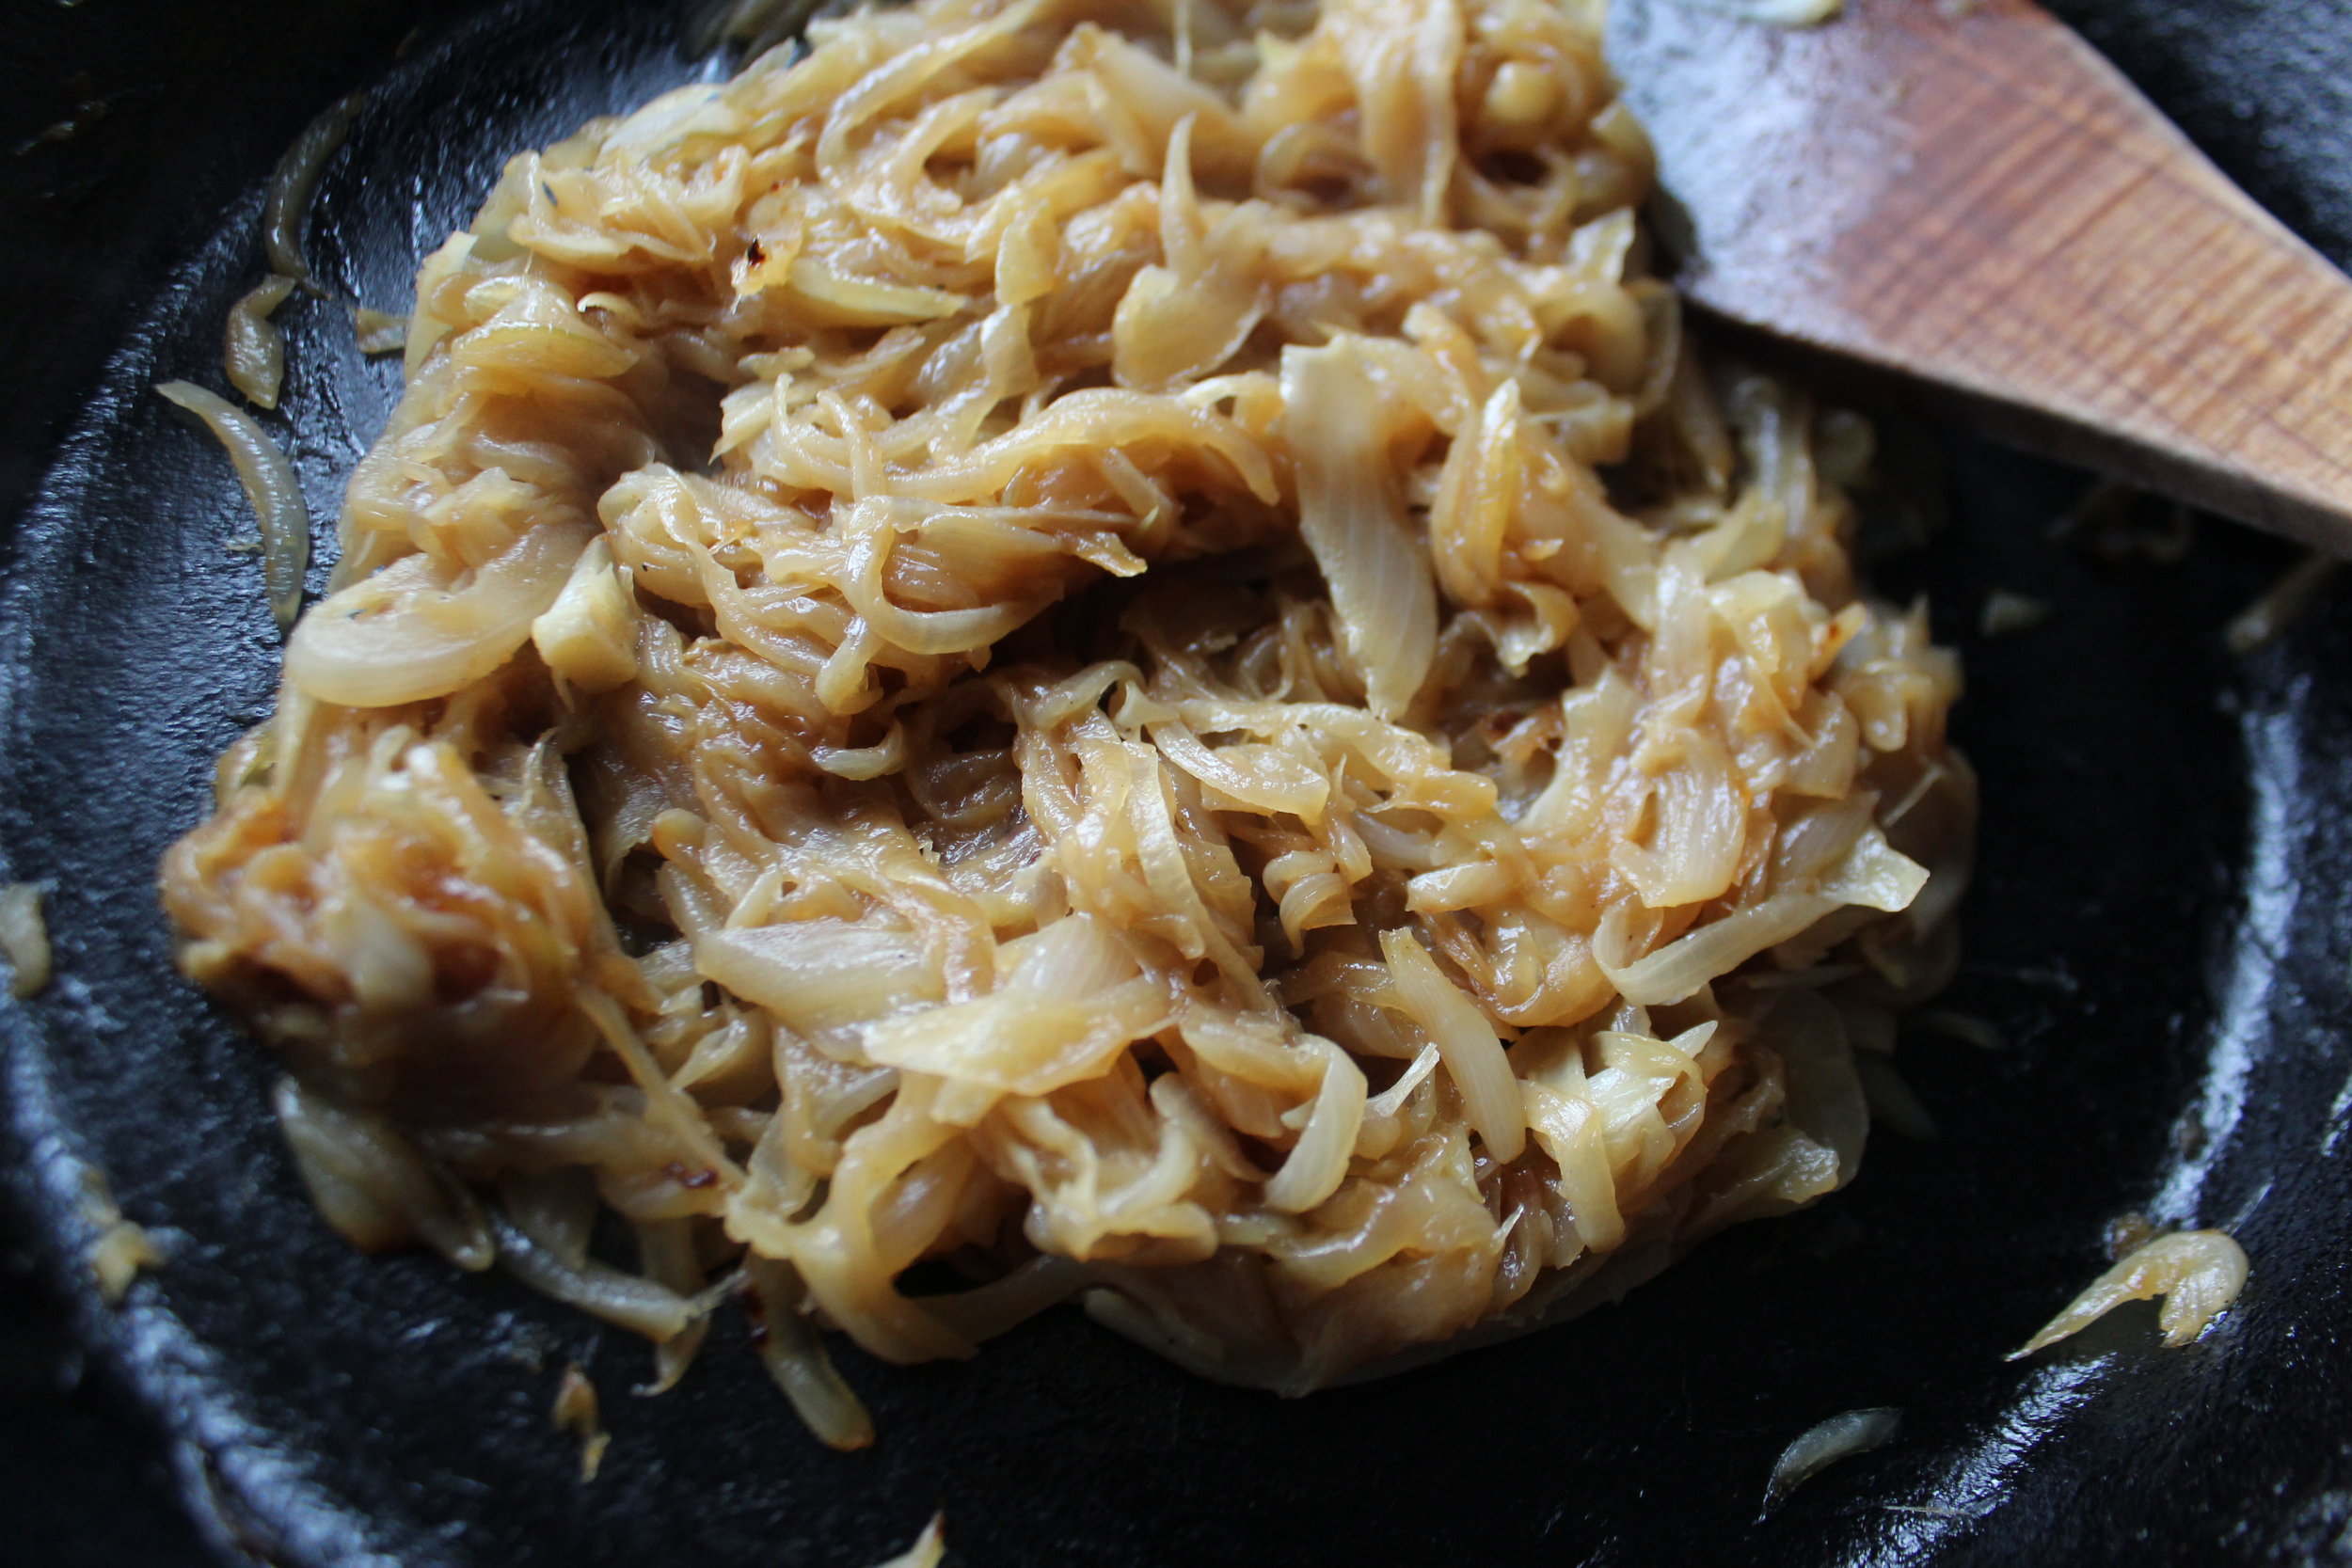
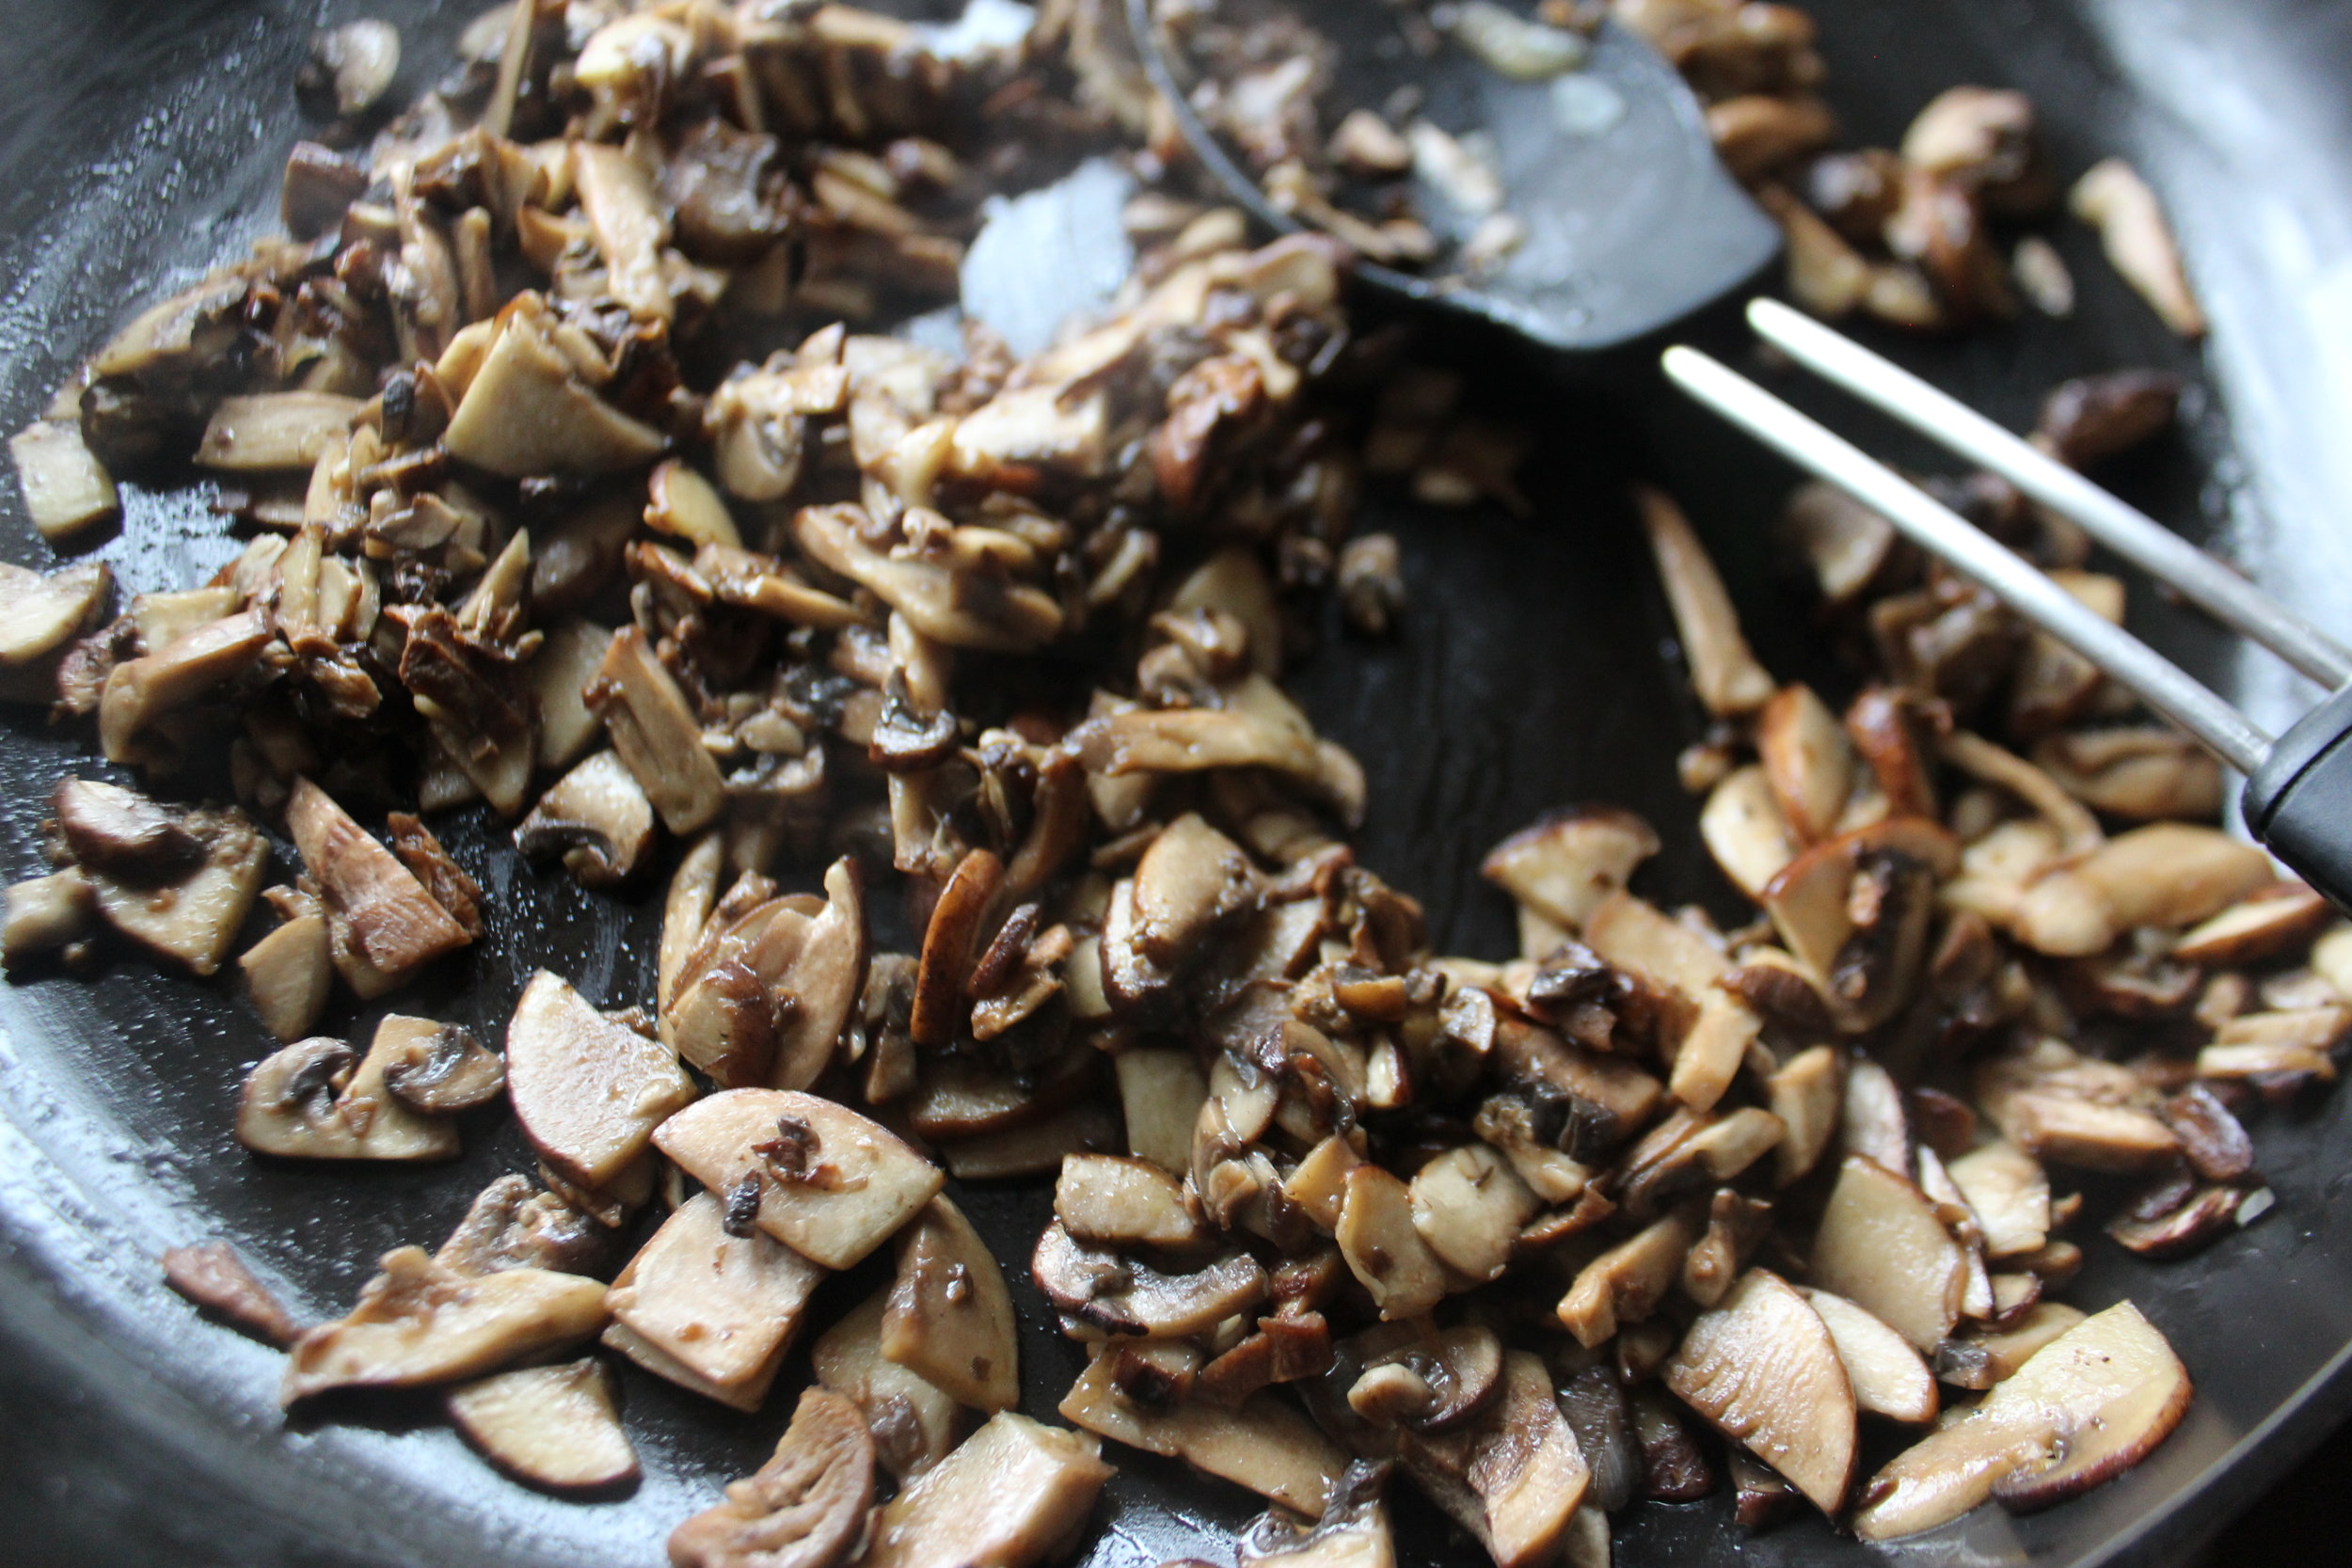
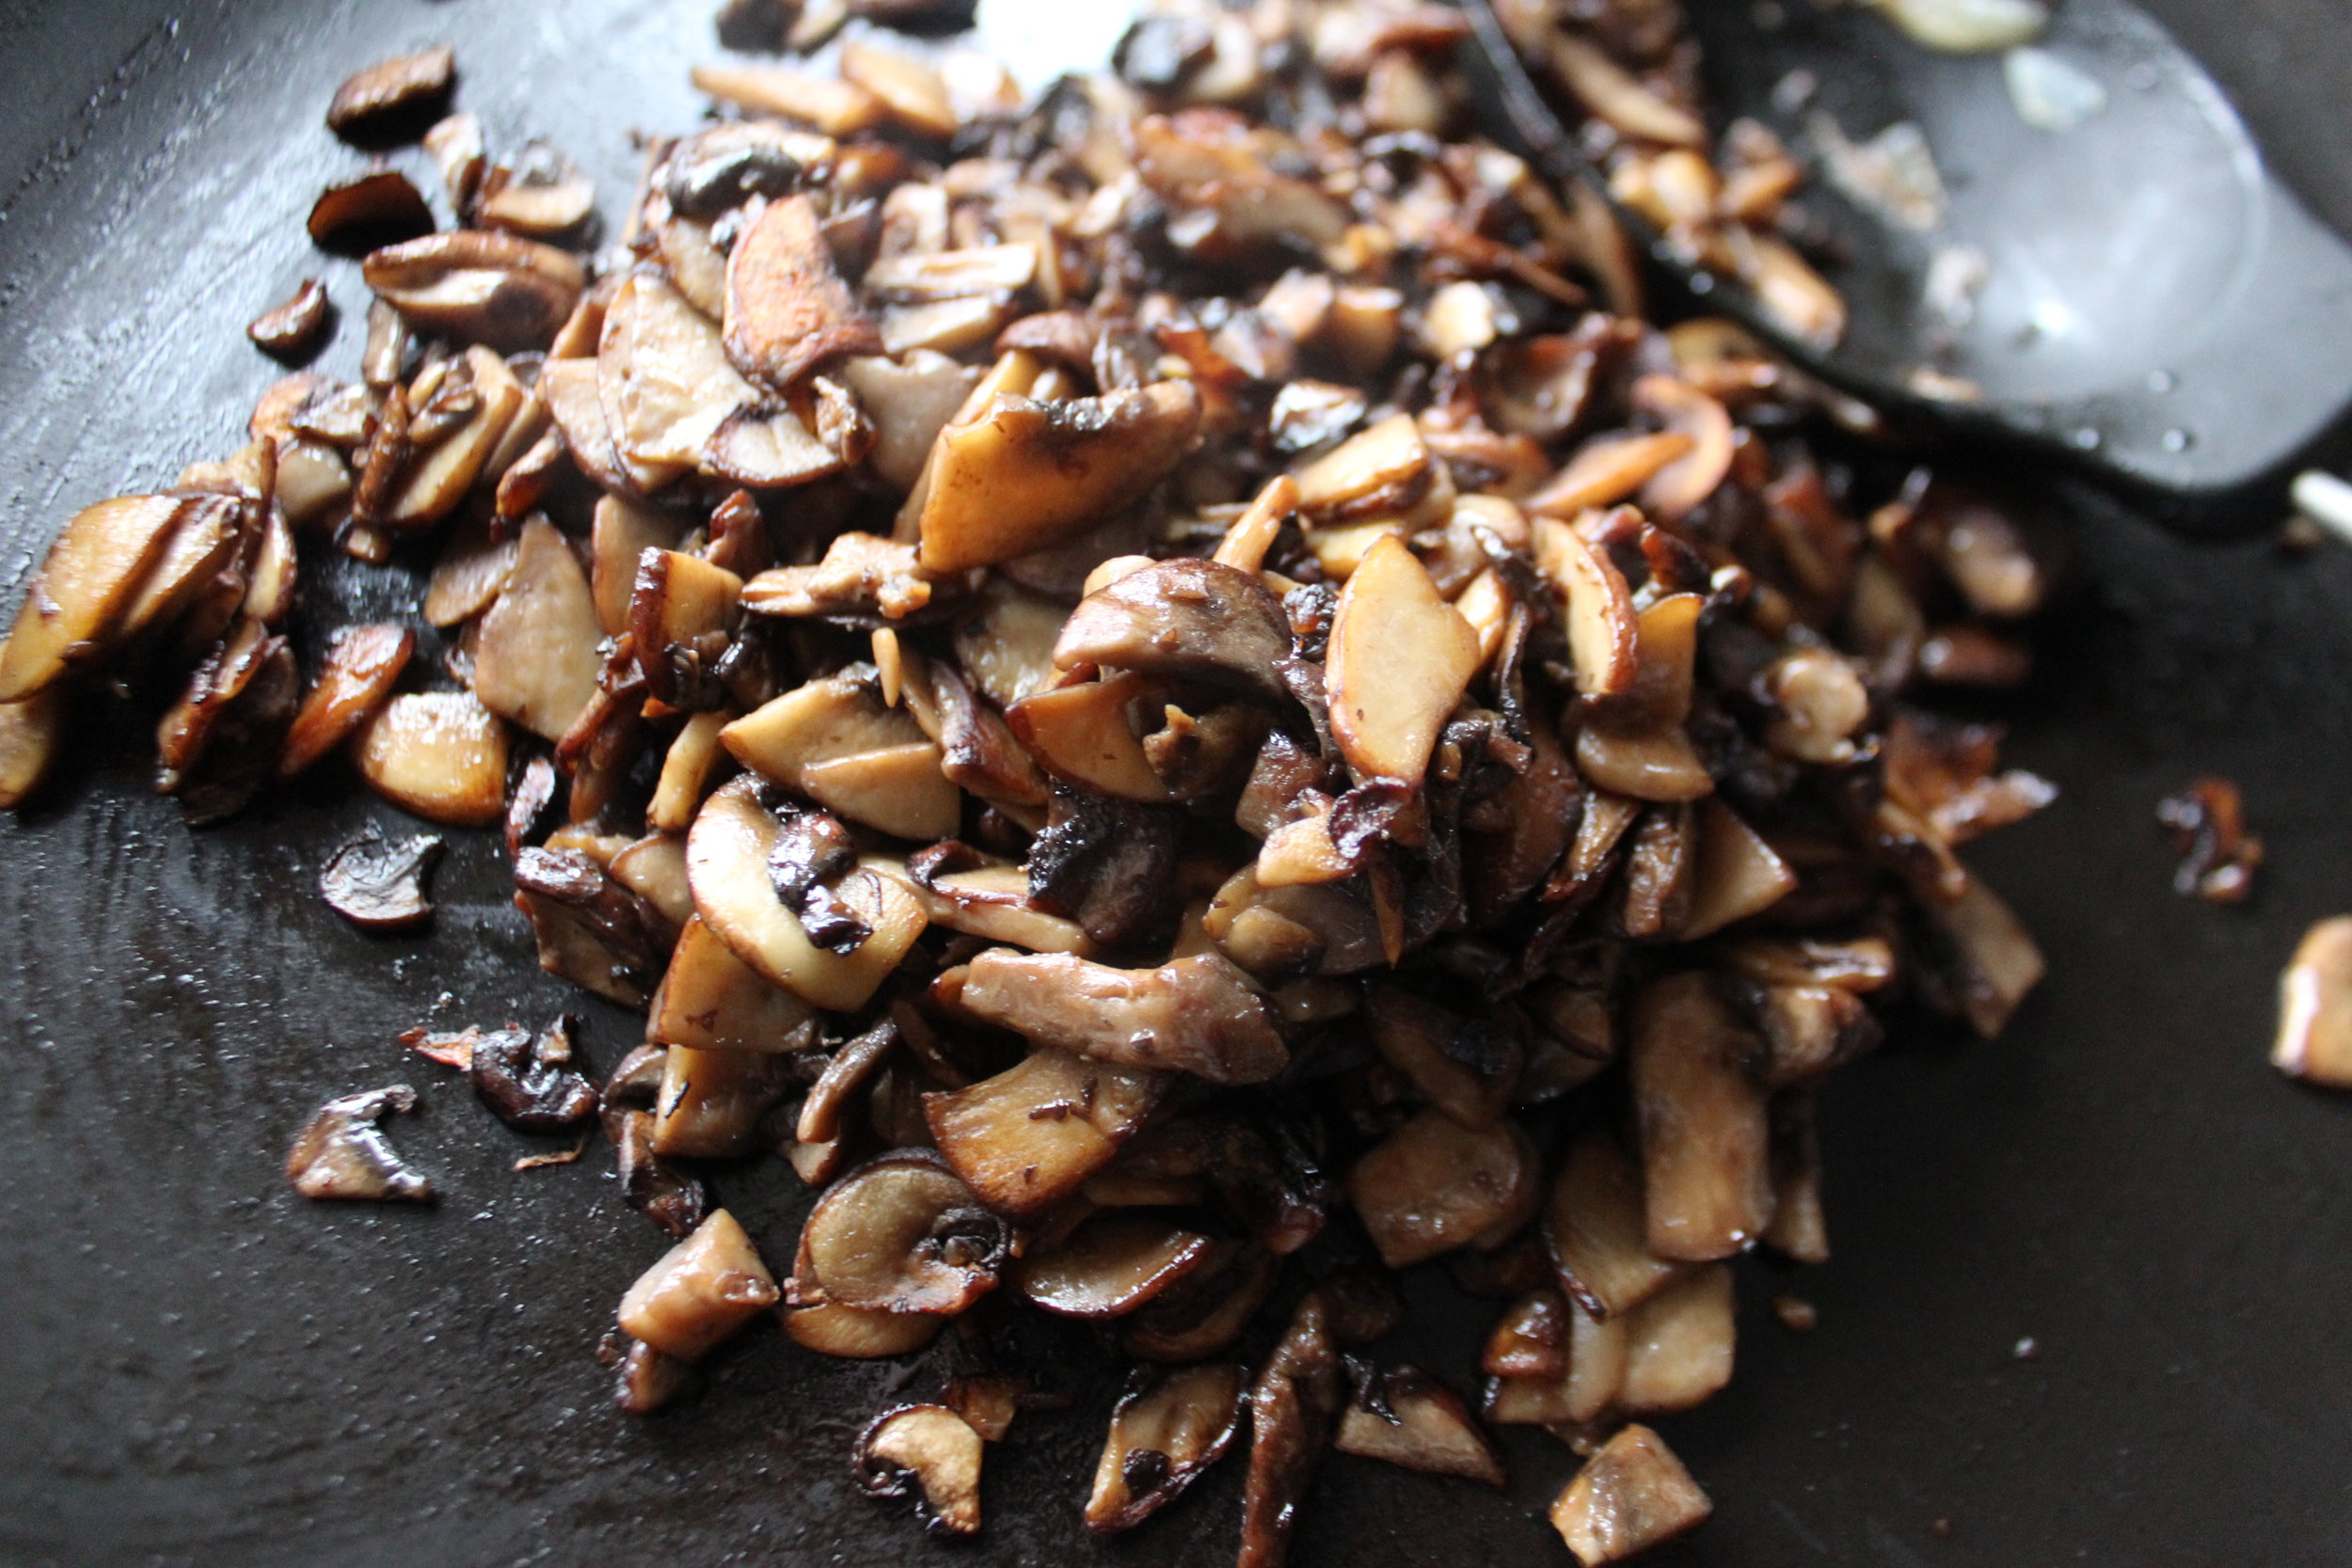
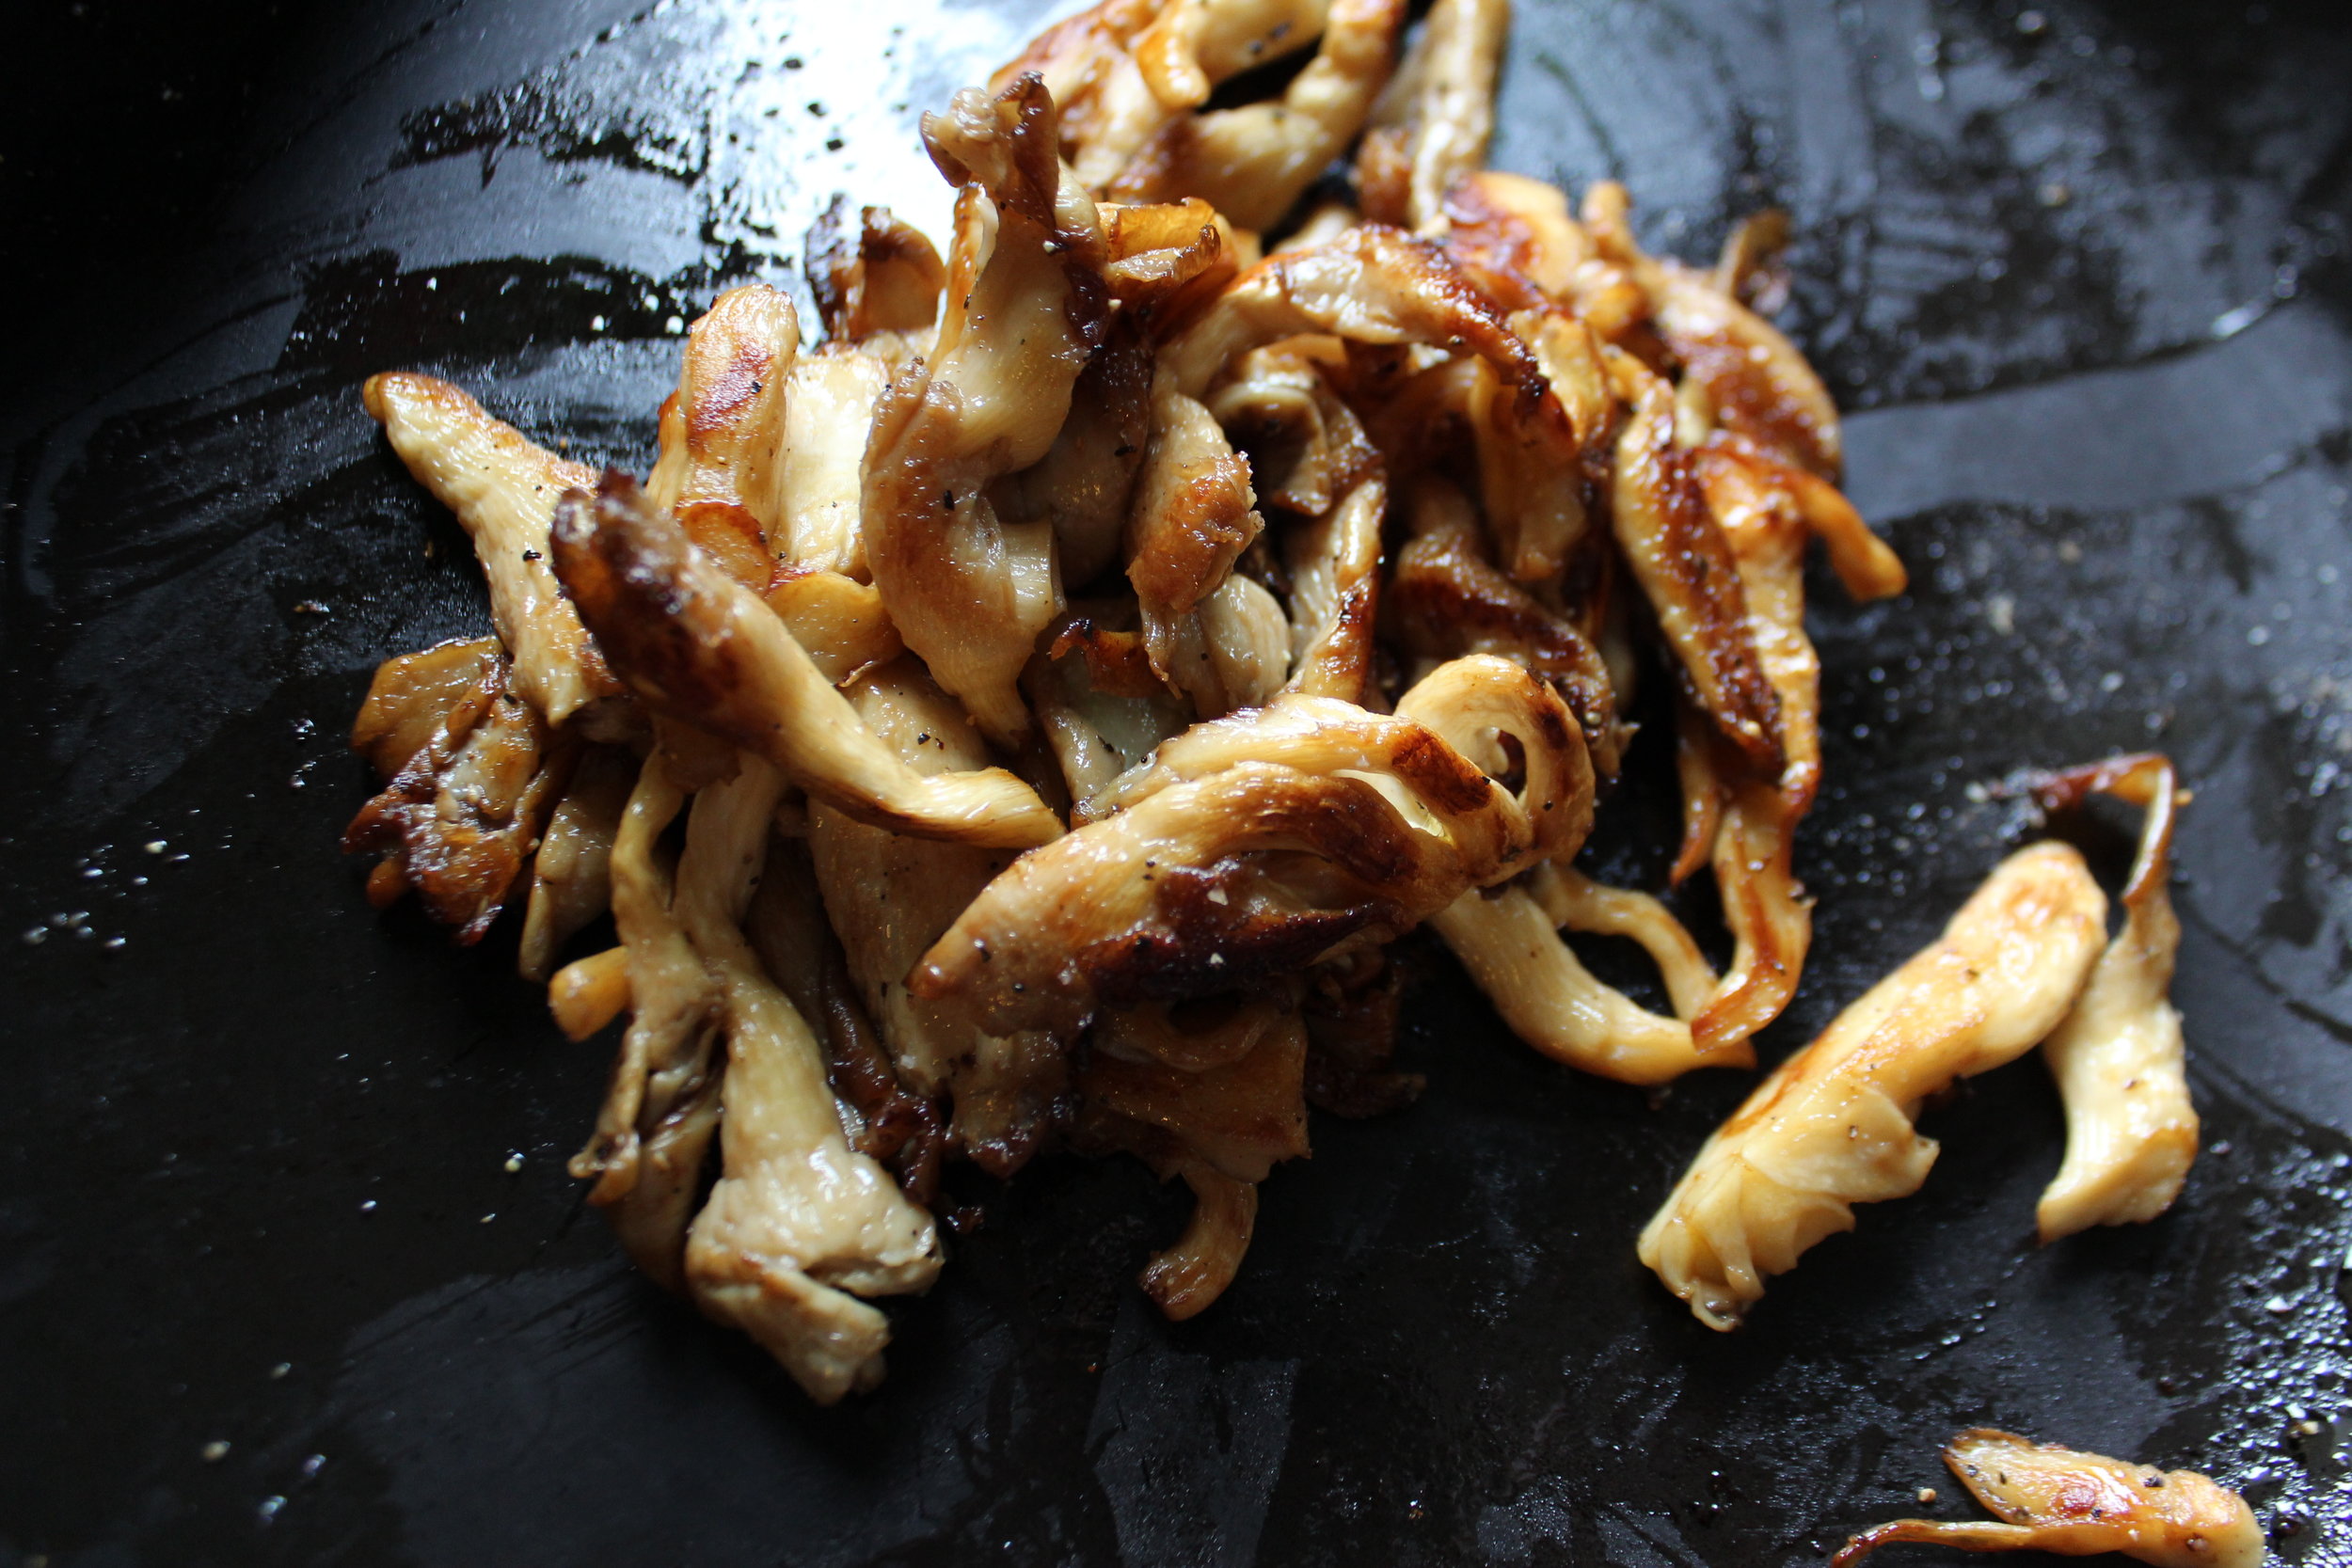
The fresh mushrooms need to be sauteed over relatively high heat until they have browned on the edges. This stops them from releasing water into the dish when everything else is added. Notice that the garlic is only added with the second batch of veggies so it won't have time to burn. Then the rice is added, tossed along with everything else, and finished with the sauce. If you have a nice big, well seasoned wok, this is a good time to get it out. I used a big 11 inch non-toxic, non-stick pan that I have. This recipe makes quite a heap of rice, so if you want ample leftovers make the full recipe. Cut it in half for about 3 hearty portions.

As we all know, fried rice is excellent with eggs, tofu, fish, and meats for really any meal. Stewed adzuki beans might be a nice side if you want to make a meal with beans. A nice bowl of rice and a little fruit make a lunch. Garnish the dish with peanuts, green onions, chilies, toasted nori strips, or, more of a nuclear condiment like chili oil. Yum. Enjoy!

IMG_5778.JPG

Black Trumpet and Crimini Mushroom Fried Rice

Ingredients:

  • 1 1/2 C short grain brown rice
  • 2 1/2 C water
  • 1/4 Tsp sea salt
  • 1/2 Oz. dried Black Trumpet mushrooms
  • 1 C hot water
  • 3 Tbsp unprocessed peanut oil (mine was toasted peanut oil)
  • 1/4 Lb Crimini or white button mushrooms
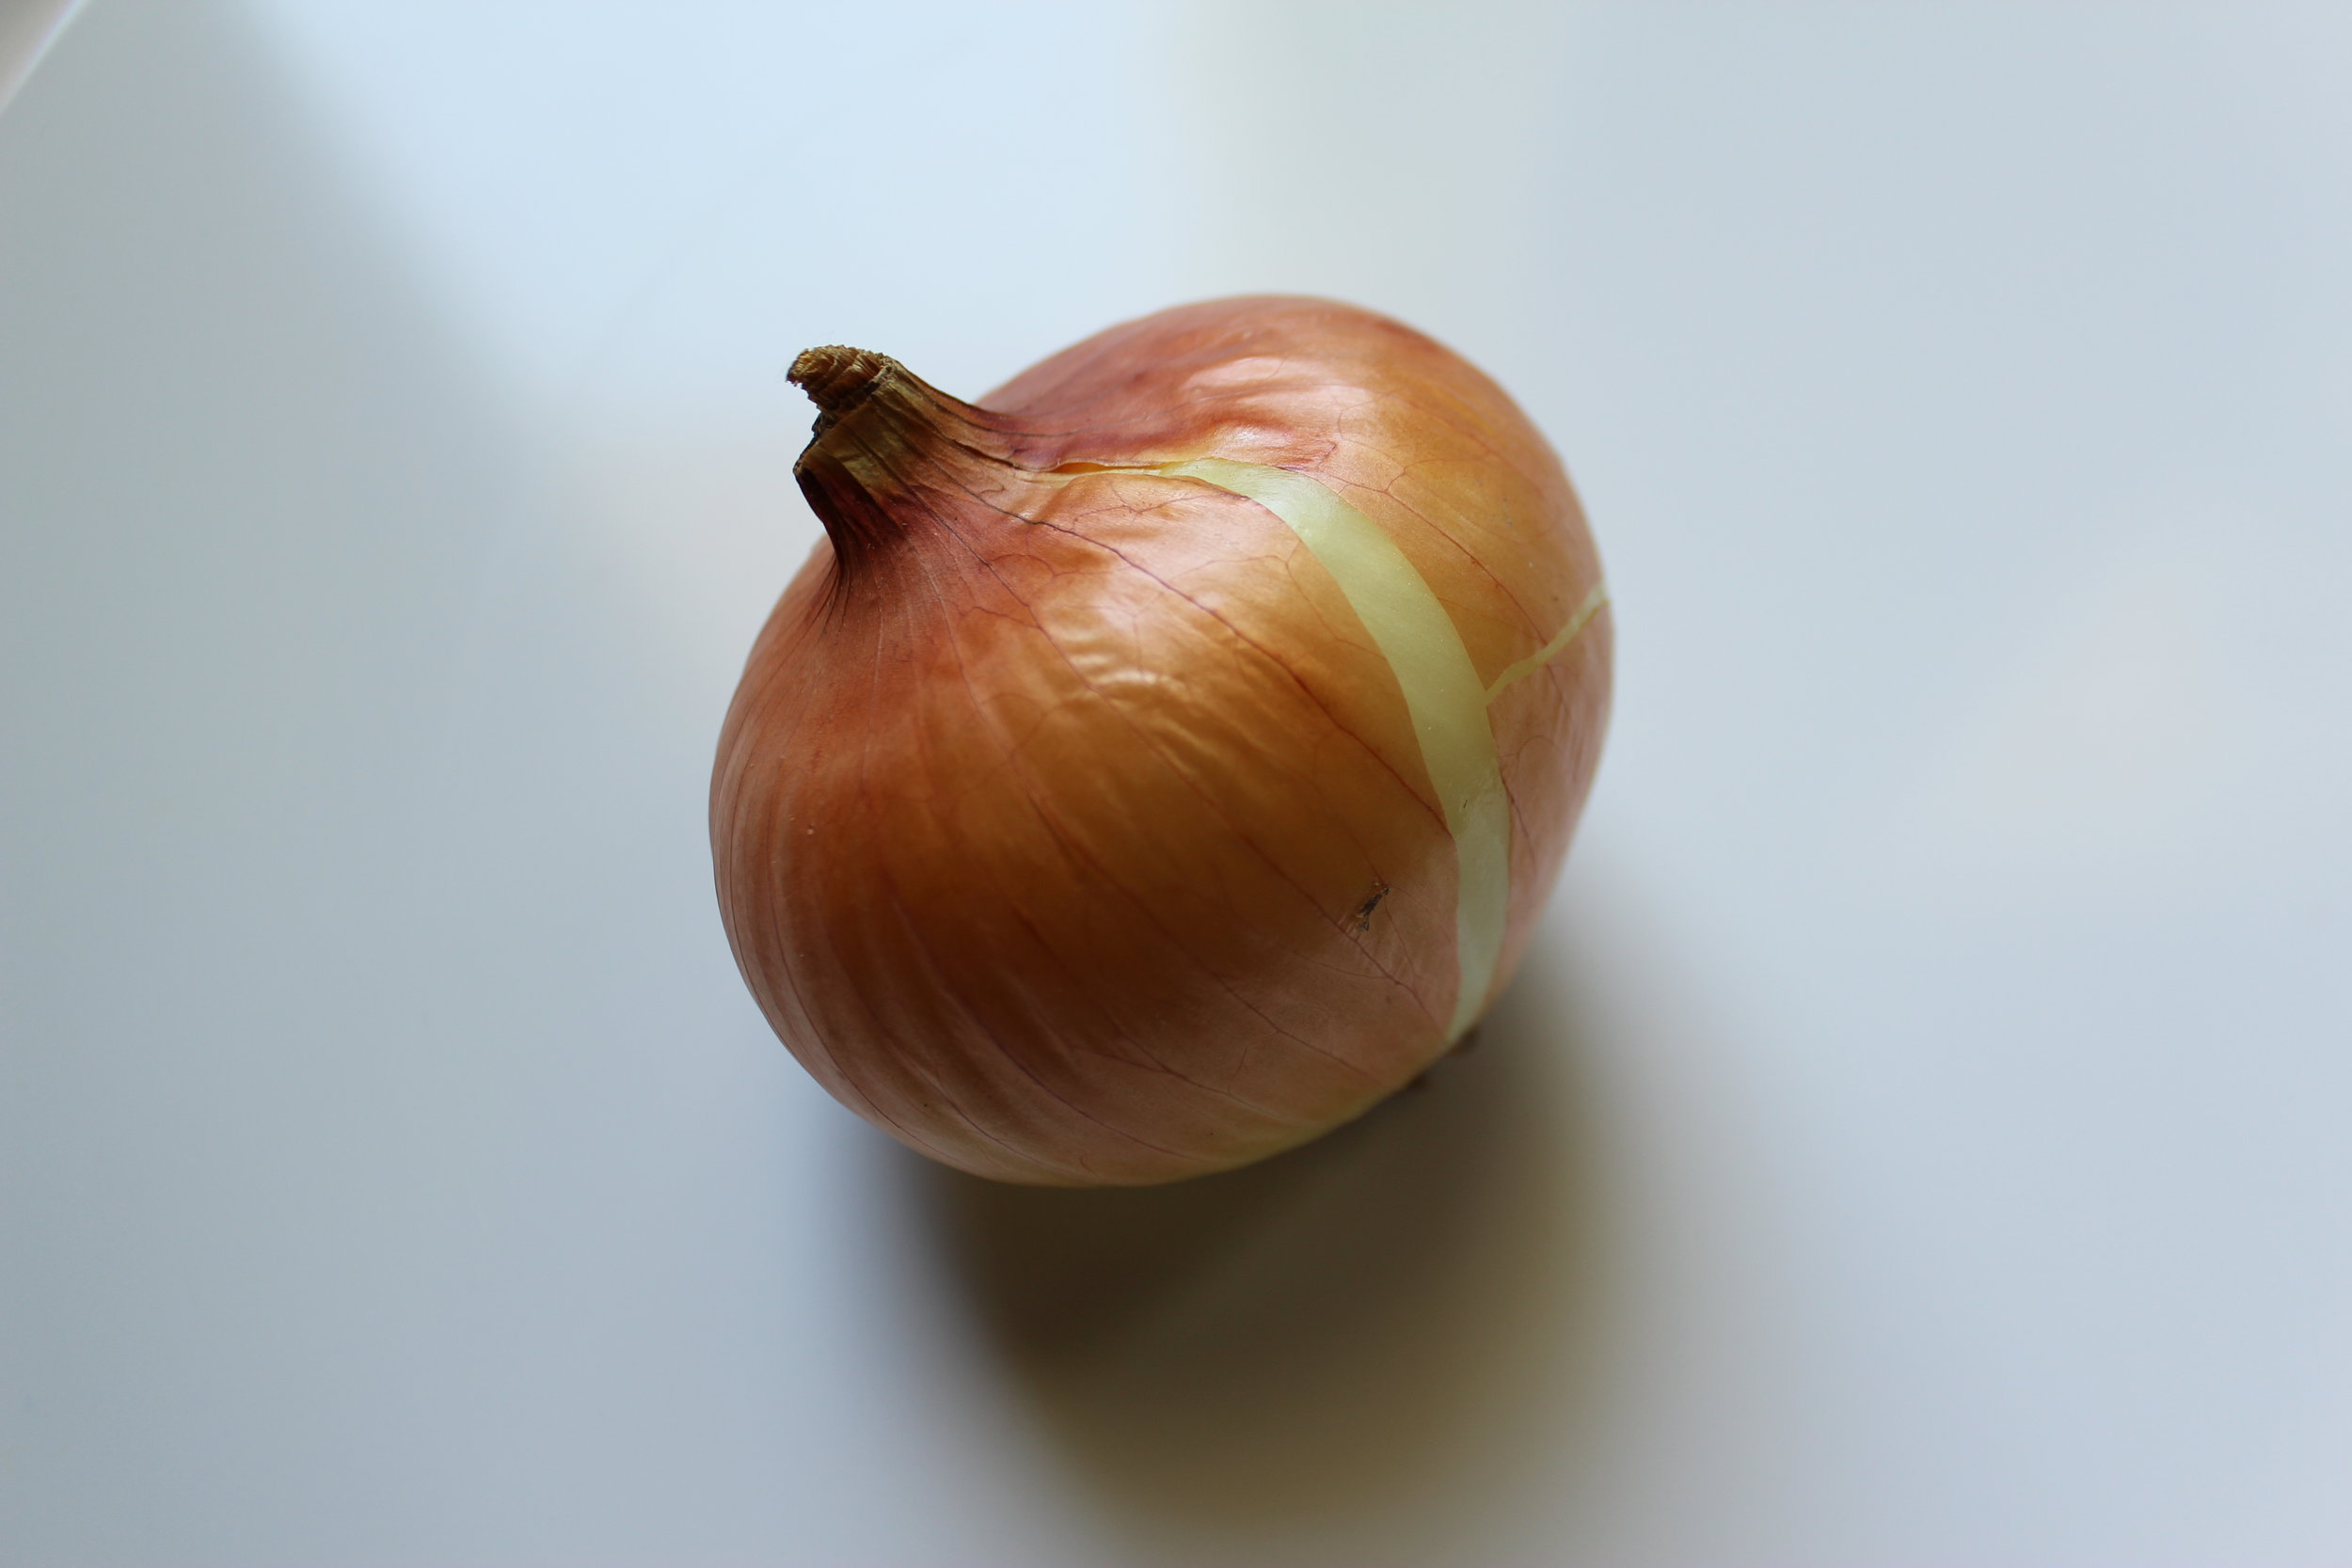
  • 1/3 C onion, small dice
  • 1 Stalk celery, bias cut 1/4 inch
  • 1 Tbsp minced ginger
  • 1 Tbsp minced garlic
  • * Optional: Sliced fresh chilies or dried chilies as desired

For The Sauce:

  • 3 Tbsp fermented black soy beans, rinsed
  • 2 Tbsp mirin
  • 2 Tbsp reduced mushroom soaking liquid
  • 1 Tbsp tamari (Tamari is gluten free but Shoyu or other traditionally brewed soy sauce can be used)

Optional Garnishes:

  • Peanuts, scallions, chilies, toasted nori strips, or a dollop of chili oil

*NOTE: If you can make the rice a day ahead, that will speed up the cooking time the day you make the fried rice. It will also give it a more firm texture. Allow it to cool in the same way as indicated below and store it, covered, in the fridge overnight.

Using a small, heavy bottomed pot with a tight fitting lid (really important here), rinse the rice once and drain well. Add the water and salt and bring to a boil. Cover and bring the rice down to a steady but low simmer using your lowest burner. Cook the rice for 40 minutes, making sure that all the water is absorbed by this time. Turn off the heat and allow the rice to stand with the lid on for another 5 minutes. Remove the rice to a sheet pan and spread out evenly to cool completely.

While the rice is cooking, soak the dried mushrooms in 1 C water, hot to the touch. The mushrooms will soften completely in about 20-30 minutes. Remove the mushrooms and squeeze as much liquid back into the soaking water as you can. Slice the re-hydrated mushrooms into thin shreds and set aside. Now, gently pour the soaking liquid into a small pot, being careful to leave any sediment at the bottom of the soaking liquid behind. Reduce the soaking liquid to two Tbsp over medium heat.

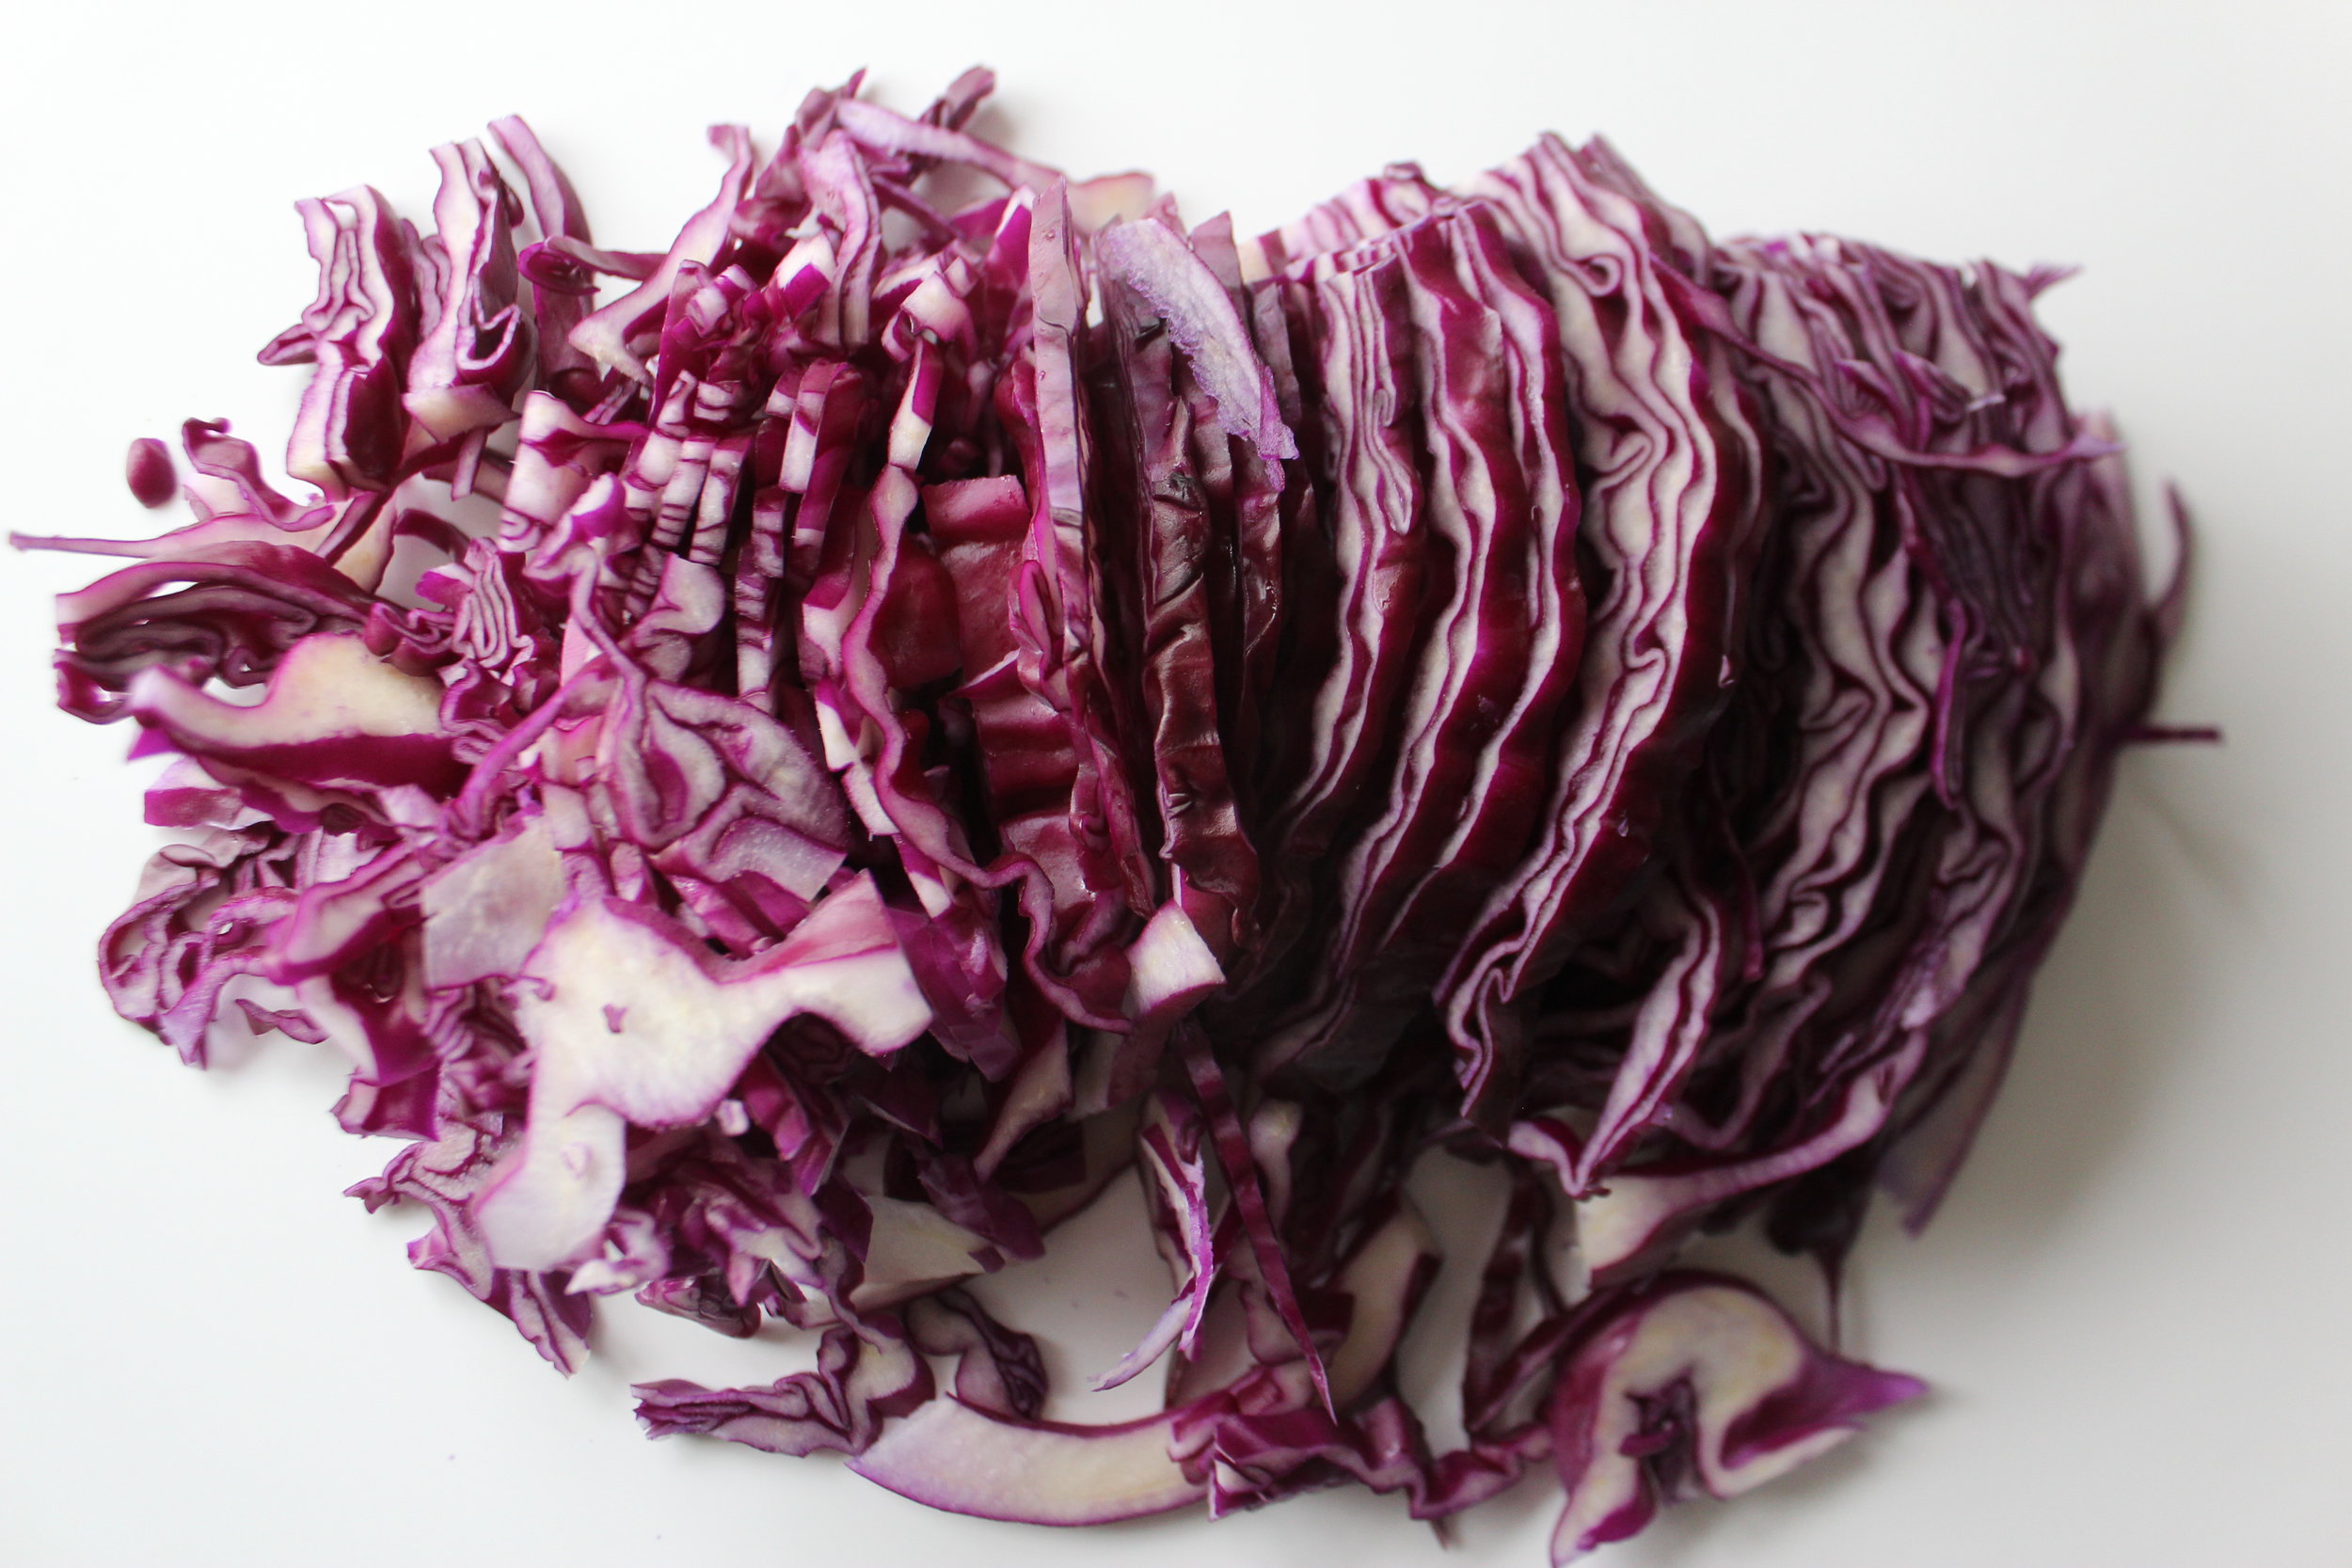
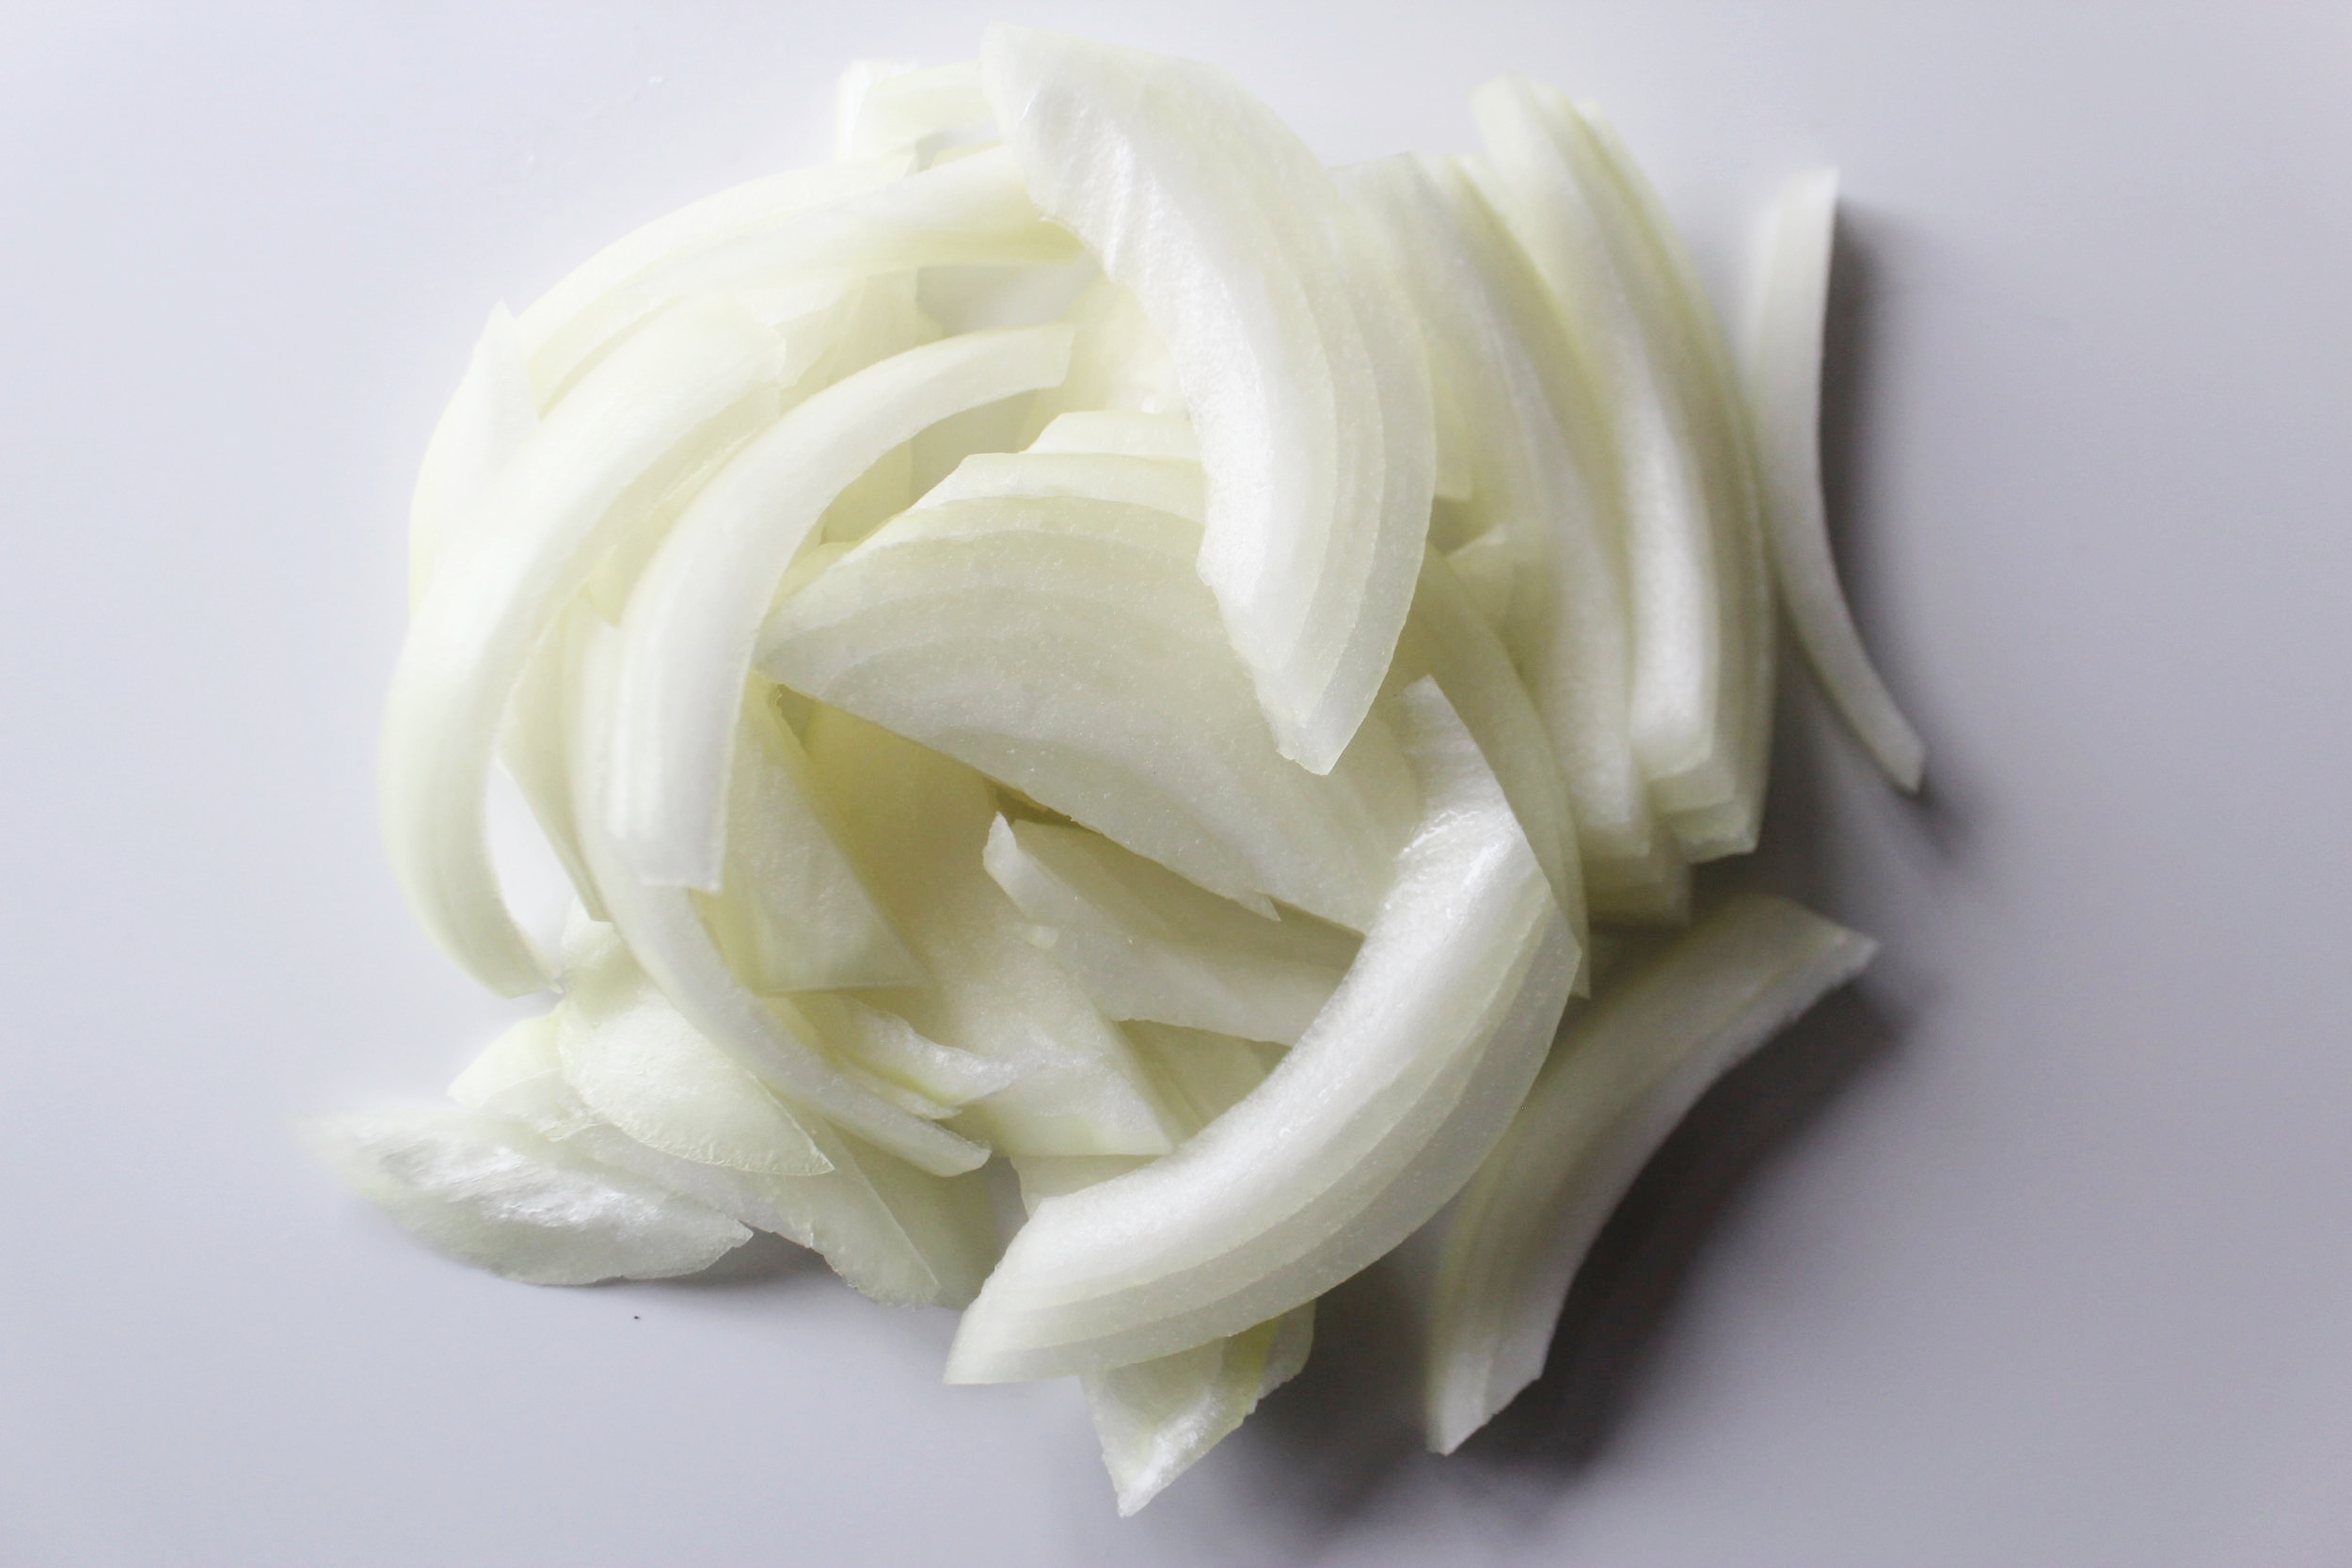
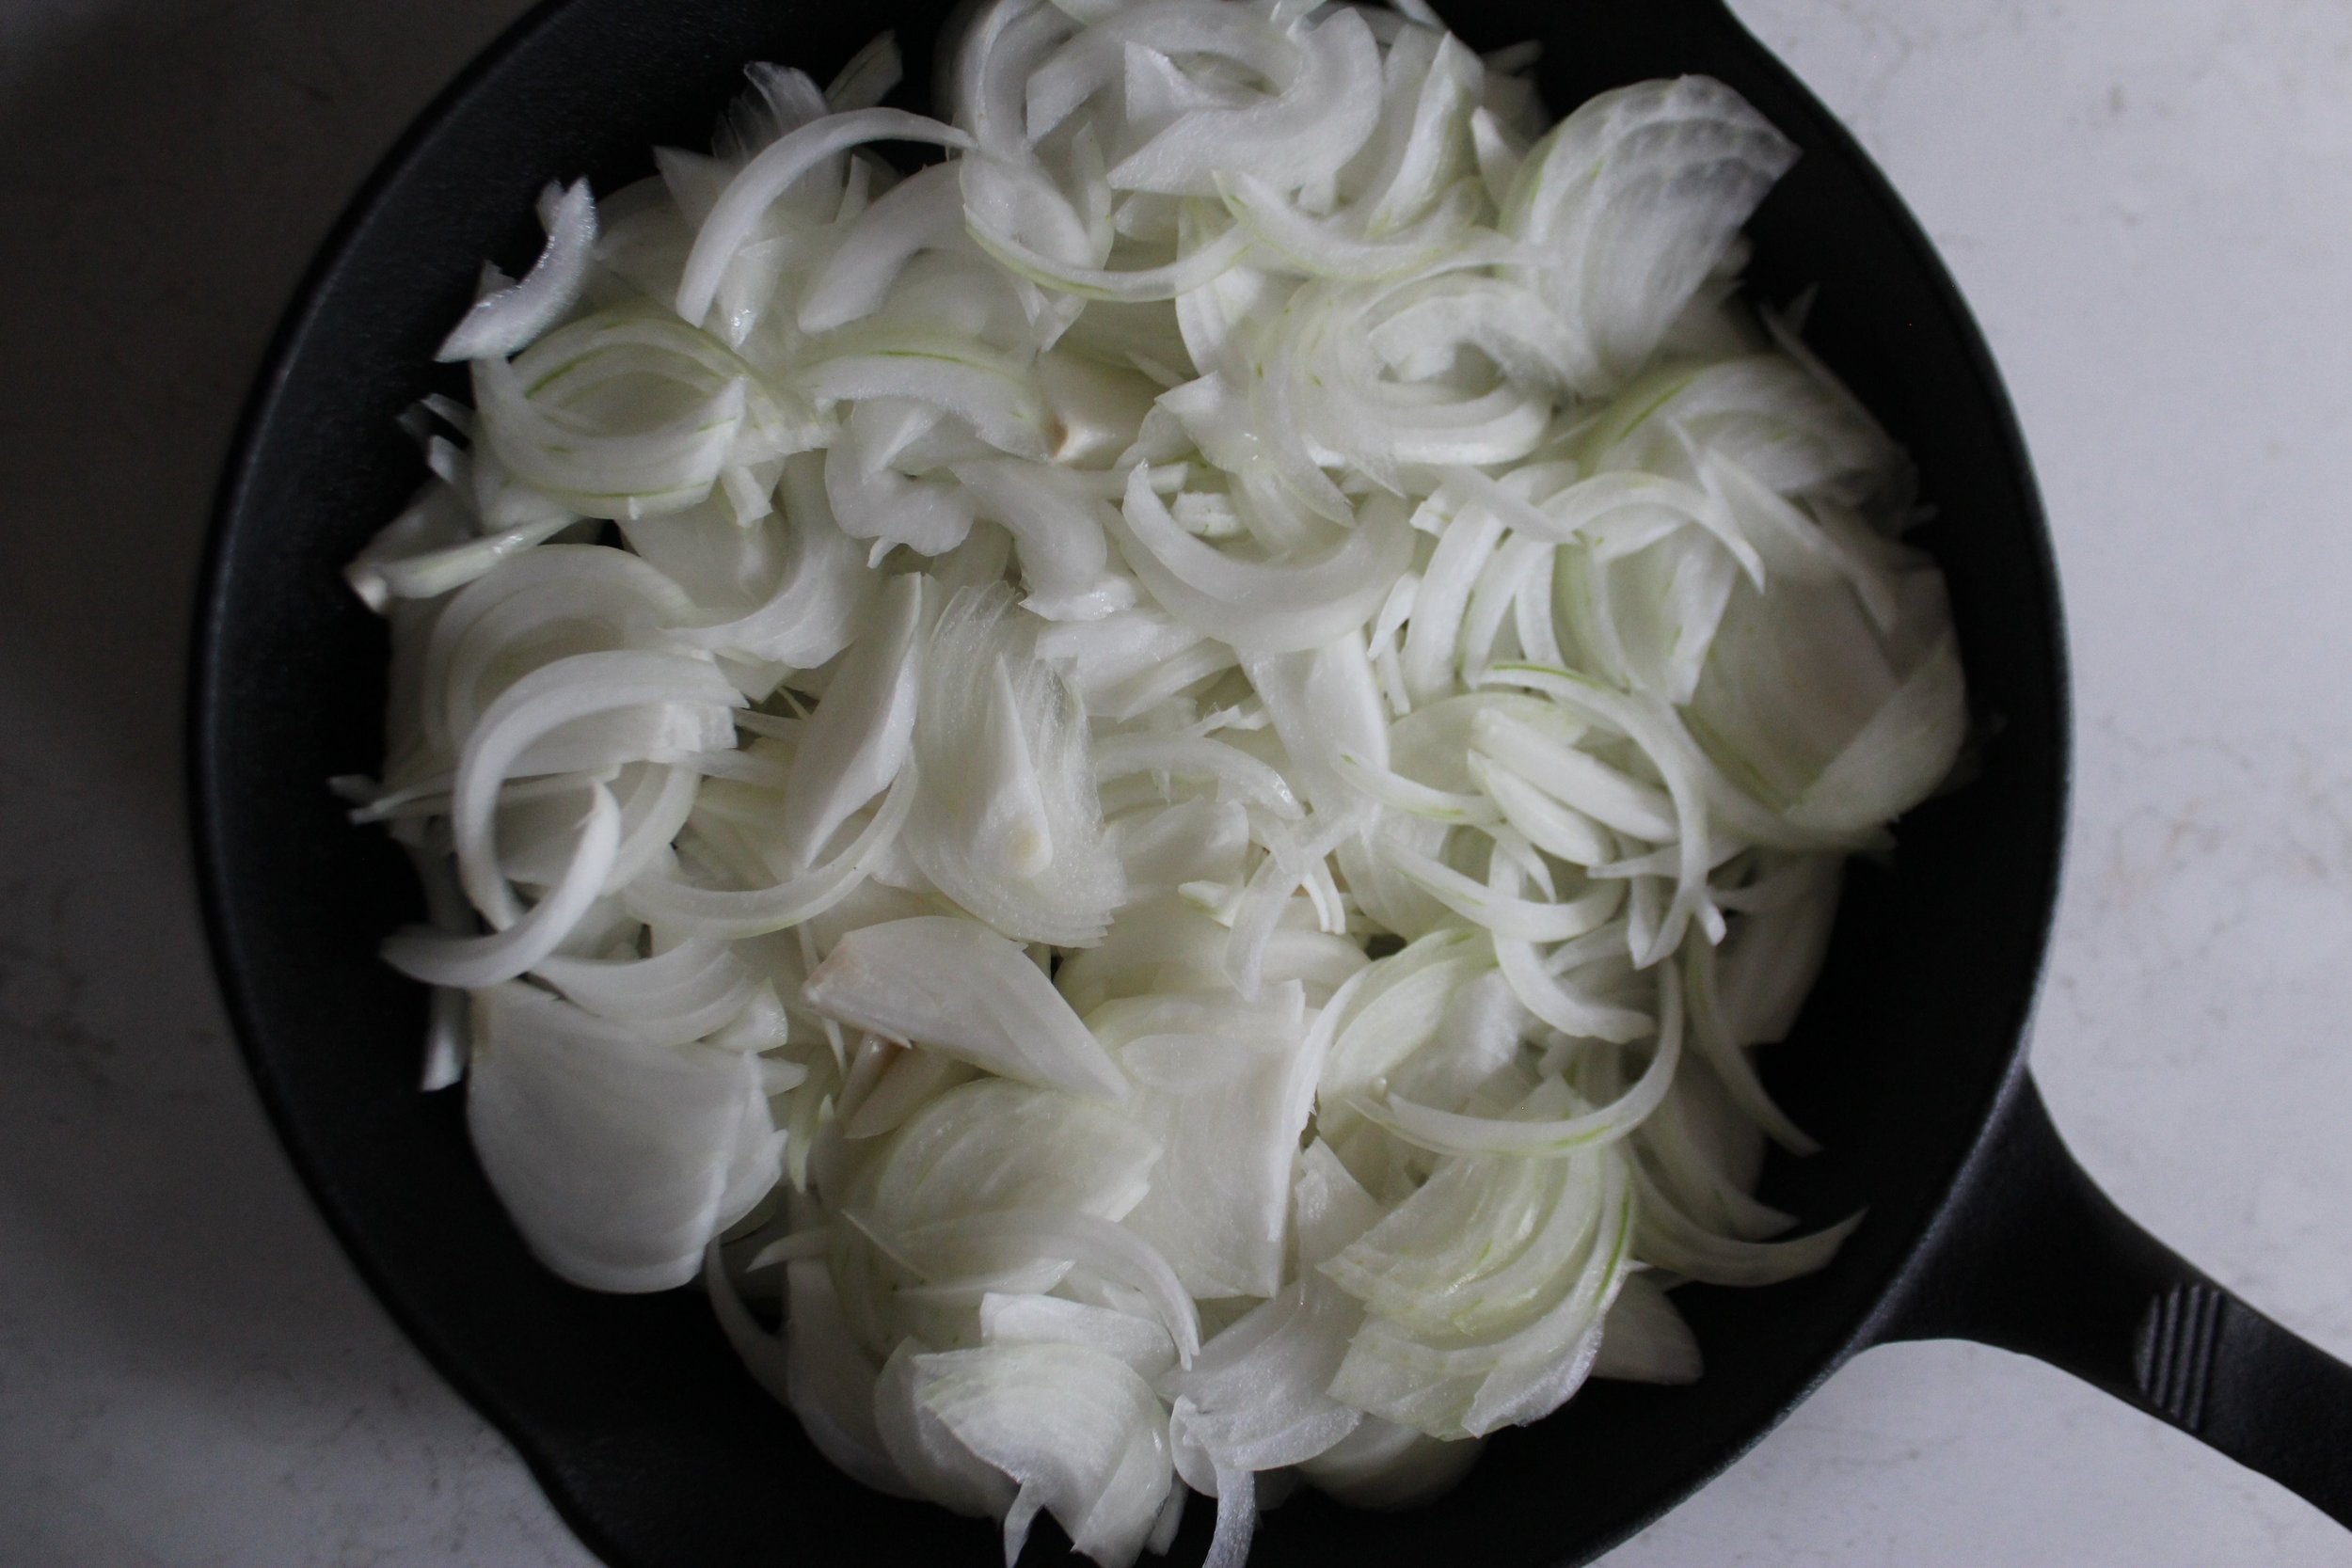
Prep the crimini by rubbing off any growing medium and, depending on the size, either slicing them to about 1/4 inch while whole, or halving them first, then slicing from top to bottom. Prep the onion, celery, ginger, and garlic as indicated in the ingredients, and add sliced fresh chilies or dried chilies as desired.

In a large, non-stick saute pan or wok, heat the peanut oil over medium-high heat and add the mushrooms, tossing until the edges have browned. Maintaining medium-high to high heat, add the onion, celery, ginger, garlic and chilies if using, and toss for an additional 2 minutes, until the celery is just getting tender. Add the rice and toss until it is lightly coated in the oil, sizzling, and mixed with the veggies. When the rice is hot and well mixed, add the finishing sauce. Maintain medium-high to high heat and toss the sauce thoroughly with the rice until all liquid is absorbed and cooked off, and the rice is seasoned evenly.

Serve the rice hot with your choice of garnish or chili oil. The rice will be best within 5 to 7 days. Reheating in a non-stick pan over high heat again is recommended.

Yield: 6 portions, about 5 cups.


January 26, 2018 /Rachel Brumitt
Brown Rice, Grains, Mushrooms
Gluten Free, Grains
Comment
IMG_5519.JPG

Sweet Sour Braised Cabbage with Dried Mushrooms

Kinship Cooking
January 14, 2018 by Rachel Brumitt in Veggie Sides

What are you having for dinner tonight? I bet you have some go-to meals that would pair nicely with this deep purple, earthy, phyto nutrient rich side dish. Sesame noodles and teriyaki salmon, Korean barbecue, barbecue tofu, stir fried rice with edamame, miso broiled eggplant and baked fish, simple chive omlette...all of these make for a perfect dinner. Hot or cold, sweet and sour cabbage is a beautiful and surprisingly light side dish that makes good use of a cool season staple.

 In the winter, we're not spending much time wandering wistfully through the farmers' market planning our menus around the abundance of spring, summer, or fall produce. We've got to stock some sturdier fellows in the old ice box, for when we get snowed-in (crosses fingers). Cabbage is great because it resides contentedly in the fridge for weeks making it an ideal veggie to have on hand for those nights when your crisper is looking a little bare. Oh, and by the way, ask the folks in produce to cut you a half a cabbage if the suckers are behemoth. It can be hard for anyone to get through one of the larger heads of cabbage at times, and I usually find the produce department most obliging.

IMG_5446.JPG
IMG_5470.JPG
IMG_5479.JPG

In the spirit of bringing more pantry wisdom to my readers and clients, I have been playing around with some dried mushrooms as well. Dried mushrooms are an ingredient I encourage because they can be easily used in so many ways, adding umami, texture, and depth to many dishes. See my recipe for Caramelized Onion and Porcini Gravy from Thanksgiving.

Using mushrooms gives this braised cabbage a heartier feel than many versions of this dish. It has a subtle sweet/sour flavor. Mushrooms are meaty without meat. For those who eat meat, try searing a little sausage or crisping slices of thick cut bacon in the pan before adding the other ingredients and braising. My point is: Eat loads of braised purple cabbage! It's good. Create your own style.

IMG_5463.JPG

I aim to help everyone develop a sense of comfort with basic cooking techniques, flavor combinations and ingredients. With this foundation, a sense of how to create endless variations on a dish follows. Getting beyond the proficient execution of recipes, and into the wild blue yonder is what gives a cook true freedom to play, and space to be creative. It also helps when you have 30 minutes to whip up a dinner from whatever random items you have on hand.

Some other variations you may want to make to this recipe include omitting the star anise, if you are not a fan, or omitting/changing the mushrooms. You may want to change the flavor profile by exchanging the ginger for more garlic, using balsamic vinegar and a bay leaf or sprigs of thyme. The sweetness of the mirin can be substituted by a little maple or sugar. Go nuts.

IMG_5471.JPG

Umeboshi "vinegar" is fun to have on hand. I used quotes because it is not a true vinegar, but rather the brine left from pickling Japanese ume plums. The pink color, and additional flavor come from the shiso leaves used when pickling the plums. This condiment has a bright, salty, fruity-tart flavor unlike anything else, and it is amazingly delicious. I always have a bottle on hand for sprinkling on rice, making beet, radish, or cucumber pickles, making dressings and sauces among other things. It is a truly excellent condiment for vegetables.

IMG_5489.JPG
IMG_5503.JPG

Sweet Sour Braised Cabbage with Dried Mushrooms

Ingredients:

  • 1/2 Oz paddy straw mushrooms
  • 1/2 C hot water
  • 3 C sliced red cabbage, 1/4 inch thick
  • 1 C sliced onion, 1/4 inch thick
  • 1 Medium clove garlic, sliced
  • 1-2 Whole star anise
  • 1/2 Inch ginger, julienne
  • 1/4 C mirin
  • 2 Tbsp rice vinegar
  • 2 Tbsp umeboshi vinegar
  • 1/4 Tsp toasted sesame oil to finish (optional)

Prep the mushrooms by soaking them in 1/2 C hot water for about 20 minutes. Squeeze the mushrooms and reserve the soaking liquid, pouring the liquid into another container and off of any grit that has settled to the bottom.

In a pan, pot, or dutch oven with a tight fitting lid, combine the cabbage, onion, garlic, star anise, ginger, mirin, rice vinegar, and umeboshi vinegar. Combine the mushroom soaking liquid plus additional water to total 2 C and add to the pan. Toss the ingredients, cover, and bring to a medium simmer. Maintain a simmer with the lid closed for 30 minutes. Check the water level after about 20 minutes to make sure too much isn't being lost to steam. The cabbage should be tender when done. Drizzle the sesame oil over the cooked cabbage before serving, or add about 4 drops to each serving individually.

Serve the cabbage hot or chilled.

Yield: 4-6 servings. The cabbage will keep for 1 week refrigerated.

January 14, 2018 /Rachel Brumitt
Cabbage, Mushrooms
Veggie Sides
Comment
IMG_4882.JPG

Caramelized Onion, Crimini, and Porcini Gravy

November 18, 2017 by Rachel Brumitt in Sauces

Ah, gravy. It's even a metaphor for the good things in life. A savory sauce to accompany a feast or bring together a Tuesday night dinner. This elegant mushroom gravy will be at home on any table, elevating even the most humble foods.

I do have to admit, I am a serious mushroom enthusiast. I was thinking the other day about what I would call my (purely hypothetical) all mushroom cookbook. I am charged with one side dish for the Thanksgiving table this year, but I am in fact bringing this mushroom gravy, both whole and pureed, a mushroom and wild rice side dish, and I even thought of bringing a mushroom appetizer but I think I will exercise at least a modicum of self control.

I think this gravy will be a hit with both the turkey gravy crowd and the non-turkey gravy crowd, and I am hoping, with one individual who explained to me that he/she (who will remain anonymous) DOES NOT LIKE GRAVY. Yes, you read that right. I aim to change that.

This recipe gets massive flavor and soft, silky texture from heaps of caramelized onion as well as a subtle hit of ultra earthy umami from dried porcini mushrooms. Dried porcini are a powerful and effortless ingredient that can add an undeniable "wow" factor to many dishes. I just used them in a quick mushroom barley soup along with button mushrooms for an added depth that the button or crimini mushrooms cannot provide themselves. They are easy to use and the flavor cannot be matched. A small amount goes a long way. When it comes to caramelized onions, yes, they are worth the time and effort. Give this gravy a try and revisit it throughout the winter months for all your gravy needs.

IMG_4724.JPG
IMG_4779.JPG

The prep for the gravy takes long enough that making a fresh vegetable stock during the process just makes sense. I like to add kombu to my stock, which you see above as the dark rectangular pieces. I keep a package of dried kombu sea vegetable in my cupboard and toss a few pieces into most stocks I make. Having kombu on hand also means you can make a dashi broth for miso soup or Japanese sauces any time. Adding layers of flavors and minerals never hurts and a fresh stock gives a nice, clean flavor base to the gravy. It is as easy as chopping some veg, tossing them in a pot, and simmering for 40 min.

Caramelizing the onions takes about an hour, so start that as soon as the stock is on. Thyme shows up twice, both in the stock and in the finished gravy, completing a classic and comforting flavor combination of mushrooms and thyme. I used crimini as the second mushroom, which are also sold as "Baby Bella", but you may use button mushrooms or really any other fresh but firm mushrooms like shiitake, oyster, or chanterelle if you really want to indulge your mushroom passions. If you use anything other than crimini or button mushrooms, I personally would not blend the sauce, and I would make sure to slice them in a way that highlights their individual shapes.

IMG_4756.JPG
IMG_4812.JPG
IMG_4831.JPG

Get comfy in your kitchen, turn on some music, maybe grab a glass of wine and settle in to caramelize the onions while you prep everything else. Caramelizing onions is less a matter of skill and more a matter of time. Grab a large, heavy bottomed pot or pan. Get those onions sliced thinly, about 1/8th inch, and toss them in with a little olive oil over medium high heat to begin.

First the onions need to sweat, so get them hot without browning them and then reduce the pan to medium. Stir them often until they are really releasing liquid and steam. If at any time the onions start to brown, turn down the heat a little. When the onions have softened, turn the heat down even further to medium low and eventually low. As the onions lose their water the temperature must be reduced. Keep stirring and observing the onions during the process. Depending on your range, you will most likely end up with the pan nearly or fully at the lowest heat for a majority of the process.

If you are still having an issue with the lowest heat being too high and you are using a heavy bottomed pot/pan and stirring fairly frequently, you may need to get creative. With an electric range you may need to babysit the onions a little more, removing the pan from the heat or turning it off from time to time. Use a flame tamer if you have one and are using a gas range.

By the end, there should be a little caramelized brown layer here and there on the bottom of the pan and the onions will have reduced drastically into a soft, golden mound. Take the onions off the heat and scrape all that flavor off of the bottom of the pan and into the onions. Congrats on your beautifully caramelized onions!

IMG_4750.JPG
IMG_4825.JPG

These magical little dried porcini mushrooms (above) are miraculous. How they have so much flavor packed into their little crinkled selves is beyond me. Amazingly, they create liquid gold when re-hydrated and this soaking liquid is as valuable as the mushrooms themselves. I bought a 1 oz package for $7. In the gravy I used 1/3 of that (including the soaking liquid of course!). Porcini can be overpowering depending on your taste, but if you would like a more intense flavor in your gravy I highly recommend increasing the porcini to 1/2 oz.

IMG_4829.JPG
IMG_4841.JPG

In order for the crimini mushrooms (above) not to release liquid into the gravy and thin it, they have to be sauteed until they stop releasing moisture. When mushrooms have reached this point, they have been cooked "au sec"...until dry. They will be nicely browned, which will also add flavor to your gravy.

IMG_4851.JPG

When you have brought everything together in one pan and have let them mingle for a few minutes, slowly whisk in your slurry of cornstarch and water while simmering the sauce. Season with salt and balsamic vinegar.

IMG_4882.JPG
IMG_4887.JPG

Caramelized Onion, Crimini, and Porcini Gravy

Ingredients:

For the Stock:

  • 3-4 Celery stalks
  • 1 Medium sized carrot
  • 1/2 Large onion
  • 2, 2x3 Inch pieces kombu (approx.)
  • 6 Sprigs fresh thyme, or more
  • 3 Large cloves garlic
  • 6 C water

For the Gravy:

  • 3 Medium sized sweet, brown or yellow onions
  • 2 Tbsp extra virgin olive oil, divided
  • 1/3 Oz dried porcini
  • 1/2 C hot water
  • 1/2 Lb crimini mushrooms
  • 1 Medium clove garlic
  • 2 Tbsp mirin
  • 5 C vegetable broth (see above)
  • 1 Tbsp fresh thyme leaves
  • 1 1/2 Tsp sea salt
  • 4 Tbsp cornstarch
  • 1/4 C cold water
  • 1/2-1 Tsp balsamic vinegar

To make the stock, begin by rinsing the celery and lightly scrubbing the carrot to remove any loose dirt. Chop them in 1/4 inch thick pieces. Cut the onion in half, remove just the roots at the bottom, and slice it with the skin on into 1/4 inch pieces. Smash and roughly chop the garlic, skin on. Place the celery, carrot, onion, garlic, kombu and thyme in a lidded pot with 7 C water. Bring the stock to a boil, loosely cover the pot to avoid boiling over, and maintain a medium simmer for 40 minutes. When the stock is finished, strain it and measure 5 cups for the recipe. Save any extra in the refrigerator or freezer.

Once the stock is started, peel and halve the three sweet onions from top to bottom. Lay them flat and slice them again through their middle. Now cut 1/8 inch slices lengthwise from the sides toward the center creating thin pieces roughly 1 to 1 1/2 inches long. If your onions are squat, skip cutting them through the middle first. The idea is to avoid extra long stringy onions. 1 to 1 1/2 inch long slices do nicely.

Before starting to caramelize the onions, place the dried porcini in a small bowl with 1/2 C hot water to soften. This will take about 30 minutes.

In a large, heavy bottomed pot or pan, begin to cook the onions over medium high heat with 1 Tbsp extra virgin olive oil. Stir them frequently until they begin to sweat. When the onions have softened significantly, reduce the heat to medium and continue to stir frequently. As the onions lose moisture, reduce the heat until the onions can be stirred occasionally without browning at all. If at any point your onions start to brown, as opposed to softening an turning a golden color, reduce the heat. For the majority of the time the onions will be cooking at a very low heat. This will take about an hour. When the onions are done, they will be very soft, greatly reduced in volume, and will have a golden color. Turn off the heat and scrape everything from the bottom of the pan into the onions.

While the onions are cooking, prepare the mushrooms. Brush any growing medium off of the crimini, or wash them if you like, and cut them from top to bottom. Cut each side once more from side to side through the cap. Now slice the mushrooms very thin, about 1/8th inch. When  the crimini have softened, squeeze out any liquid and slice them paper thin. Reserve the cooking liquid but when you add it to the gravy be aware of any grit at the bottom and simply pour the liquid off of the top to leave sediment at the bottom of the bowl.

Combine the sliced porcini and crimini with 1 Tbsp extra virgin olive oil in a saute pan over medium high heat. When the crimini have lost much of their water you may reduce the heat slightly. Continue sauteing until they have browned considerably. Grate the garlic into the pan and stir well to cook the garlic. Add the mirin to the pan and cook it off briefly. Now add the onions, porcini soaking liquid, vegetable stock, fresh thyme, and sea salt. Allow the combined elements to simmer for about 5 minutes.

When the mixture has simmered for 5 minutes, mix the cornstarch and cold water to form a slurry. Pour the slurry into the simmering gravy slowly while whisking to mix evenly. When the mixture is thickened, season with 1/2 to 1 Tsp balsamic vinegar. If the result is too thick or too thin for your taste simply add a little more stock/water or make a small additional amount of cornstarch slurry and add until you reach the desired consistency.

Yield: approximately 8 servings


November 18, 2017 /Rachel Brumitt
Mushrooms
Sauces
Comment
Oyster Mushrooms

Seared Oyster Mushroom Salad

June 30, 2017 by Rachel Brumitt in Salads

Behold the Oyster Mushroom. Even slightly roughed up from my market bag, this beautiful, creamy white fungus is moving in its form. Visual stimulation is a strong motivator in my desire to work with food. I love how food is at once visual, tactile, aromatic, alive, emotionally and physically nourishing.

I was in need of some emotional nourishment when I decided to put together something woodsy and summery, both hearty and light, assuming this combination is even possible. I have been pining for my home state of Minnesota (yes, there is a pun in there, especially when you think of the Arrowhead region) and will be there in just one week. I will hang out in and around the Twin Cities a while then make my way up to the north shore of the great, frigid, and vast Lake Superior.

I guess I came up with a salad in a red flannel shirt. Something for the long summer days up north, where it's still chilly enough to don a sweater after the sun goes down. Something that reminds me of exploring the woods as a child and being fascinated by shelf fungus, various mushrooms and the occasional vivid orange or yellow slime mold. Something that folds in a native food that I grew up with (what, you've never had wild rice casserole?) and I equate strongly with home. Enjoy this salad in a little rustic north woods cabin in your mind. Or the real deal if you get the chance.

Seared Oyster Mushroom Salad
IMG_3319.JPG
IMG_3368.JPG
IMG_3337.JPG
IMG_3401.JPG
IMG_3408.JPG

The companion salad components are easy and well worth the time to put together. At the Dallas Farmers Market I found some spectacular, kicky arugula, fresh sweet corn and an onion so sweet I had the overwhelming urge to bite into it like an apple as soon as I cut it. It was that good. All in season in Texas. So, in order to make the prep time on this salad be more worth your while think of prepping extra wild rice to accompany meals later in the week, or put a small bag full in the freezer to pop into vegetable soups or chowders. It freezes very well. Toast a whole pan full of pecans for snacking or topping ice cream. I promise you will eat them up quickly. And, it's not like you are going to buy one ear of corn...when it's in season we eat it voraciously, as it is a fleeting pleasure.

Cooked Wild Rice

The wild rice I found was Canadian but I really recommend ordering some Minnesota grown wild rice from one of the area tribes. The rice is still commonly hand harvested but you will also find machine harvested. Just go for it. It stores well in an airtight container up to a year.

IMG_3303.JPG
IMG_3305.JPG

With oyster mushrooms, you are never going to get completely uniform pieces, so no worries. The trick is not to stir too much during cooking so the pieces can have good contact with the hot pan and get a nice sear. So, stir them only enough to keep them cooking evenly. Also, and very importantly, my magical ingredient is mirin. Mirin is a traditional subtly sweet and complex rice wine. In the U.S. all sorts of things are sold as mirin, and apparently in Japan you cannot sell seasoned (salted) mirin as true mirin but there also exist many grades of mirin-like products.

I can tell you that if you want a lovely seasoned rice cooking wine (considered Aji No Haha type-labeled as mirin here in the U.S.) try Eden brand. If you see sugar, corn syrup or anything other than rice, koji, and salt in the ingredients, look for another. If you get to a good Asian grocer and find somebody knowledgeable about true mirin, which is unsalted and can be drunk as is, please by all means get it! If you do use the unseasoned kind, you will need to salt the mushrooms. My knowledge of mirin is limited but now I want to go on a mirin research binge....

IMG_3399.JPG
IMG_3380.JPG
Seared Oyster Mushroom Salad 2

Seared Oyster Mushroom Salad

Ingredients:

  • 1/3 C wild rice
  • 1/4 Tsp sea salt
  • 1/2 Lb. oyster mushrooms
  • 2 Tbsp extra virgin olive oil
  • 2 Tbsp mirin
  • Fresh ground black pepper to taste
  • 2 Large handfuls arugula (enough to fill two dinner plates)
  • 1 Ear fresh sweet corn
  • 1/2 C pecan halves or pieces
  • Red, yellow or white onion

For the dressing:

  • 1 Tbsp extra virgin olive oil
  • 2 Tbsp rice vinegar
  • 1 Tsp whole grain mustard
  • 1 Tsp maple syrup
  • 1/8 Tsp sea salt
  • 1/8 Tsp grated garlic

Bring the wild rice to a boil in a small pot in 2 C water with 1/4 Tsp sea salt. Reduce the rice to a low boil and place the lid over the pot with a small crack to let out excess steam. This will allow the rice to cook without loosing too much liquid and without boiling over. Look for the rice to split open and begin to curl. Some wild rice will cook faster and curl more, some will remain mostly straight and only split open lengthwise. I have seen wild rice cook as quickly as 30 minutes where some takes 1 hour, so check the rice after 30 minutes and continue to boil until done. When the rice is done, drain it well and set it aside to cool.

Look over your oyster mushroom/mushrooms. If you see any of the growing medium, brush it away or cut it off. If you like you can gently dip the mushrooms in a bowl of water to rinse off any dirt or growing medium, but I usually just brush them off. They will not absorb enough water to make much of a difference in cooking as long as you dry thoroughly, though this may cause the mushroom to break apart more. You will find conflicting advice on this so go with your comfort level.

Break down the mushrooms to long pieces cut away from the central base lengthwise, almost like you would split broccoli off the stem. You can use the base, just make sure to leave base pieces no thicker than 1/2 inch. This part will be more chewy but I kind of like that. If some of the base seems particularly tough, simply remove it. Now heat a large saute pan to medium high heat. Make sure the pan is big enough not to crowd the mushrooms. Add 2 Tbsp extra virgin olive oil and quickly add the mushrooms. The pan should be hot enough for the mushrooms to sizzle but not hot enough to smoke the oil. Stir the pan occasionally but not continuously in order to allow the mushrooms continued contact long enough to sear the sides. It should take about 6 minutes for the mushrooms to have browned and become tender yet chewy. Remove the pan from the heat and add 2 Tbsp mirin, stirring quickly to coat the mushrooms while the mirin cooks off. Season the mushrooms with fresh ground pepper to taste and remove them from the pan to cool.

Heat your oven to 350 and place the pecans on a sheet pan or glass baking dish. Toast the nuts for 6 to 7 minutes or until they are aromatic and lightly browned. Allow the pecans to cool. Thinly slice the desired amount of onion for two salads. This is up to you, but a salad just isn't a salad without some raw onion in my estimation! I leave the amount up to your good judgment, but don't overpower the salad.

Grab a large mixing bowl to throw together the dressing and toss the salad. Simply mix the oil, vinegar, mustard, maple syrup, salt and garlic in the bowl and then add the arugula, corn, wild rice, and onion, tossing gently until well mixed. With a tong, mound the dressed salad on two dinner plates, scooping up the rice and corn that fall to the bottom and heaping them on top of each salad. Finish the salad with the toasted pecans and piles of seared oyster mushrooms. This salad is best at room temperature, so if you have refrigerated any of the components, please bring them up to room temperature before putting it together. Enjoy!

Yield: 2 large dinner salads or 4 side salads.

June 30, 2017 /Rachel Brumitt
Mushrooms, Wild Rice, Corn, Arugula, gluten free
Salads
Comment

Powered by Squarespace